
V40 L4-1.9L Turbo VIN 29 B4204T3 (2002)
Install the cable harness on the headlining. Secure the headlining using tape.
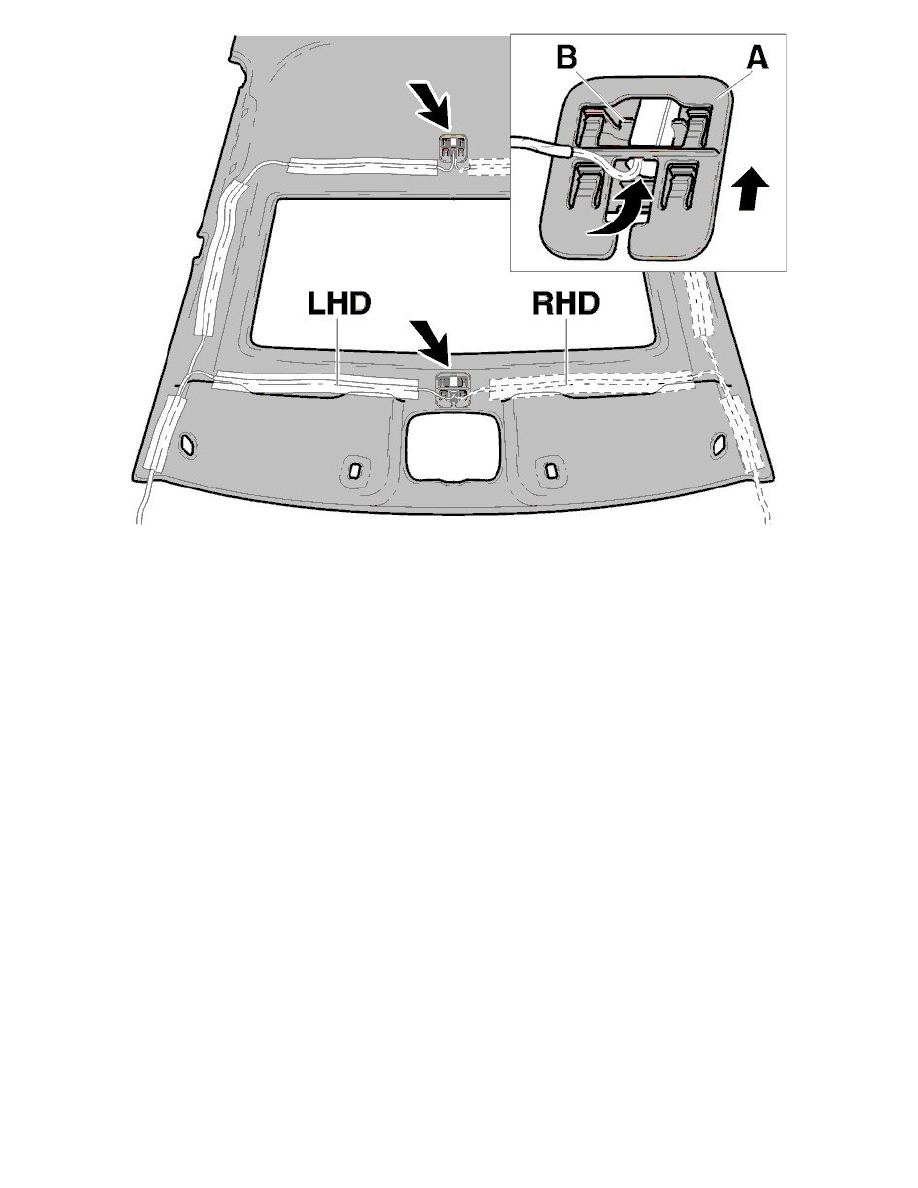
Install the casing (B) in the headlining.
Press the ultrasonic sensor into the casing. Slide the catch until the ultrasonic sensor locks in the casing.
Install:
-
the headlining according to:
-
S40 Headlining See: Body and Frame/Interior Moulding / Trim/Headliner/Service and Repair
-
V40 Headlining See: Body and Frame/Interior Moulding / Trim/Headliner/Service and Repair.
-
the cable harness on the A-post
-
the cable harness connector to the control module
-
the upper A-post panel on the passenger side according to Upper A-post panel See: Body and Frame/Interior Moulding / Trim/Trim Panel/Service
and Repair/Removal and Replacement/Upper A-Post Panel
-
the lower A-post panel on the passenger side according to Lower A-post panel See: Body and Frame/Interior Moulding / Trim/Trim Panel/Service
and Repair/Removal and Replacement/Lower A-Post Panel
-
the passenger side soundproofing according to Passenger side soundproofing See: Body and Frame/Sound Proofing / Insulation/Service and
Repair/Passenger Side Soundproofing
-
the battery negative lead according to Note when disconnecting and connecting the battery lead See: Starting and Charging/Battery/Service and
Repair/Procedures/Battery, Disconnecting.
Check the function. Read off any diagnostic trouble codes (DTCs).