
V40 L4-1.9L Turbo VIN 29 B4204T3 (2002)
Slacken off the toe-in adjustment screw (A).
Note! The adjustment screw must be slackened off because it affects the camber angle.
Slacken off the nut (B). Turn the adjustment screw until the correct camber angle is obtained.
Note! Do not turn the adjustment scale off the scale because this could damage the control ring.
Tighten the nut. Check again.
Note! There are two different types of nut. Each type is tightened to a different value.If the nut does not have a flange, tighten to 80 Nm. If the
nut has a flange, tighten to 90 Nm.
For the correct values, see Wheel camber, specifications See: Specifications.
Caution! Always adjust the camber angle before adjusting the toe-in.
Checking the toe-in, rear
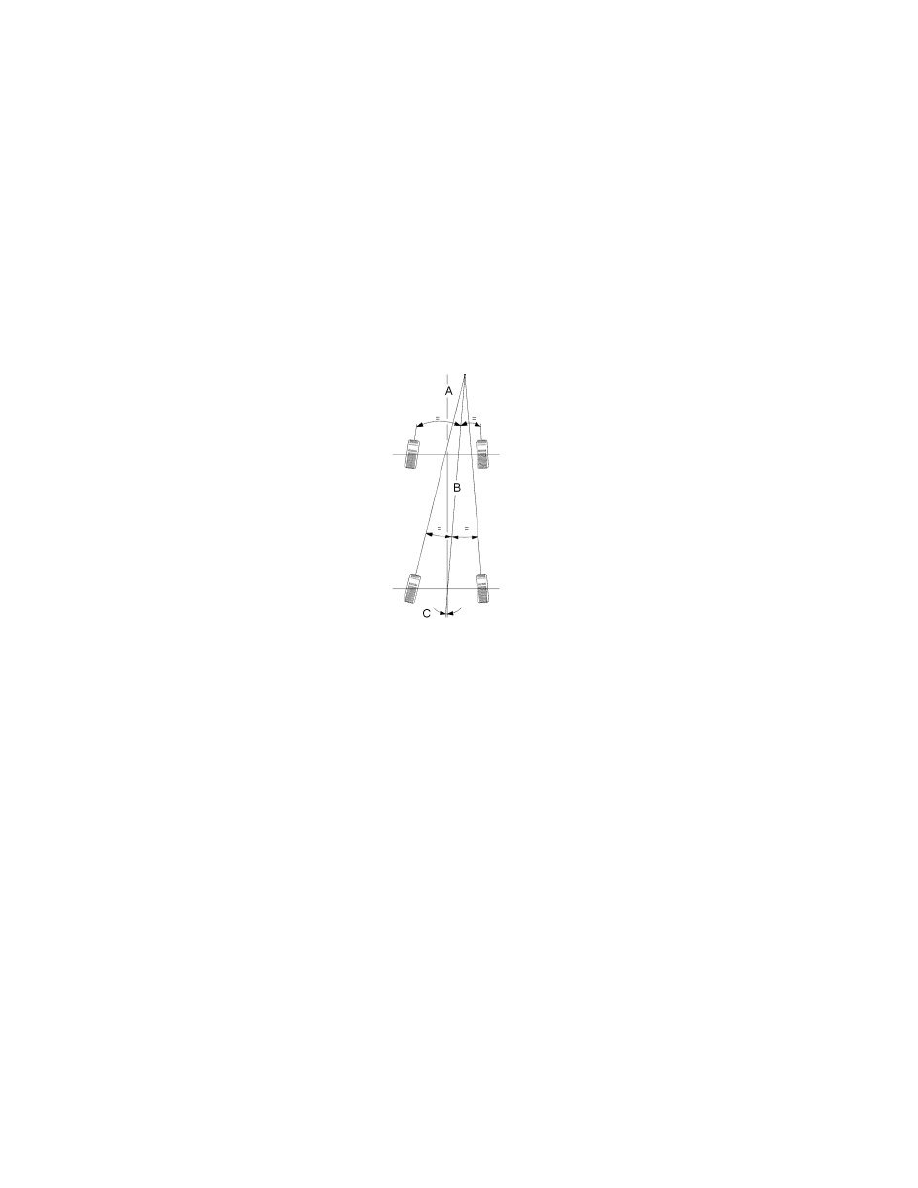
Check that the instruments are adjusted in relation to each other on the front and rear axles.
This is extremely important so that the thrust angle can be adjusted.
The difference between the symmetry line (A) of the wheels and the thrust line (B) is called the thrust angle (C).
Check and adjust the toe-in and thrust angle in the following order:
-
Toe-in rear wheels
-
thrust angle (C)
-
toe-in front wheels, in relation to the thrust line (B).
For the correct values, see Wheel camber, specifications See: Specifications.
Adjusting the toe-in, rear