
V70 2.4 L5-2.4L VIN 61 B5244S (2001)
-
Applies to cars with parking assistance: Lift up the bumper in position. Pull the cable for the sensors through the hole for the bumper's guide,
and pull the cable in from the inside.
-
Reinstall the bumper by pressing it forwards. Ensure that the four screws, protruding from the bumper, align with the holes in the car.
-
Before the bumper is completely installed, slide the top edge (1) into the grooves. Then slide the bumper fully in.
-
Check that the guide lug (4) and clip (5) are centred with the hole in the wheel arch lining.
-
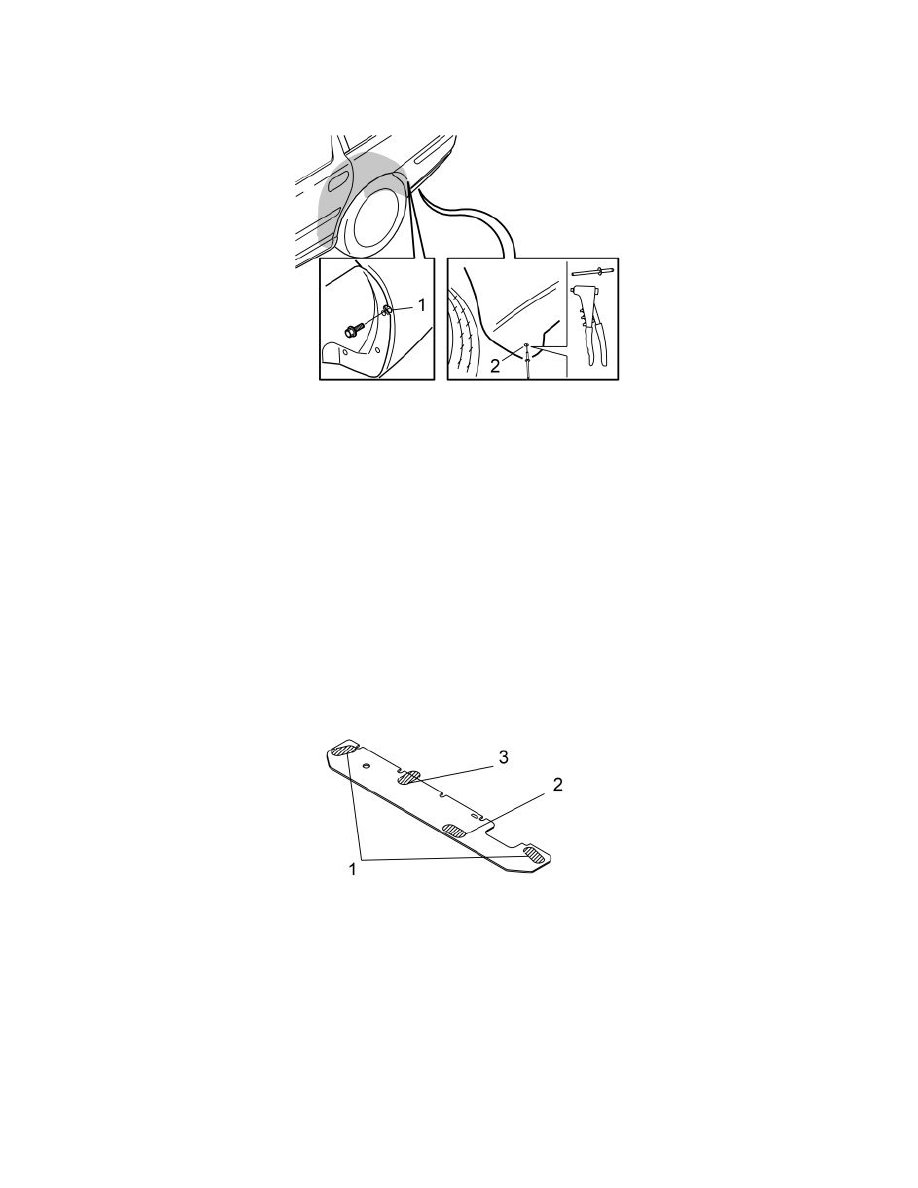
Tighten the screw (1) on both sides.
-
Rivet (2) the bumper into place as illustrated.
Only applies if the car is equipped with clips and mouldings
-
Reinstall the clips underneath the bumper. This is to secure the bumper to the mouldings. Ensure that the clip locks are in the normal position.
Applies to all models
-
Reinstall the nuts. Tighten the nuts. Tighten to 18 Nm (13 lbf. ft.).
-
Connect the antenna connector.
Applies to cars with mudguards
-
Rivet in the mudguard.
-
Reinstall the wheels and tighten the screws alternately to 110 Nm (81 lbf.ft.).
Only applies if the car is equipped with lining mat with 4 perforations
Install the rubber tabs from the kit over the four installed screws as follows:
-
Align the rubber tabs (1) edge to edge with the lining mat.
-
Compress the rubber tab (2) slightly to align in the cut-out
-
Align the rubber tab (3) so that the lower edge is positioned edge to edge with the lining mat. Then cut off the section protruding from the lining
mat. Do not remove too much.
Only applies if the car is equipped with lining mat with 1 perforation
-
Install a new lining mat.