
XC90 L5-2.5L Turbo VIN 59 B5254T2 (2004)
Transfer:
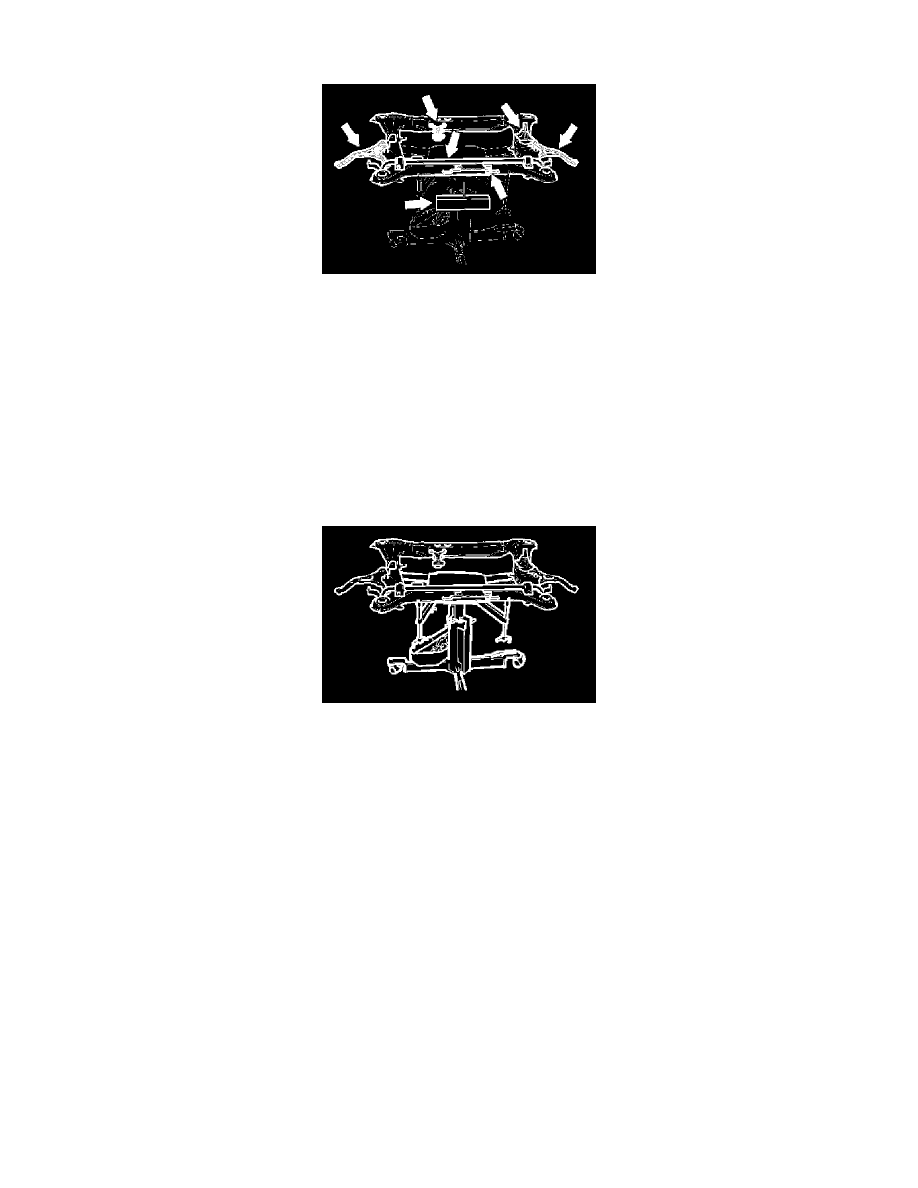
-
the control arms. Use new screws and new nut.
Tighten the front screws. Tighten to 65 Nm.
Angle-tighten 90 degrees. Use bevel protractor 951 2050. Tighten the rear screw. Tighten to 105 Nm. Angle-tighten 90 degrees
-
the anti-roll bar. Tighten to 60 Nm
-
the right-hand engine mounting. Tighten the screws. Tighten to 65 Nm. Angle-tighten 60 degrees
-
the exhaust mounting bracket. Tighten to 50 Nm
-
the shock absorber Tighten to 50 Nm lower torque rod. Tighten to 65 Nm. Angle tighten 90 degrees.
Install new pipe / hose holders.
Installing the sub-frame
Position the sub-frame on a lifting table.
Carefully lift the sub-frame.
Locate the control arms to the ball joints and the steering gear to its mountings.
HINT: Lubricate the rubber coated clamp for the servo pressure pipe on the sub-frame using a soap solution. Install the screw before raising the
sub-frame completely. Do not tighten the screw more than 2 turns as the pipe must be able to slide to the correct position in the clamp whilst raising the
sub frame.
NOTE: Ensure that the brake pipe at the exhaust mounting is not trapped when raising the sub frame.
Lift the sub-frame up completely.
Install the four screws in the sub-frame together with the sub-frame brackets and engine block heater, if applicable. Use new screws. Lubricate the
screws.
First tighten the screws on the left side of the subframe.
Tighten to 105 Nm. Angle tighten to 120 degrees.
Then tighten the right-hand side to the same value.
Finally tighten the screws for the brackets on both sides to 50 Nm.