
XC90 AWD L5-2.5L Turbo VIN 59 B5254T2 (2005)
Caution! Make sure that the piston rings are not stuck and that they turn easily.
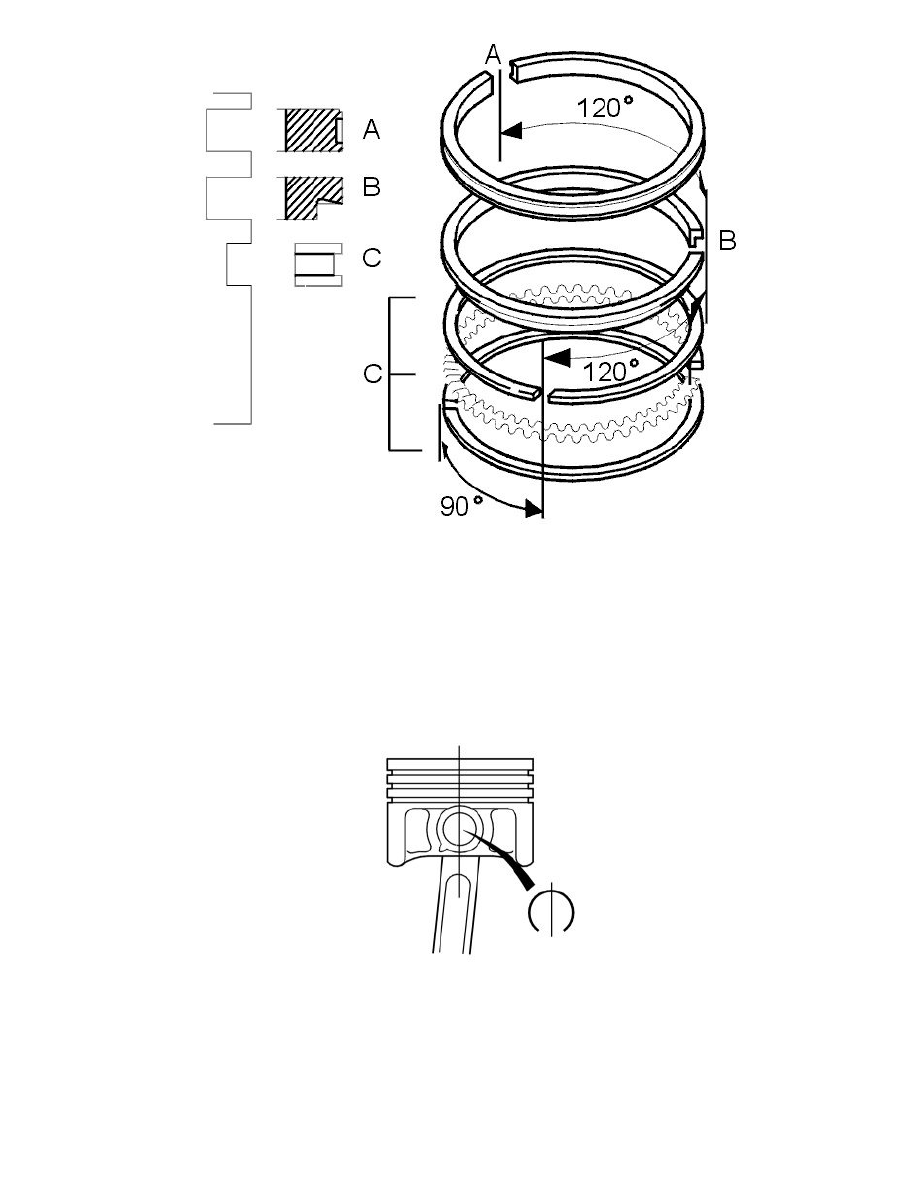
Note! Incorrect positioning may result in higher oil consumption.
Use piston ring pliers. Turn the piston rings so that the openings are offset as illustrated.
A=Compression ring. The text on the piston ring must be upwards.
B=Scraper ring. Chamfered edge must face downwards.
C=Oil ring. Three sections, identical on all sides. First install the expander ring (C), then the two other rings over the expander ring.
Assembling pistons and connecting rods
Warning! The lock ring can easily fly off. Wear protective goggles
There is an arrow marking on the upper side of the cylinder. This must be turned forwards in the cylinder block.
The connecting rods are symmetrical and can be turned freely. Marked rods however must be turned in the same direction.
Assemble the connecting rod and piston with the piston pin. Check that the classification and any numbering for each cylinder/piston diameter and
connecting rod correspond.
Install both the snap rings on the piston pin. Check that the snap rings are positioned correctly in the piston. The opening must be vertical.
Wipe clean around the bearing recess in the connecting rod and the cap.