audi Workshop Repair Guides

Audi Workshop Service and Repair Manuals

Tightening torques > < Checking dimensions of wheel bearing housing
Installing
Installing
Installing wheel hub with wheel bearing
   
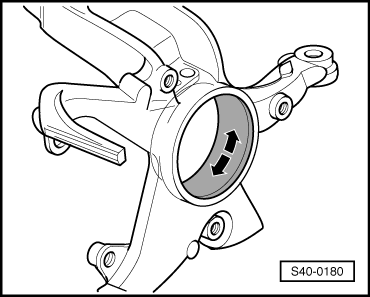
–  Coat entire surface of bore with Molykote grease.
Molykote grease -G 052 723 A2-
Use grease sachet from repair kit.
  S40-0180
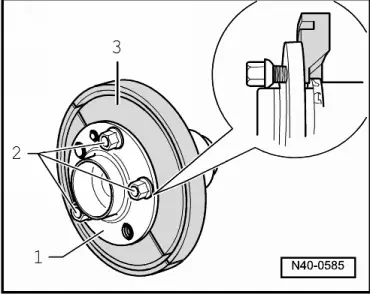
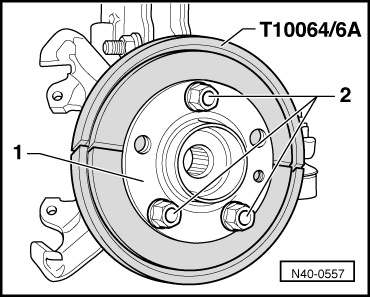
–  Bolt grip plates -T10064/6A--3- to wheel hub/wheel bearing unit -1-.
Wheel bolts -2- must not project beyond rear surface of grip plates -T10064/6A-.
  N40-0585
–  Pull wheel hub/wheel bearing unit into wheel bearing housing.
  Note!
Make sure wheel hub/wheel bearing unit is kept straight when installing.
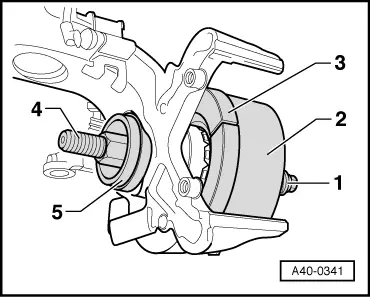
–  Pull in wheel hub/wheel bearing unit circlip engages audibly.
1 - Axial roller bearing -3253/4-
2 - Tube -T10064/1-
3 - Grip plates -T10064/6A-
4 - Spindle -3253/3-
5 - Guide piece -T10064/4-
–  Insert guide piece -T10064/4- with larger diameter facing wheel bearing housing.
  A40-0341
–  Unbolt grip plates -T10064/6A- from wheel hub/wheel bearing unit.
1 - Wheel hub with wheel bearing
2 - Wheel bolts
Remaining installation steps are carried out in reverse sequence. Note the following points:
–  Remove any paint or adhesive residue and/or corrosion on thread and splines of outer drive shaft joint.
–  Remove any remaining locking fluid from splines on outer drive shaft joint and splines of wheel hub.
Splines on outer joint and splines of wheel hub must be free of oil and grease.
–  Degrease thread on outer joint (stub axle) if necessary.
Important: Do not apply grease to threads of outer joint.
  N40-0557
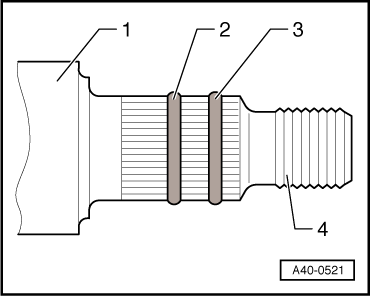
–  Apply two beads of locking fluid -D 185 400 A2- on splines as illustrated. Bead diameter approx. 2 mm.
1 - Outer joint
2 - Bead approximately in centre of splines
3 - Bead near beginning of splines
4 - Do not grease thread on outer joint (stub axle).
Vehicles with fabricated wishbone and bolt-on swivel joint
–  When securing swivel joint to wishbone on vehicles with fabricated wishbone, keep to previously marked position of bolts, or original bolt impressions. Use new bolts and a new locking plate with nuts.
Observe correct installation sequence of bolts → Item.
–  Fit and secure wheels → Chapter.
After installation, check position of steering wheel by test-driving vehicle.
Wheel alignment must be checked and adjusted if steering wheel is not in central position when driving straight-ahead.
–  Check and adjust wheel alignment → Chapter.
All vehicles (continued):
–  Always replace hexagon socket nut (pressed-steel version) with a 12-point nut.
  A40-0521

Tightening torques > < Checking dimensions of wheel bearing housing