
A3 Mk1
| Servicing clutch - exploded view |
 Note
Note| t | Before renewing the clutch plate and pressure plate refer to Fault finding on power transmission - Complaints regarding clutch and clutch mechanism → Chapter. |
| t | Check that dowel sleeves for centralising engine/gearbox are in the cylinder block, install if necessary. |
| t | If the dowel sleeves are not fitted, this will lead to gear-change problems, clutch malfunction and in some cases gearbox noise (gears will make rattling noises). |
| t | Renew clutch plate and pressure plate if riveted fastening is damaged or loose. |
| t | Allocate clutch plate and pressure plate according to → Electronic parts catalogue. |

| 1 - | Flywheel |
| q | Ensure that dowel pins fit tightly |
| q | Contact surface for clutch lining must be free of scoring, oil and grease |
| q | Removing and installing → Rep. Gr.13 |
| 2 - | Clutch plate |
| q | Allocate according to → Electronic parts catalogue |
| q | Installation position with one-piece flywheel: spring cage faces towards pressure plate |
| q | Centralising → Chapter |
| q | Lightly grease splines |
Note| Clean input shaft splines and (in the case of used clutch plates) the hub splines. Remove corrosion and apply only a very thin coating of grease for clutch plate splines -G 000 100- to the splines of the input shaft. Then move clutch plate backwards and forwards on input shaft until hub moves freely on shaft. It is important to remove excess grease. |
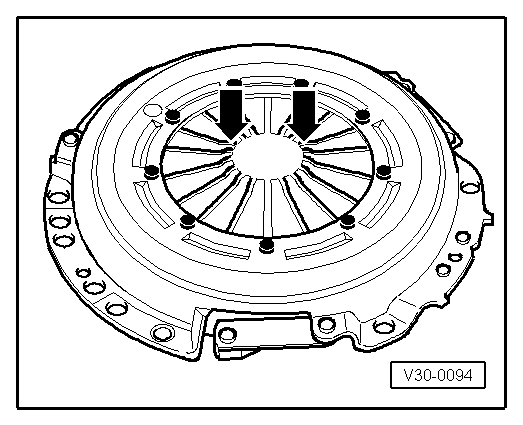
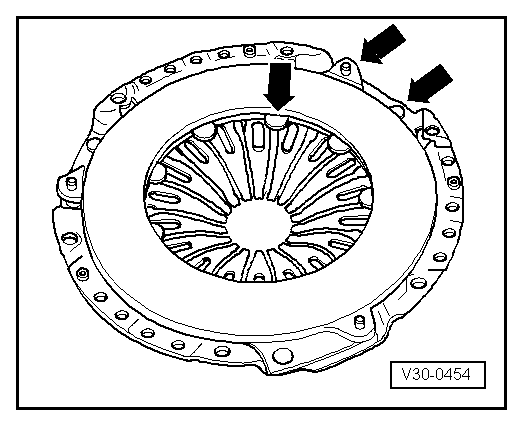
| 3 - | Pressure plate |
| q | Removing and installing → Chapter |
| q | Checking ends of diaphragm spring → Fig. |
| q | Checking spring connections and rivets → Fig. |
Note| Pressure plates have an anti-corrosion coating and are greased. Only the contact surface may be cleaned, otherwise the service life of the clutch will be considerably reduced. |
| 4 - | Bolt |
| q | 20 Nm |
| q | For correct version, refer to → Electronic parts catalogue |
| q | Loosen and tighten gradually in diagonal sequence |
|
|
|
|