audi Workshop Repair Guides

Audi Workshop Service and Repair Manuals

Removing and installing vibration damper > < Poly V-belt drive - exploded view
Removing and installing poly V-belt
Special tools and workshop equipment required
   
t  Locking pin -T10060 A-
  W00-10235
Removing
–  Take off engine cover panel -arrows-.
  A10-0515
–  Unscrew bolt -arrow- and remove cover over coolant expansion tank.
  A10-1164
–  Remove air pipe -arrows-.
  Note
  A10-0442
Before removing, mark direction of rotation of poly V-belt with chalk or felt-tipped pen. If the belt runs in the opposite direction when it is refitted, this can cause breakage.
–  Turn the tensioner in the direction of the -arrow- to slacken the poly V-belt.
  A13-0083
–  Lock tensioner in position with locking pin -T10060 A-.
  N13-10135
–  Remove centre noise insulation -arrows-.
  A10-1256
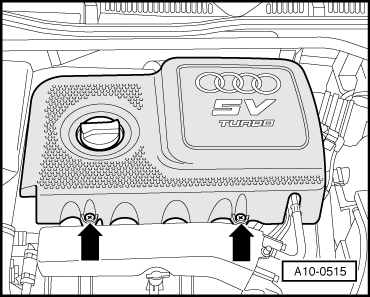
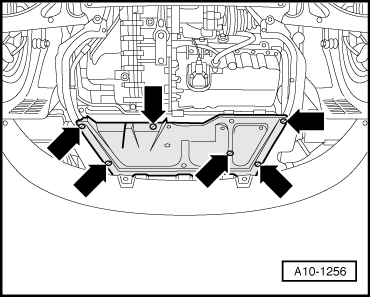
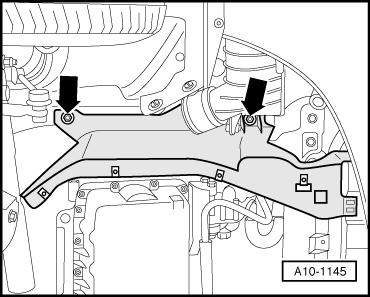
–  Remove right noise insulation -arrows-.
–  Remove poly V-belt.
Installing
Installation is carried out in the reverse order; note the following:
  Note
t  Before fitting poly V-belt, make sure all mechanical units (alternator, air conditioner compressor, power steering pump) are firmly in position.
t  Hose connections and hoses for charge air system must be free of oil and grease before assembly.
t  Secure all hose connections with the correct type of hose clips (same as original equipment) → Parts catalogue.
–  Fit poly V-belt onto crankshaft pulley, power steering pump pulley and then onto alternator pulley.
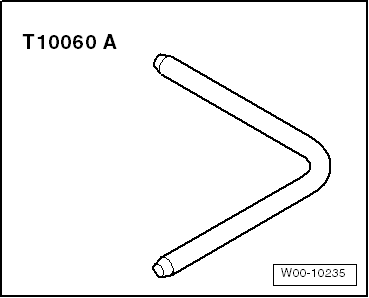
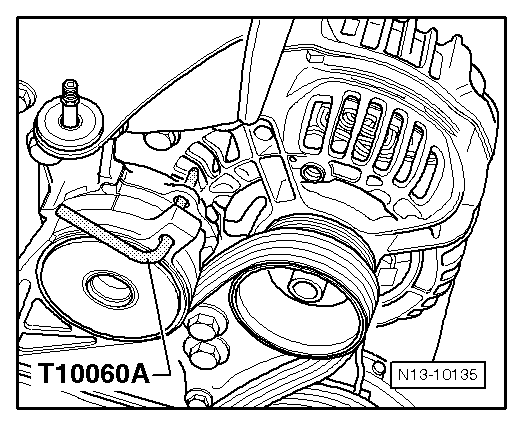
–  Release pressure from tensioner and remove locking pin -T10060 A-.
–  Check poly V-belt for proper seating.
l  Routing of poly V-belt on vehicles without air conditioner → Fig..
l  Routing of poly V-belt on vehicles with air conditioner → Fig..
–  Start engine and check that belt runs properly.
Tightening torque
  A10-1145
ComponentNm
Hose clips for air hoses3.5


Removing and installing vibration damper > < Poly V-belt drive - exploded view