
A3 Mk1
|
Removing and installing cylinder head
Removing, installing and tensioning toothed belt
|
 |
|
|
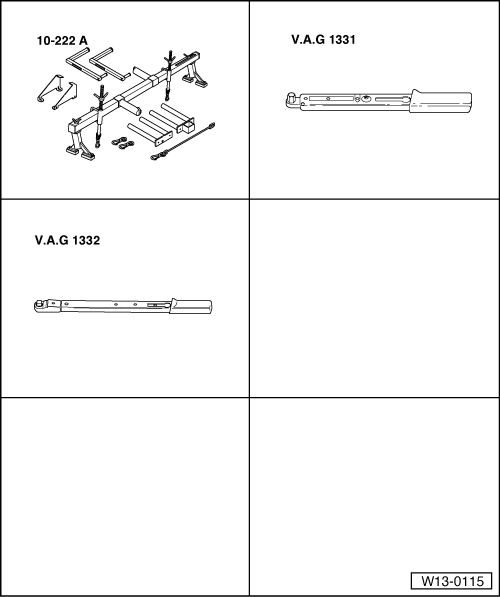
(Adjusting valve timing) Special tools, workshop equipment, test and measuring appliances and auxiliary items required
Removing
=> Repair group 24; Servicing injection system; Removing and installing air cleaner
Vehicles with air conditioner
Continuation for all vehicles
|
 |
|
|
 |
|
|
 |
|
|
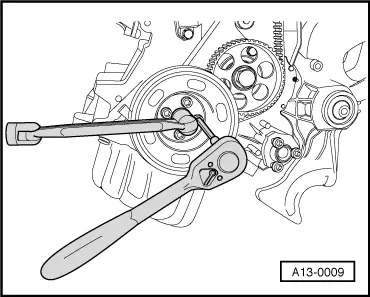
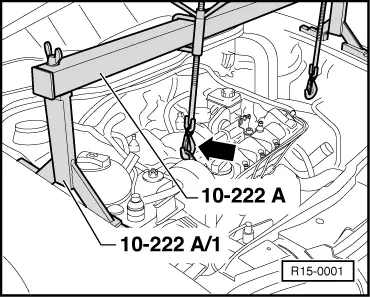
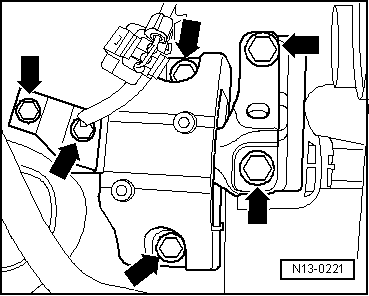
Work sequence
|
 |
|
Vehicles with air conditioner
Continuation for all vehicles
Note: When installing the ribbed belt ensure that it sits correctly in the pulleys. |