audi Workshop Repair Guides

Audi Workshop Service and Repair Manuals

Exploded view - removing and installing 3rd to 6th gear > < Exploded view - servicing self-locking centre differential
Removing and installing self-locking centre differential with gearbox installed
Special tools and workshop equipment required
   
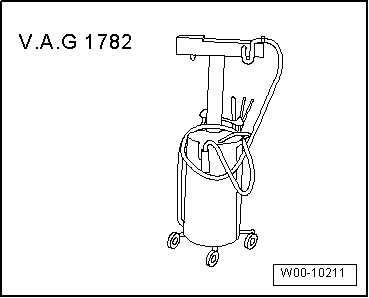
t  Used oil collection and extraction unit -V.A.G 1782-
Removing
  W00-10211
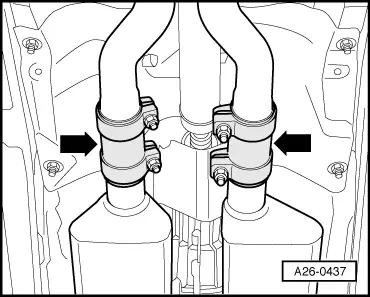
–  Disconnect exhaust system at clamps -arrows-.
  Note
t  The flexible pipe connection (de-coupling element) in the front exhaust pipe must not be bent more than 10° - otherwise it can be damaged.
t  The illustration shows the exhaust system in conjunction with the 3.0 ltr. V6 petrol engine.
–  Disengage rear section of exhaust system at rubber mountings and remove.
  Note
A second mechanic is required for removing the rear section of the exhaust system.
  A26-0437
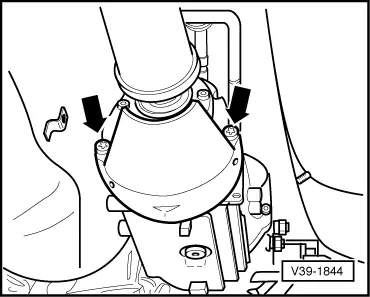
–  If fitted, unbolt heat shield for propshaft -arrows-.
  V39-1844
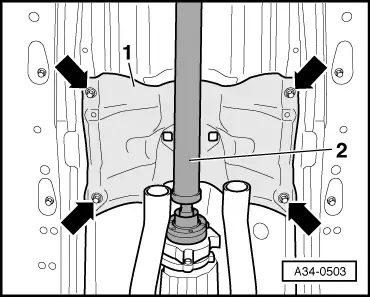
–  Remove heat shield -1- for exhaust system below selector mechanism -arrows-.
  A34-0503
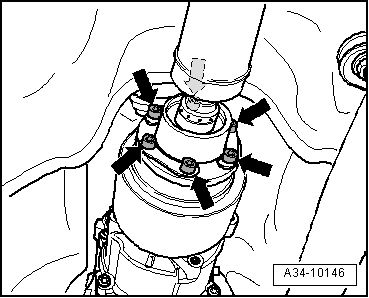
–  Remove bolts -arrows- at gearbox/propshaft flange.
–  Slide propshaft together towards rear final drive. The constant velocity joints can be moved axially.
  A34-10146
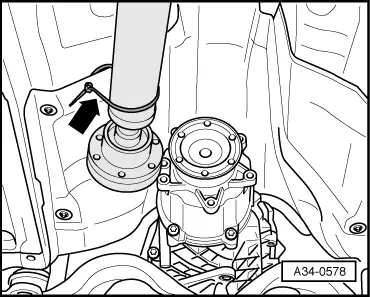
–  Tie propshaft up to side onto heat shield -arrow-.
–  Place used oil collection and extraction unit -V.A.G 1782- below gearbox.
–  Drain off gear oil.
  A34-0578
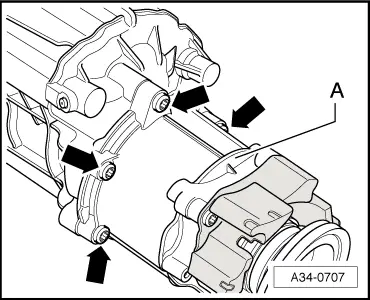
–  Unscrew bolts -arrows- and carefully detach centre differential housing -A-.
  Note
The illustration shows only 4 of the 6 securing bolts.
  A34-0707
Installing
Installation is carried out in reverse sequence; note the following:
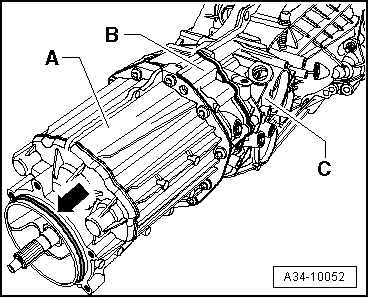
–  Fit new O-ring -arrow- and lubricate lightly with gear oil.
  A34-10052
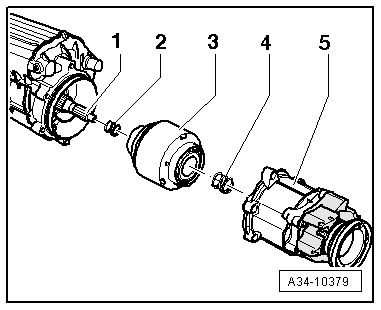
–  Place small spring -2- and centre differential -3- onto pinion shaft/hollow shaft -1-.
–  Insert large spring -4-.
–  Then fit centre differential housing -5- onto gearbox cover.
  A34-10379
–  Tighten bolts -arrows-. Tightening torque → Item
  Note
The illustration shows only 4 of the 6 bolts.
–  It is important to clean the threaded holes for the propshaft bolts in the gearbox/propshaft flange to remove any remaining locking fluid. The residue can be removed using a tap.
–  Fill up with gear oil and check gear oil level → Chapter.
–  Bolt propshaft onto gearbox → Rear final drive 01R; Rep. gr.39.
–  Install exhaust system so it is free of stress → Engine, mechanics; Rep. gr.26.
Tightening torques
  A34-0707
Component Nm
Heat shield for propshaft to centre differential housing25


Exploded view - removing and installing 3rd to 6th gear > < Exploded view - servicing self-locking centre differential