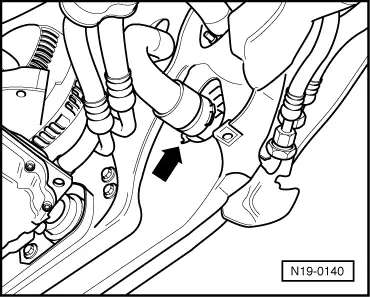
audi Workshop Repair Guides

Audi Workshop Service and Repair Manuals

Removing and installing viscous fan > < Radiator and radiator fan - exploded view of components
Removing and installing radiator
Special tools and workshop equipment required
   
t  Drip tray for workshop hoist -VAS 6208-
Removing
  Note
t  Collect drained coolant in a clean container for re-use or disposal.
t  The coolant must be drained off completely if the radiator is renewed.
  WARNING
Hot steam or hot coolant can escape when expansion tank is opened; cover filler cap with cloth and open carefully.
–  Open filler cap on coolant expansion tank.
–  Remove front bumper → Rep. Gr.63.
  W00-10228
–  Place drip tray for workshop hoist -VAS 6208- under engine.
–  Turn drain plug -arrow- on radiator anti-clockwise, if necessary fit drain hose to connection.
  A10-0189
–  Detach coolant hose from radiator by releasing retaining clip at connecting flange -arrow-.
  N19-0140
–  Unplug electrical connector -arrow- at radiator fan thermal switch -F18-/-F54- at bottom left of radiator.
Vehicles with automatic gearbox:
–  Detach ATF lines from radiator → Rep. Gr.37.
  A17-0155
All models:
–  Unscrew cooling pipe for power steering hydraulic fluid -arrows- and move clear to side; do not open hydraulic fluid circuit.
  A10-0227
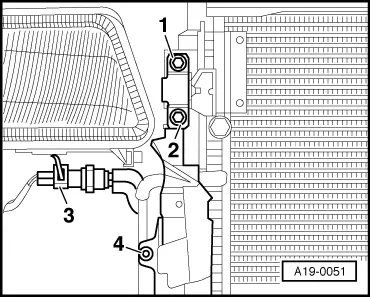
–  Unbolt air ducts (left and right) at radiator -4-.
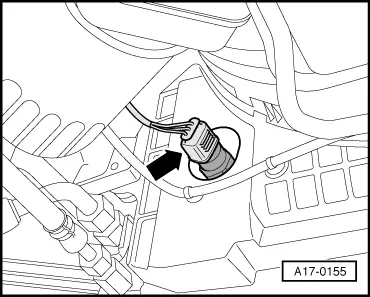
–  Unplug electrical connector -3- at low pressure switch for air conditioner -F73-.
Vehicles with air conditioning:
  WARNING
The air conditioner refrigerant circuit must not be opened.
  Note
To prevent damage to the condenser and refrigerant pipes/hoses, ensure that the pipes and hoses are not stretched, kinked or bent.
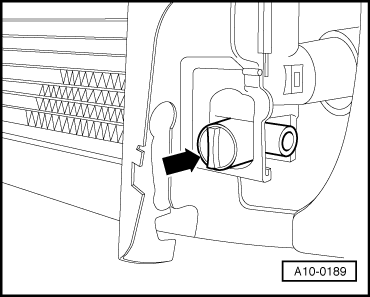
–  Unscrew securing bolts -1- and -2- for condenser.
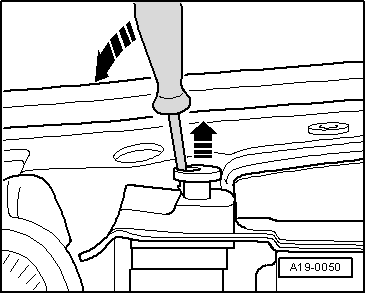
–  Pull condenser up out of its bracket, pivot to side and secure to right-side front wheel with wire.
  A19-0051
All models:
–  Disconnect top coolant hose at radiator.
–  Release two retaining pins for radiator and pull out upwards -arrows-.
–  Swivel radiator forwards by its top edge and remove upwards.
Installing
Installation is carried out in the reverse order; note the following:
  Note
t  Renew gaskets and seals.
t  Secure all hose connections with the correct type of hose clips (same as original equipment) → Parts catalogue.
Vehicles with automatic gearbox:
–  Secure ATF lines to ATF cooler → Rep. Gr.37.
–  Check ATF level → Rep. Gr.37.
All models:
–  Install front bumper → Rep. Gr.63.
–  Fill cooling system → Anchor.
Tightening torques
  A19-0050
ComponentNm
Condenser to radiator10
Cooling pipe for hydraulic fluid to radiator10


Removing and installing viscous fan > < Radiator and radiator fan - exploded view of components