audi Workshop Repair Guides

Audi Workshop Service and Repair Manuals

Removing and installing rear splined shaft, oil seal and ball bearing for rear splined shaft > < Exploded view - centre differential housing - propshaft with splines on gearbox end
Removing and installing centre differential housing with gearbox installed - propshaft with splines on gearbox end
Special tools and workshop equipment required
   
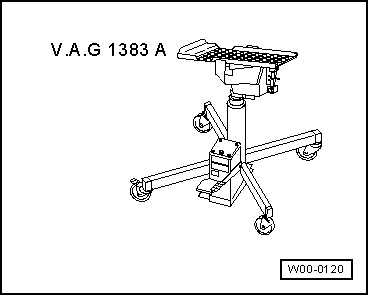
t  Engine and gearbox jack -V.A.G 1383 A-
  W00-0120
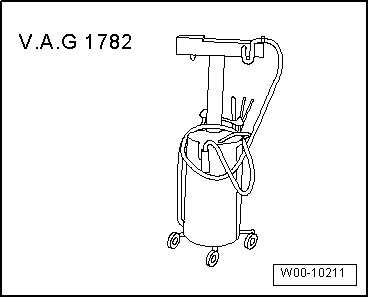
t  Used oil collection and extraction unit -V.A.G 1782-
  W00-10211
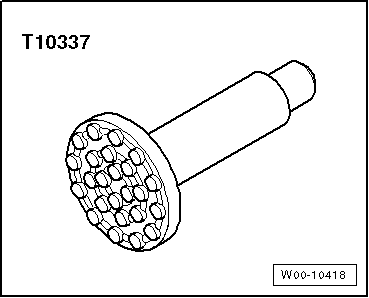
t  Gearbox support -T10337-
t  For sealant, refer to → Electronic parts catalogue
Removing
  Note
Please refer to the vehicle data sticker or the identification on the rear final drive to find out which type of rear final drive is installed in the vehicle. Then select the appropriate Workshop Manual for the rear final drive.
–  Remove propshaft (version with splines on gearbox end) → Rear final drive 0BC; Rep. gr.39 or → Rear final drive 0BF and 0BE - sport differential; Rep. gr.39.
  W00-10418
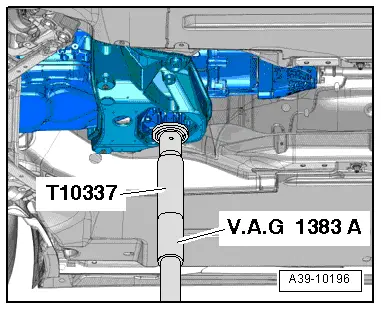
–  Set up gearbox support -T10337- on engine and gearbox jack -V.A.G 1383 A- and position underneath gearbox mounting.
–  Slightly lift gearbox with engine and gearbox jack -V.A.G 1383 A-.
  WARNING
Risk of accident.
Engine and gearbox jack -V.A.G 1383 A- must remain in position when work is being carried out and must not be left unattended.
  A39-10196
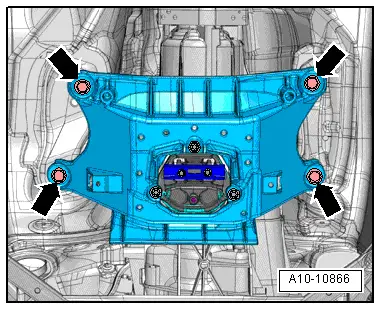
–  Remove bolts -arrows- for tunnel cross member.
  A10-10866
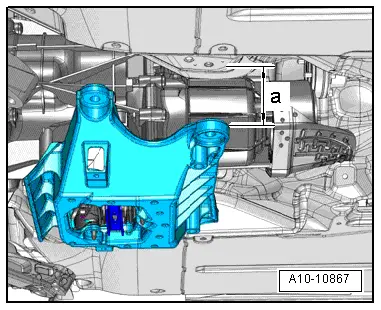
–  Lower gearbox by dimension -a- using engine and gearbox jack -V.A.G 1383 A-.
l  Dimension -a- = 100 mm (maximum)
  A10-10867
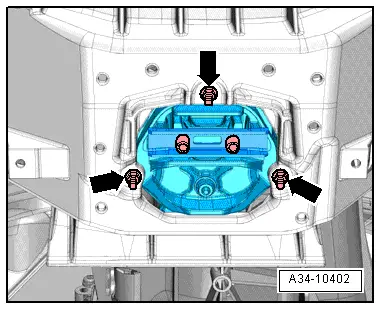
–  Unscrew nuts -arrows- and remove tunnel cross member.
  A34-10402
–  Place used oil collection and extraction unit -V.A.G 1782- below gearbox.
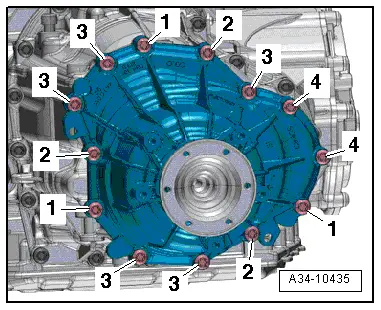
–  Remove bolts -1 … 4- and carefully detach centre differential housing; gear oil (MTF) will drain off.
  Caution
Risk of damage to the centre differential.
t  Pull the centre differential housing slowly and carefully towards the rear off the gearbox. The centre differential may otherwise fall out of the gearbox.
t  A centre differential which has fallen to the ground can no longer be installed.
  A34-10435
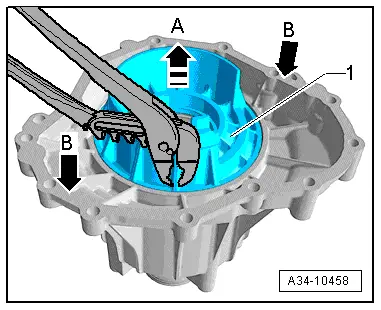
If bearing plate -1- remains behind in centre differential housing, proceed as follows:
  Caution
Risk of damage to the sealing surface of the centre differential housing.
Carefully tap the housing in several places with a hammer.
–  Grip one of the side ribs on bearing plate -1- with pliers and pull off in direction of -arrow A-.
–  While doing so, carefully tap alternate sides of housing -arrows B- with a rubber-headed hammer.
Installing
Installation is carried out in reverse sequence; note the following:
l  Tightening torques → Chapter „Exploded view - centre differential housing - propshaft with splines on gearbox end“
  Note
Renew the bolts for the centre differential housing.
–  Thoroughly clean both housing joint surfaces; they must be free from oil and grease.
  A34-10458
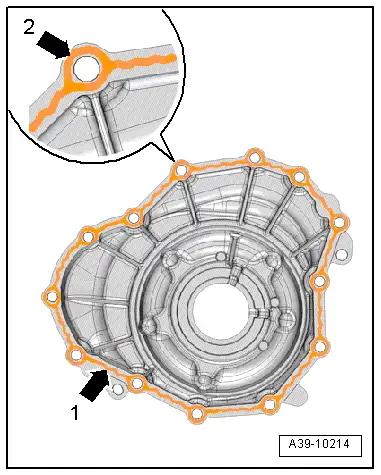
–  Apply bead of sealant -arrow 1- evenly and not too thick on housing joint surface; for sealant refer to → Electronic parts catalogue.
–  To avoid contact corrosion, apply a ring of sealant around each bolt hole -arrow 2-.
–  Lightly lubricate fitting surfaces for bearing plate with gear oil (MTF).
  A39-10214
–  Lightly lubricate surfaces of both races on outside of bearing plate with a small quantity of gear oil (MTF).
–  Insert bearing plate.
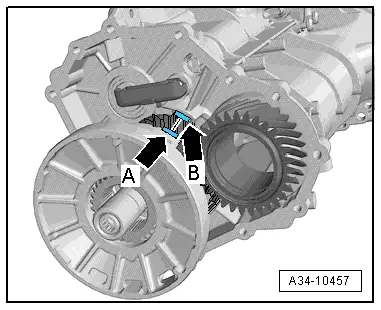
l  Installation position: shoulder of bearing plate -arrow A- must engage in recess on gearbox housing -arrow B-.
  A34-10457
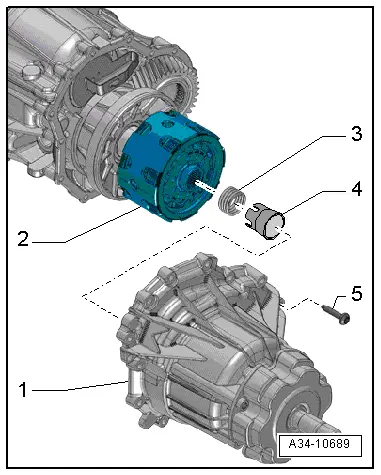
–  Fit centre differential -2- onto gearbox -1-.
–  Fit assembly sleeve -4- on centre differential.
–  Insert spring -3- in centre differential.
  A34-10689
–  Press centre differential housing fully onto gearbox housing, keeping it centred, and hold in place.
–  Tighten bolts for centre differential housing → Fig..
  A34-10435
–  Install tunnel cross member and tighten → Chapter.
  Note
Please refer to the vehicle data sticker or the identification on the rear final drive to find out which type of rear final drive is installed in the vehicle. Then select the appropriate Workshop Manual for the rear final drive.
–  Install propshaft → Rear final drive 0BC; Rep. gr.39 or → Rear final drive 0BF and 0BE - sport differential; Rep. gr.39.
–  → Chapter „Filling up gear oil (MTF)“.
–  Install exhaust system so it is free of stress → Engine, mechanics; Rep. gr.26.
–  Install subframe cross brace → Running gear, front-wheel drive and four-wheel drive; Rep. gr.40.
–  Install noise insulation → General body repairs, exterior; Rep. gr.66.
  A10-10866

Removing and installing rear splined shaft, oil seal and ball bearing for rear splined shaft > < Exploded view - centre differential housing - propshaft with splines on gearbox end