STS RWD V8-4.6L (2007)

Notice: Refer to Fastener Notice.
2. Install the right secondary camshaft drive chain guide bolt.
Tighten the secondary camshaft drive chain guide bolt to 25 N.m (18 lb ft).
3. Install the right intake actuator to the secondary chain, ensuring that the actuator timing mark is aligned with the chain link that was marked during
disassembly.
4. Loosely install the oil control valve to secure the intake actuator to the camshaft.
Notice: Refer to Torque Reaction Against Timing Drive Chain Notice.
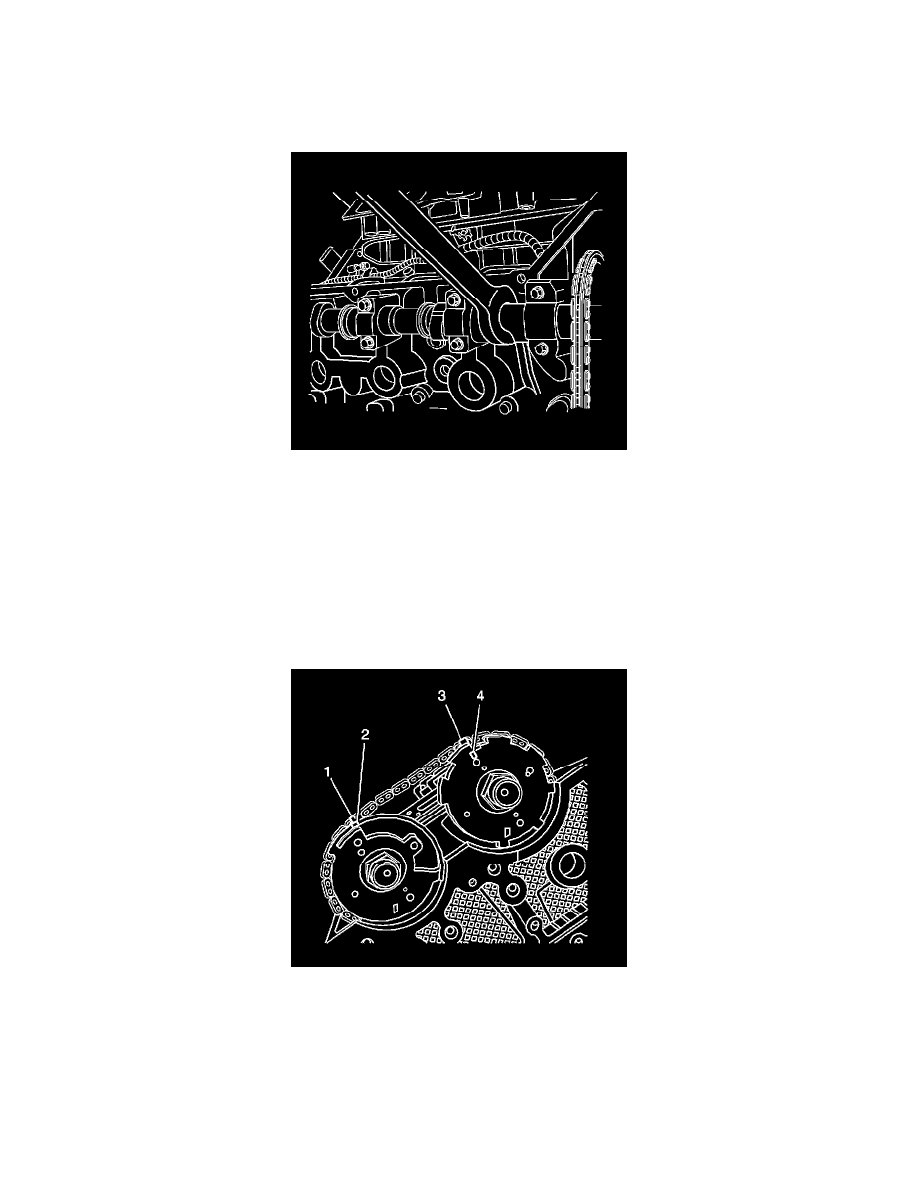
5. Use an open-end wrench on the hex cast into the camshaft in order to prevent the camshaft from rotating when tightening the oil control valve.
Tighten the oil control valve to 120 N.m (89 lb ft).
6. Install the right secondary camshaft drive chain tensioner.
7. Ensure that the previously created paint marks (1, 3) still line up with the sprocket timing marks (2, 4).
8. Install the right camshaft actuator housing.
