
HHR L4-2.4L (2010)
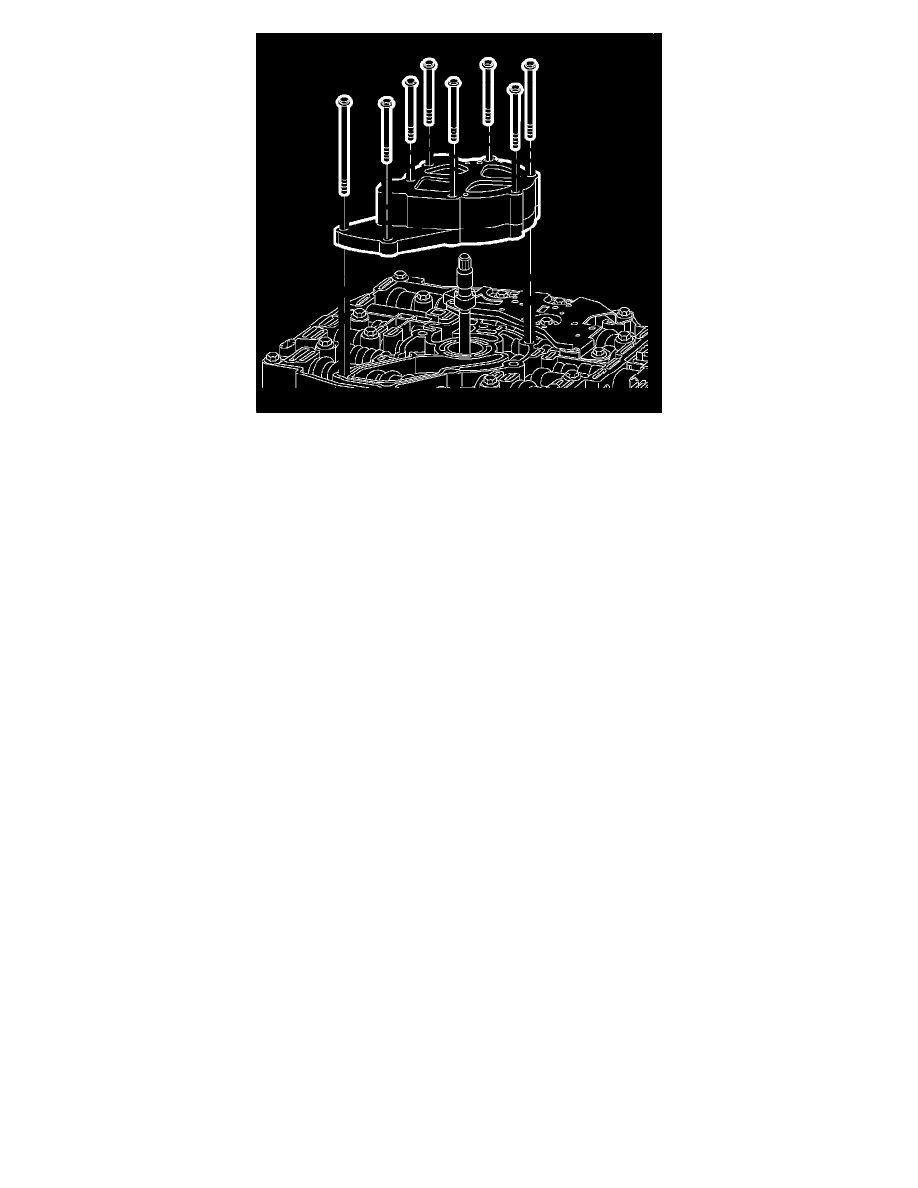
11. Install the oil pump shaft into the control valve body assembly.
Note: If necessary, rotate the oil pump shaft while installing the oil pump assembly in order to engage the shaft splines to the splines on the oil
pump rotor.
12. Install the oil pump assembly onto the oil pump shaft and the control valve body..
Hand start and install the oil pump assembly bolts and tighten to 12 Nm (9 lb ft).
13. Install the transaxle case side cover. Refer to Control Valve Body Cover Replacement (See: Control Valve Body Cover Replacement).
14. Start the engine, warm up the transaxle, and check for leaks.
15. Inspect for proper fluid level. Refer to Transmission Fluid Level and Condition Check (See: Testing and Inspection/Transmission Fluid Level
and Condition Check).
Note: It is recommended that transmission adaptive pressure (TAP) information be reset.
Resetting the TAP values using a scan tool will erase all learned values in all cells. As a result, the ECM, PCM or TCM will need to relearn TAP
values. Transmission performance may be affected as new TAP values are learned.
16. Reset the TAP values. Refer to Transmission Adaptive Functions (See: Description and Operation/Transmission Adaptive Functions).