
Charade L4-1295cc 1.3L (1989)
18.
Removal of timing belt.
NOTE: Prior to removal of the timing belt, put an arrow mark indicating the normal rotating direction on the belt, using a chalk or the like.
CAUTION:
^
Do not try to pry the timing belt with a screwdriver or the like during the removal or installation.
^
Do not allow the belt to come into contact with oil, water or dust.
^
Do not bend the belt at a sharp angle or turn the belt inside out, for it is very vulnerable to bending. Do not utilize the tension of the timing belt
pulley when loosening the set bolt of the camshaft timing belt pulley.
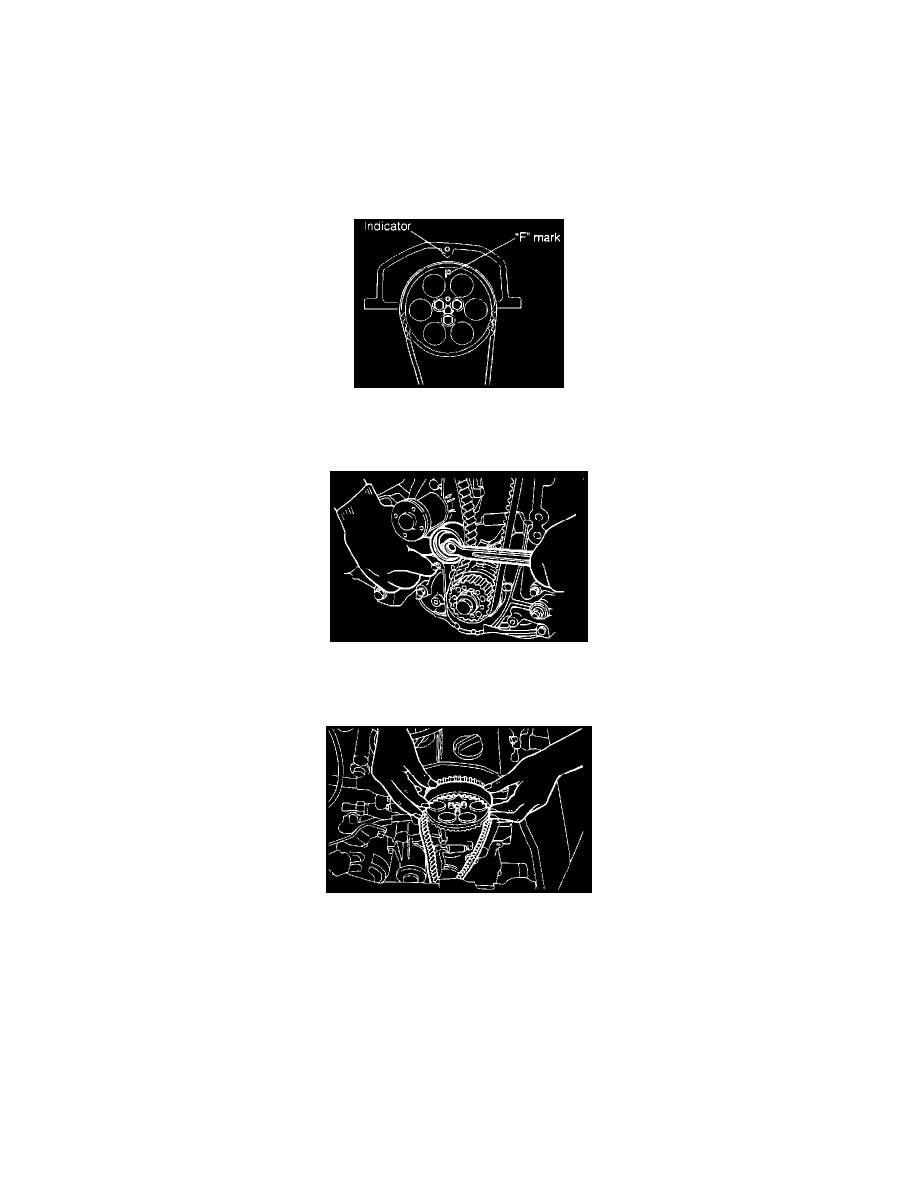
"F" Mark
(a) Rotate the crankshaft until the "F" mark of the camshaft timing belt pulley is aligned with the indicator of the cylinder head cover.
Timing Belt Tensioner
(b) Loosen the attaching bolt of the timing belt tensioner. Move the tensioner to the left as far as it will go and tighten the bolt temporarily.
Removing Timeing Belt
(c) Remove the timing belt.
19.
Removal of camshaft timing belt pulley.
(a) Remove the oxygen sensor wire from the clamp.
(b) Disconnect the spark plug wire at the cylinder head cover side.
NOTE: Be sure to hold the rubber boot during the spark plug wire disconnection. Never remove the spark plug wire, holding the cord portion.
(c) Disconnect the PCV hoses.
(d) Disconnect the accelerator cable from cable clamp.
(e) Remove the engine ground wire from the cylinder head cover. (Radio equipped vehicle only).