| Removal and Installation 3. Remove the components in the order indicated in the following illustration(s) and table(s). CAUTION:Seal the refrigerant lines and the A/C compressor to prevent dirt ingress. 1 - A/C compressor clutch connector 2 - Bolt for A/C compressor refrigerant line to suction accumulator 3 - A/C compressor refrigerant line to suction accumulator 4 - Seal for A/C compressor refrigerant line to suction accumulator 5 - Bolt for A/C compressor refrigerant line to condenser 6 - A/C compressor refrigerant line to condenser 7 - Seal for A/C compressor refrigerant line to condenser 8 - A/C compressor retaining bolts 9 - Bolt, A/C compressor heat shield 10 - A/C compressor heat shield 4. To install, reverse the removal procedure. Removal Details Item 13 : A/C compressor drive plate | | -
Remove the A/C compressor drive plate bolt. | Item 14 : A/C compressor pulley | | -
NOTE:If necessary, remove a seized A/C compressor pulley using a suitable remover. Remove the A/C compressor pulley snap ring. - Remove the distance washers.
- Discard the pulley snap ring.
| Item 15 : A/C compressor clutch field coil | | -
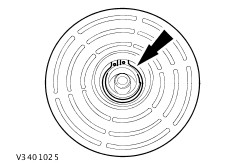
Remove the clutch field coil snap ring. | | | -
NOTE:Mark the installation position of the A/C compressor clutch connector in relation to the compressor housing. Detach the clutch field coil. | Installation Details Item 15 : A/C compressor clutch field coil CAUTION:Do not tilt the clutch field coil when installing in the A/C compressor. NOTE:Installation position of the A/C compressor clutch connector in relation to the compressor housing. Item 14 : A/C compressor pulley NOTE:Install a new A/C compressor pulley snap ring. |