
F 350 4WD Pickup V8-7.3L DSL Turbo VIN F (1994)
13. Support the axle under the differential carrier with a suitable jack, such as Rotunda Heavy Duty Truck Transmission Jack 077-00008 or
equivalent.
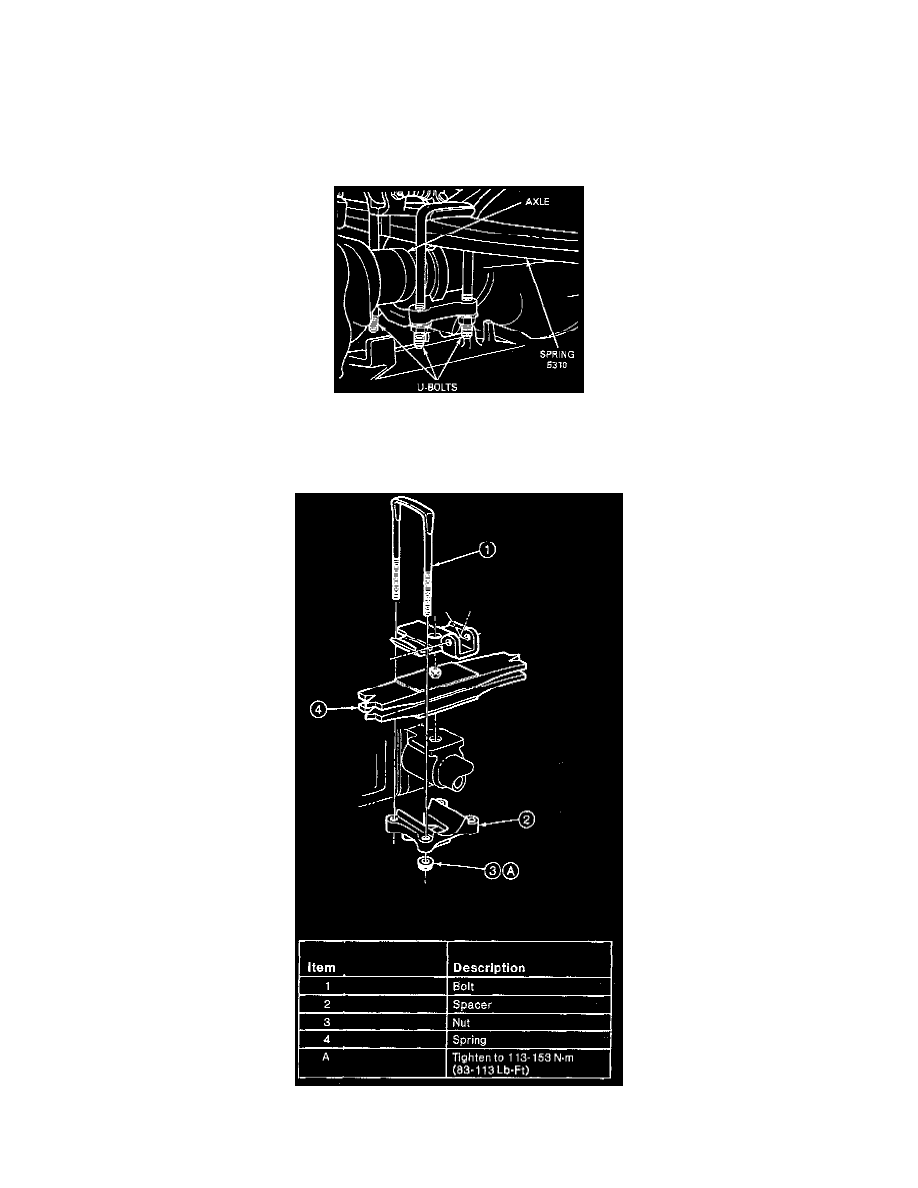
14. Remove the U-bolts and nuts securing the axle to the spring.
15. Carefully lower the axle from the vehicle.
16. If required, place the axle in a suitable differential carrier repair stand.
INSTALLATION
1. With the axle supported under the differential carrier by a suitable transmission jack, carefully raise the axle to the vehicle. Make sure the retaining
bolt head protruding from the leaf spring plate seats in the recessed portion of the axle spring mounting plate.
2. Install the nuts, U-bolts and spring caps securing the axle to the front spring. Tighten to 113-153 Nm (83-113 ft. lbs.).
3. Remove jack and raise the vehicle to a suitable working height. Remove safety stands.
4. Connect the driveshaft to the front axle pinion flange, secure with nuts and U-bolts, and tighten to 11-20 Nm (8-15 ft. lbs.).
5. On the right-hand side of the vehicle, connect the tracking bar to the spring cap, and secure with nut and bolt. Tighten to 70-100 Nm (52-74 ft.