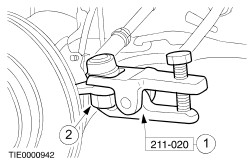
| Removal and Installation Special Tool(s) | | Separator, Ball Joint 211-020 (13-006) | Removal All Vehicles | | -
CAUTION:Prevent the piston rod from rotating using an Allen key. Loosen the strut and spring assembly nut five turns. | | | -
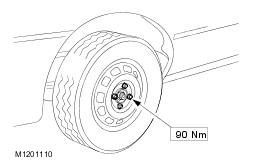
Loosen the front wheel nuts. | | | -
Remove the lower drive belt guard. | Vehicles with 2.5L (200 PS) engine | | -
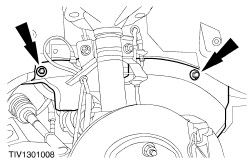
Remove the four lower arm to subframe nuts and bolts. | All Vehicles | | -
Remove the two lower arm to subframe nuts and bolts. | | | -
Detach the stabilizer bar connecting link assemblies (one nut each side). | | | -
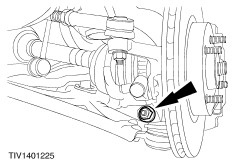
Loosen the tie-rod end nut. | | | -
CAUTION:Protect the ball joint seals to prevent damage. Using the special tool, release the tie-rod ends from the wheel knuckles. - Release the tie-rod end.
- Remove the nut.
| | | -
Detach the driveshaft from the transmission. - Detach the driveshaft center bearing.
- Remove the heat shield.
| | | -
Remove the lower arm to wheel knuckle pinch bolt and nut. | | | -
CAUTION:Protect the ball joint seals to prevent damage. Detach the lower arm from the wheel and remove the lower arm. | Installation All Vehicles | | -
Refit the components in reverse order. | Vehicles with 2.5L (200 PS) engine CAUTION:Make sure the bolt heads are uppermost. All Vehicles CAUTION:Make sure the bolt heads are uppermost. CAUTION:Prevent the piston rod from turning using an Allen key. |