
Windstar V6-232 3.8L (1995)
1.
Open hood and inspect leading edge of hood for bond separation. Start inspection at the front centerline of the hood by placing a flat blade (putty
knife) between the inner and outer panel. Gently pry the putty knife, checking for separation along the entire front bond of the hood (Figure 1). If
there is any evidence of separation of the bond along the front of the hood, the hood should be replaced (F6SZ-16612-AA).
2.
If there is no evidence of bond separation, refer to the following Hood Adhesive Procedure to add adhesive behind the hood latch.
Hood Adhesive Procedure
Materials and tools needed are as follows:
^
One (1) Lord FUSOR Adhesive and Mixer # 148
^
One (1) Adhesive Dispenser - # 300
^
One (1) Putty Knife (25 mm/1" Wide)
^
One (1) Shop Rag
Also required is Repair kit # 707, which contains the following:
^
Four (4) 8 mm (5/16") Wood Dowels
^
One (1) Wood Tongue Depressor
^
One (1) Bottle Isopropyl Alcohol (IPA)
^
One (1) Mill End Rag
For nearest establishment to obtain the materials/supplies needed, call Lord Corporation at (800) 234-3876.
NOTE:
REPAIR MUST BE PERFORMED AT A TEMPERATURE OF 15.5°C (60°F) OR ABOVE WITH HOOD ON VEHICLE.
1.
Open hood and prop open with prop rod.
2.
Remove hood insulator pad and ground strap and set aside.
3.
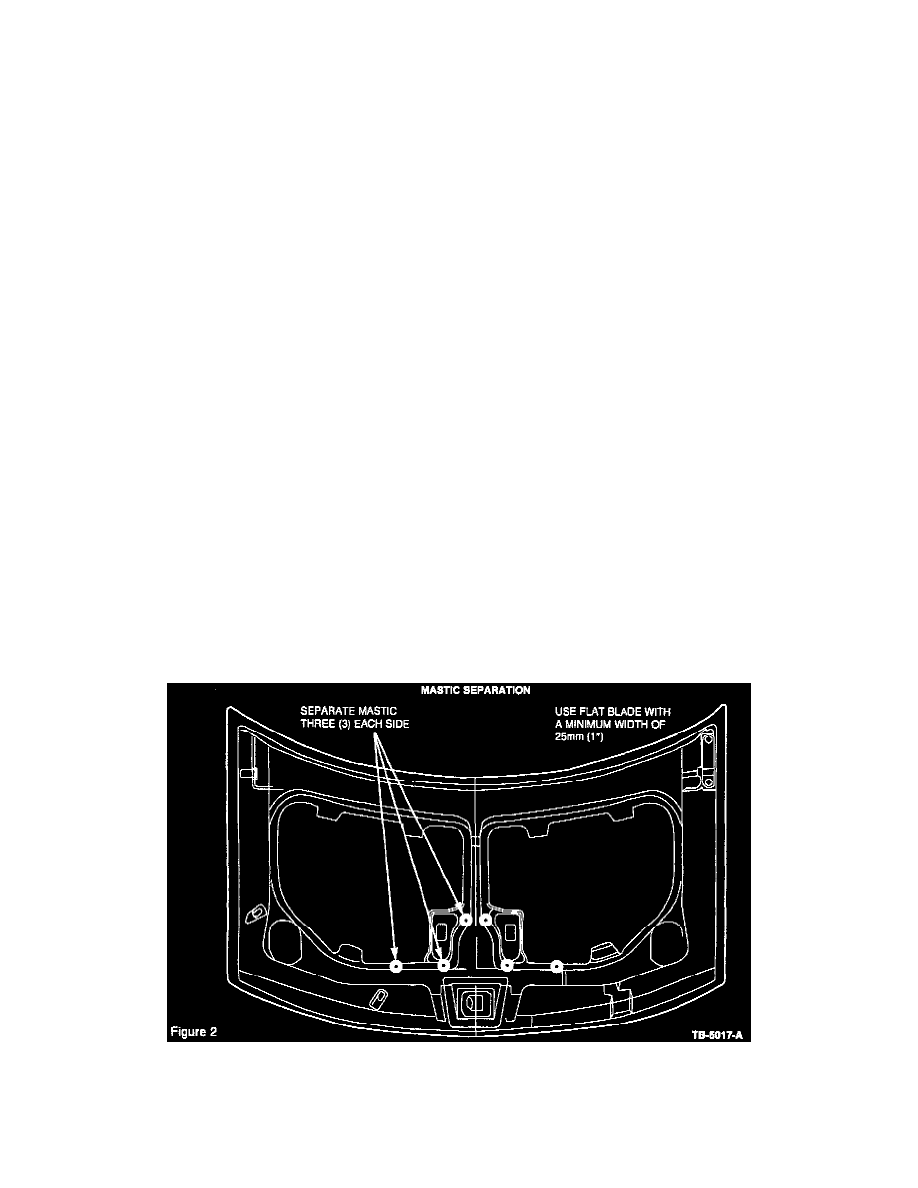
With a clean rag, wipe inner panel clean of excess oil, dirt and dust in the area to be bonded.
4.
Locally separate mastic at points shown in Figure 2 with putty knife (flat blade with 25 mm/1" minimum width).