
Accord V6-3.0L Hybrid (2005)
Trunk / Liftgate Latch: Service and Repair
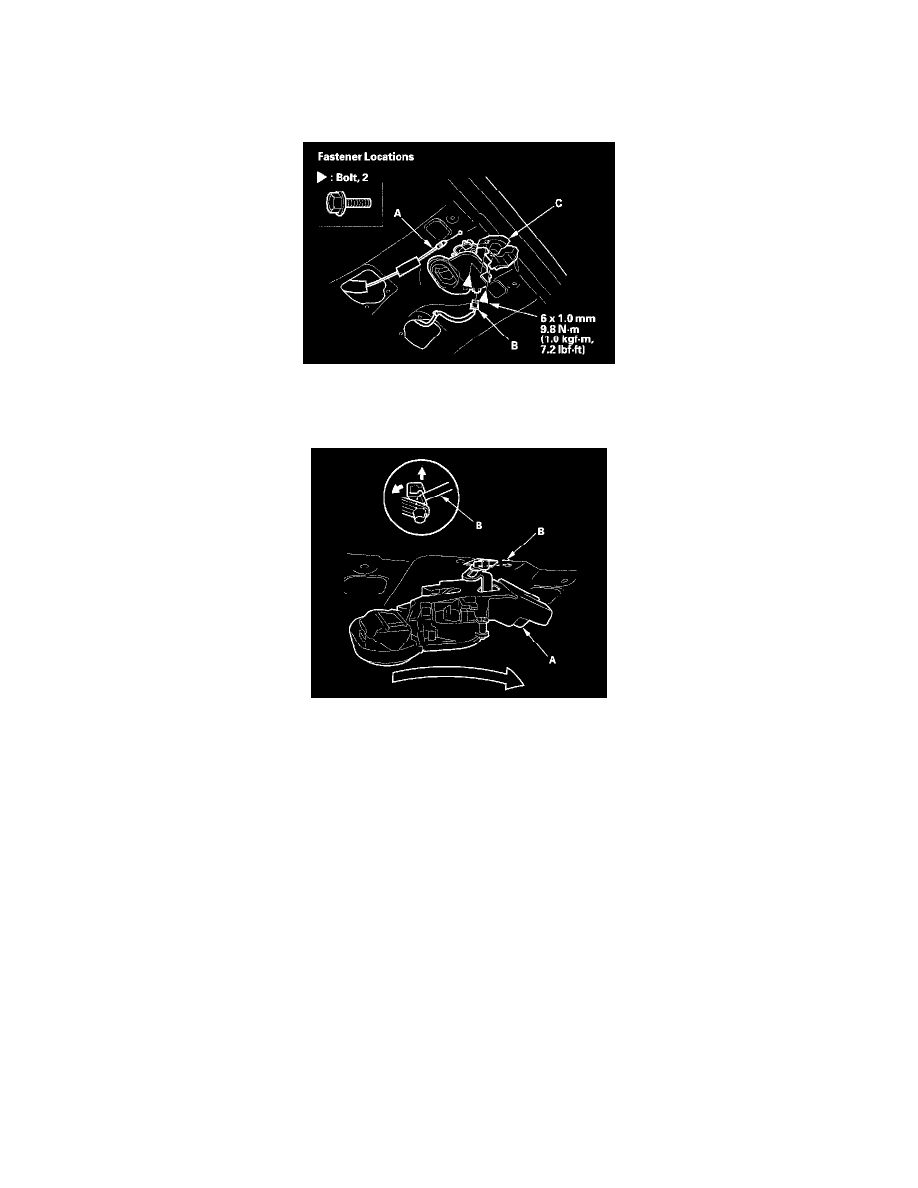
Trunk Lid Latch Replacement
1. Remove the trunk lid trim.
2. Disconnect the cylinder rod from the lock cylinder.
3. Disconnect the trunk lid opener cable (A) and trunk lid latch switch connector (B). Detach the trunk lid latch switch connector from the trunk lid.
Take care not to bend the opener cable.
4. Remove the bolts from the trunk lid latch (C).
5. Pull the trunk lid latch (A) out, and disconnect the cylinder rod (B) from the trunk lid latch. Take care not to bend the cylinder rod.
6. Install the latch in the reverse order of removal, and note these items:
-
Make sure the connector is plugged in properly and the opener cable is connected properly.
-
Make sure the trunk lid opens properly and locks securely.