
Santa Fe V6-3.5L (2004)
5. Install auto tensioner to oil pump case.
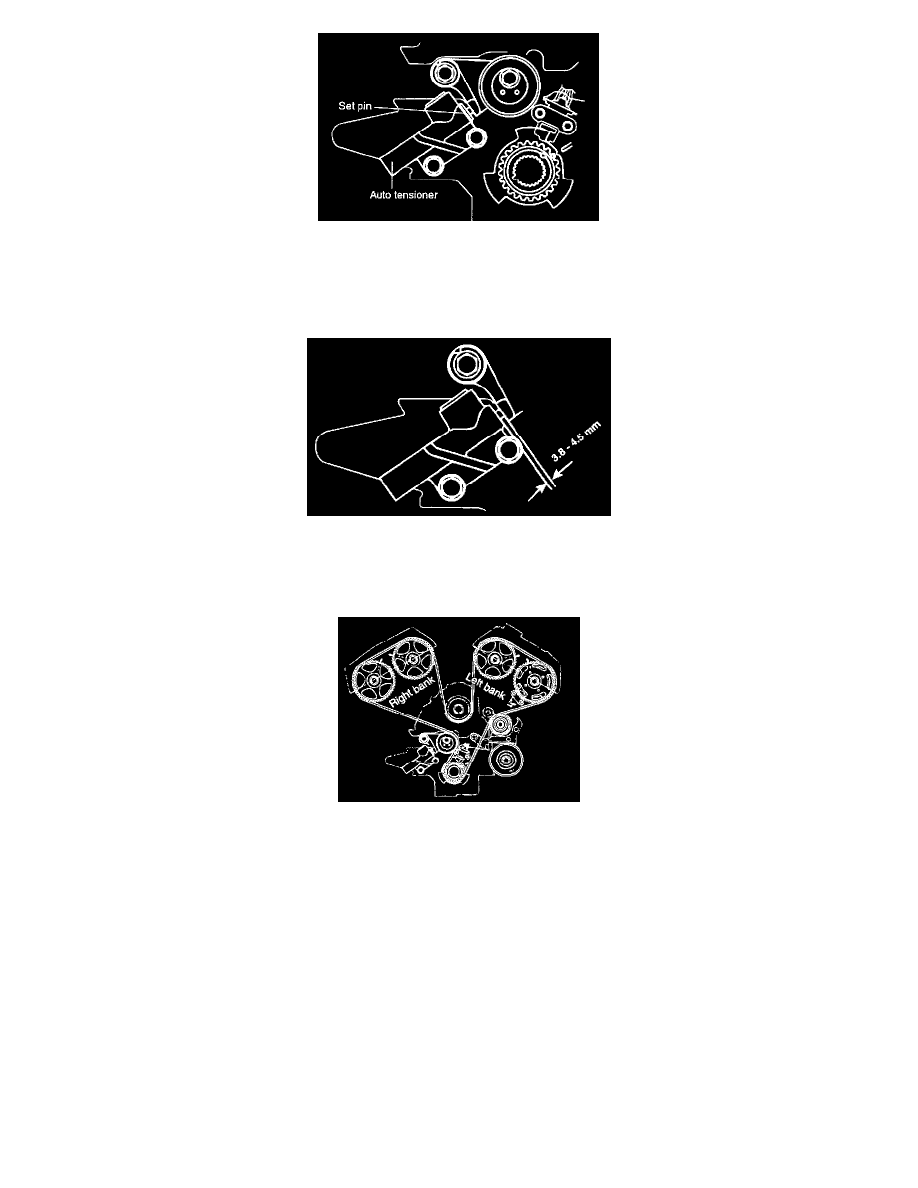
NOTE: If the auto tensioner rod is in its fully extended position, reset it as follows.
1. Clamp it in a vise equipped with soft jaws, in a level position. Use a plain washer if there is a plug at the bottom of the auto tensioner.
2. Compress the rod slowly with the vase until the set hole in the rod is aligned with set hole in the cylinder.
3. Insert a set pin through the auto tensioner body and rod.
CAUTION: Leave the set pin installed in the auto tensioner.
6. Align the timing marks of each sprocket and install the timing belt in this order.
Crankshaft sprocket -> Idler pulley -> Exhaust camshaft sprocket (LH) -> Intake camshaft sprocket (RH) -> Exhaust camshaft sprocket (RH) ->
Tensioner pulley
NOTE:
^
In this step, No. 1 is in TDC (Compression stroke)
^
Do not insert fingers.
7. After installing the timing belt, reconfirm the timing mark.
8. Timing belt tension adjustment
1) Setting tension (under Non-operation of auto tensioner: set pin installed)