
Discovery II
INTERIOR TRIM COMPONENTS
76-3-22 REPAIRS
32. Remove 2 clips securing rear of headlining to
roof.
33. Release rear sunroof switch from headlining.
34. Disconnect multiplug and remove rear sunroof
switch.
35. Remove screw securing headlining to roof.
36. With assistance, remove headlining.
37. Models with rear A/C:
a Remove foam pads from air vents.
b Release 2 rear air vents from headlining.
c Release 3 central air vents from headlining.
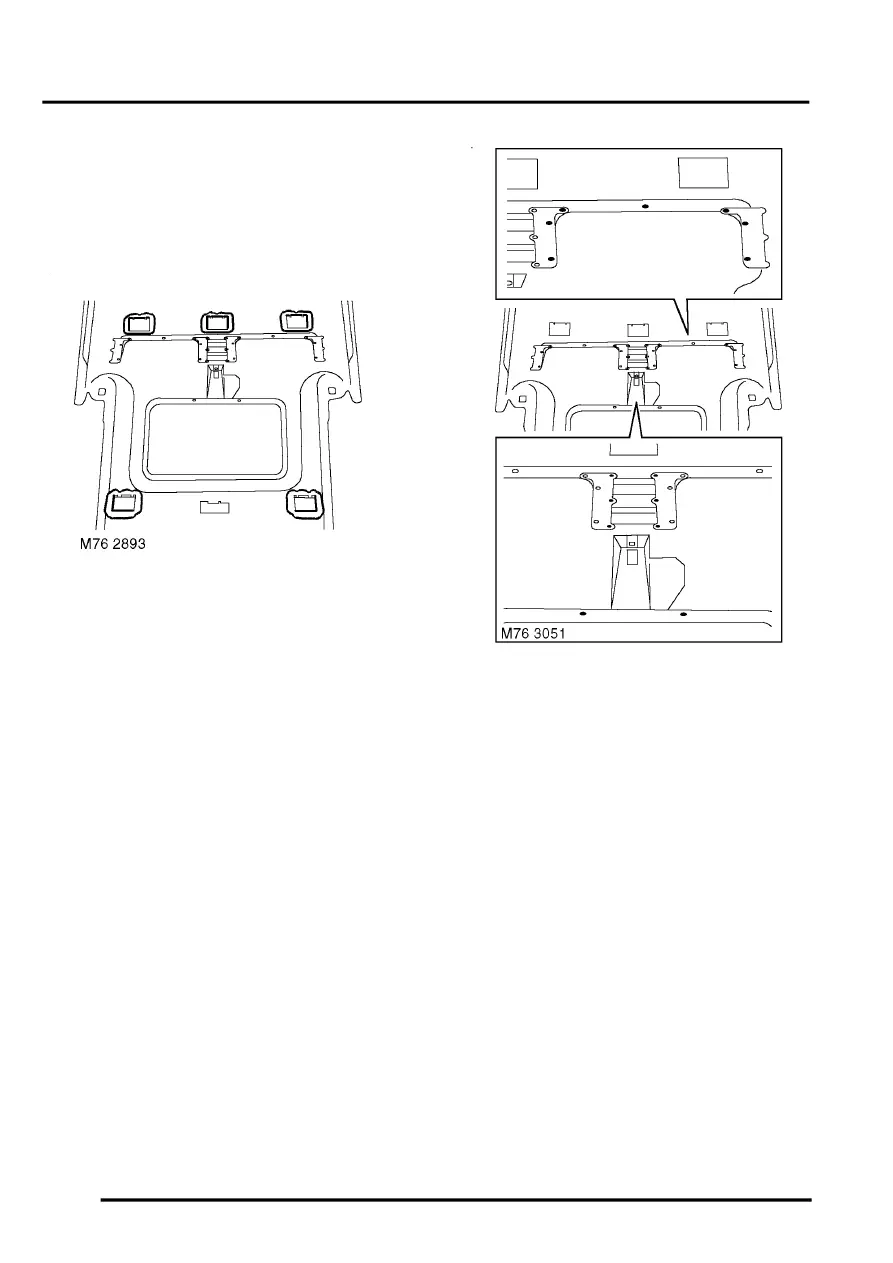
38. Remove 7 nuts securing each stowage pocket
to headlining and collect mounting plates.
39. Remove both pockets from headlining.
40. Remove 8 screws securing rear console to
headlining and collect 3 mounting plates.
41. Remove rear console from headlining.
Refit
1. Fit rear console and mounting plates to
headlining.
2. Fit and tighten nuts securing rear console to
headlining.
3. Fit both stowage pockets and mounting plates
to headlining.
4. Fit and tighten nuts securing stowage pockets
to headlining.
5. Models with rear A/C:
a Fit 3 central air vents to headlining.
b Fit 2 rear air vents to headlining.
c Fit foam pads to air vents.
6. With assistance, position headlining in vehicle.
7. Fit and tighten screw securing centre of
headlining to roof.
8. Connect multiplug to rear sunroof switch.
9. Fit rear sunroof switch to rear console.
10. Fit clips securing rear edge of headlining to
sunroof.