
Discovery II
INTERIOR TRIM COMPONENTS
REPAIRS 76-3-21
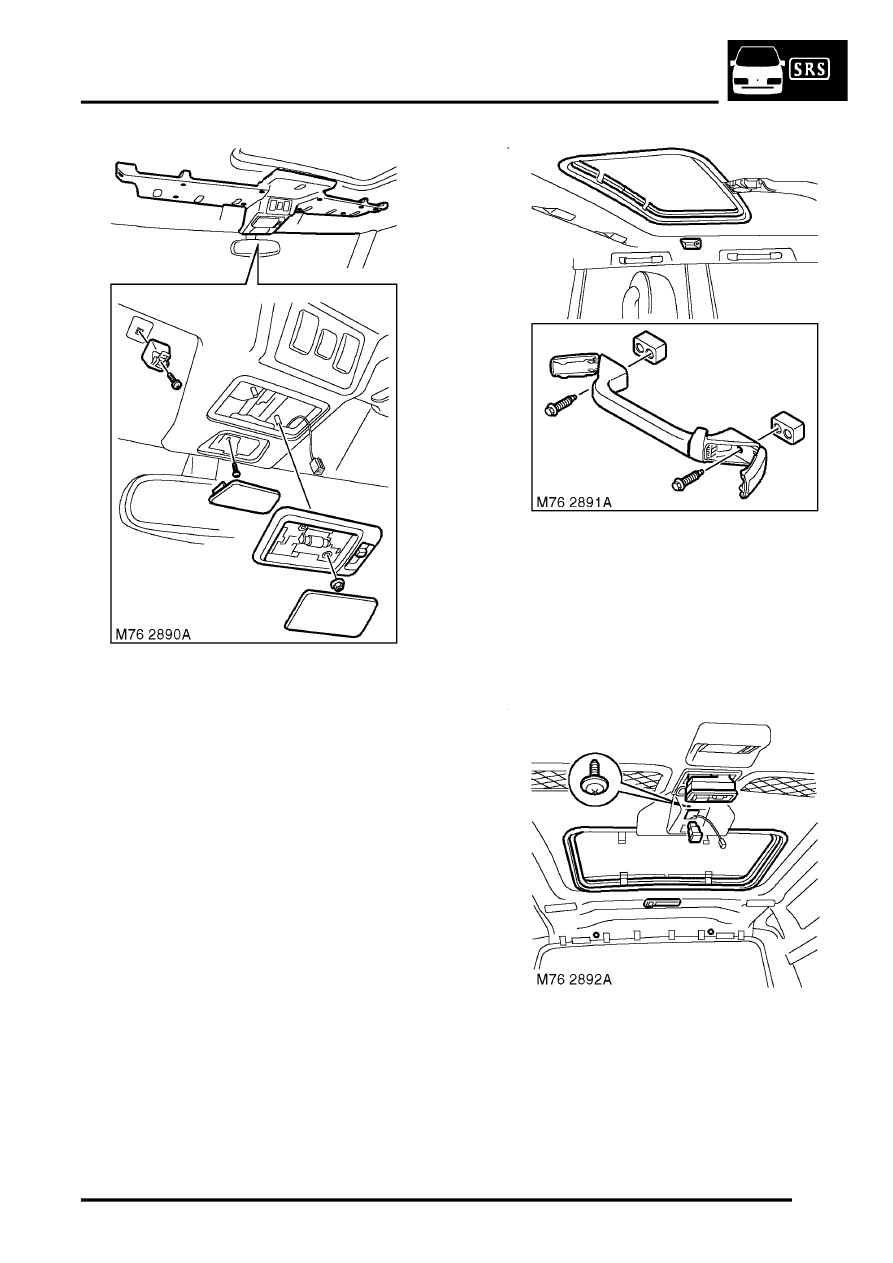
11. Remove access panel from front edge of front
stowage pocket.
12. Remove screw securing front stowage pocket
to headlining.
13. Remove lens from front interior lamp.
14. Remove 2 nuts securing front interior lamp to
headlining.
15. Disconnect multiplug from front interior lamp.
16. Remove front interior lamp.
17. Remove 10 screws securing front stowage
pocket to headlining.
18. Disconnect 3 multiplugs from sunroof switches.
19. Remove front stowage pocket.
20. Remove caps from sun visor clips.
21. Remove screws and release both sun visor
clips.
22. Remove tail door aperture upper trim casing.
23. Remove rear sunroof aperture trim.
24. Remove front sunroof aperture trim.
25. Release end caps from all grab handles.
26. Remove 2 bolts securing each grab handle to
roof.
27. Remove all 4 grab handles.
28. Models with volumetric alarm: Release front
volumetric sensor from headlining and
disconnect multiplug.
29. Models with rear A/C:
a Release rear A/C control panel from
headlining.
b Disconnect 2 multiplugs and 2 Lucar
connectors from rear A/C control panel.
c Remove rear A/C control panel.
30. Release rear interior lamp from headlining and
disconnect multiplug.
31. Remove rear interior lamp.