
Freelander Service Procedures
HOOD
76-7-6
REPAIRS
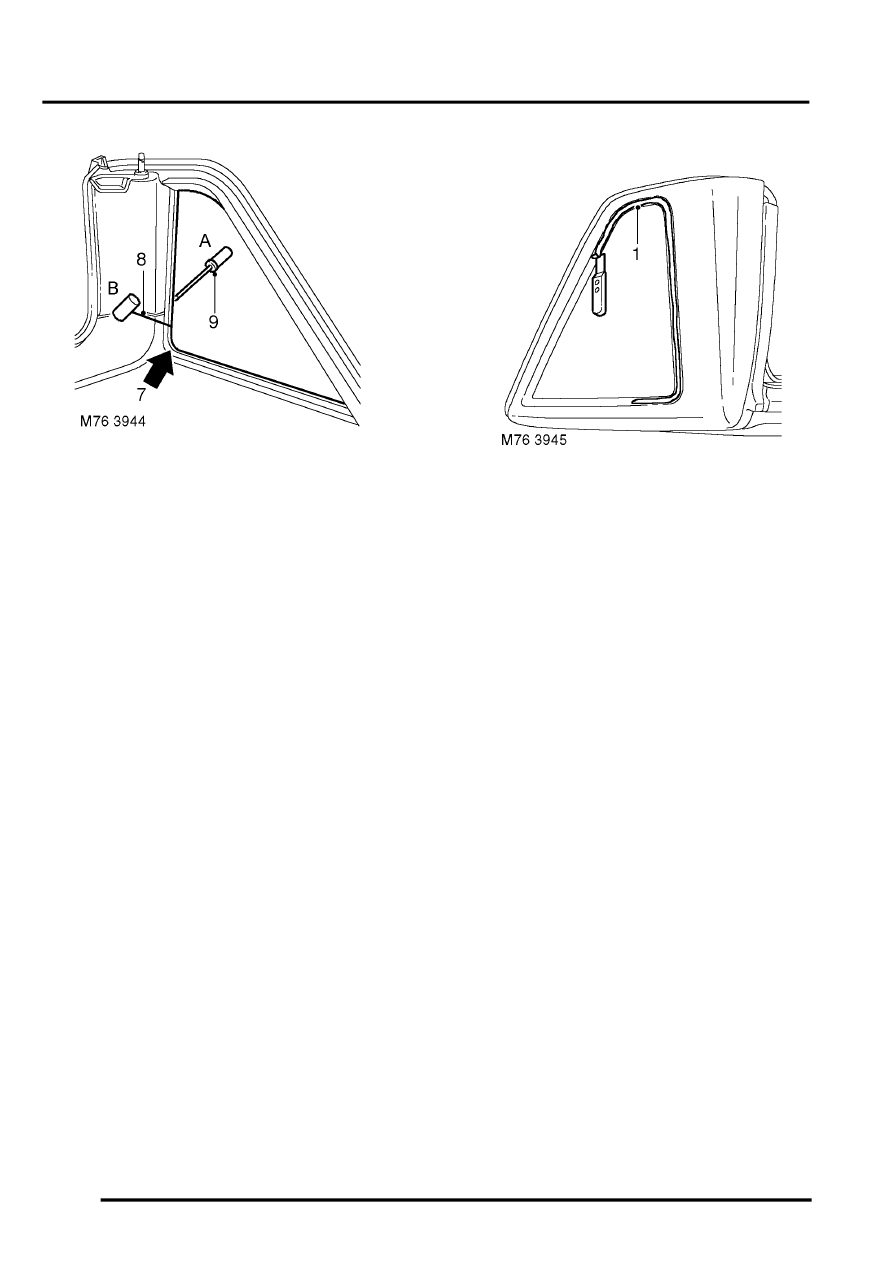
7. Make knife cut in sealant at bottom of 'E' post.
8. Insert cutting wire through previously made
knife cut and fit handles as shown, with
approximately 200 mm of wire between
handles.
9. With assistance, wedge tube of handle A
between glass and body, ahead of cutting
position, and carefully cut sealer using a
continuous pull on handle B from the outside.
Ensure that glass is retained as last sealant is
cut.
If multi-strand cutting wire is used, a sawing
action can be used to cut through heavy
sealant deposits around corners.
Use of a sawing action may overheat and
break single strand wire.
10. Attach suction cup and remove glass body.
Lay glass on felt covered supports. Do not
stand on edge. Any chipping of glass edge
may develop into cracks.
Refit
1. Carefully remove excess sealer from body
leaving a smooth surface.
2. Use a vacuum cleaner to clear away any waste.
3. Original glass: Carefully cut back old sealant to
obtain a smooth surface without damaging
obscuration band on glass.
4. With assistance, locate glass to body.
5. Apply masking tape reference marks to aid
fitment.
6. Remove glass and place aside.
7. Clean frame and edge of glass with solvent.
Do not touch cleaned or primed surfaces
with fingers.
8. Repair any damaged paintwork as necessary.
9. Apply bonding agent to glass and allow to cure.
10. Apply activator over old sealer on frame.
11. Allow activator to cure.
12. Apply primer to frame.
13. Fit pre-cut nozzle to sealer cartridge, remove lid
and shake out crystals, and install in applicator
gun.
Nozzle will need modification to achieve
required bead section.