
Range Rover P38
CHASSIS AND BODY
25
REPAIR
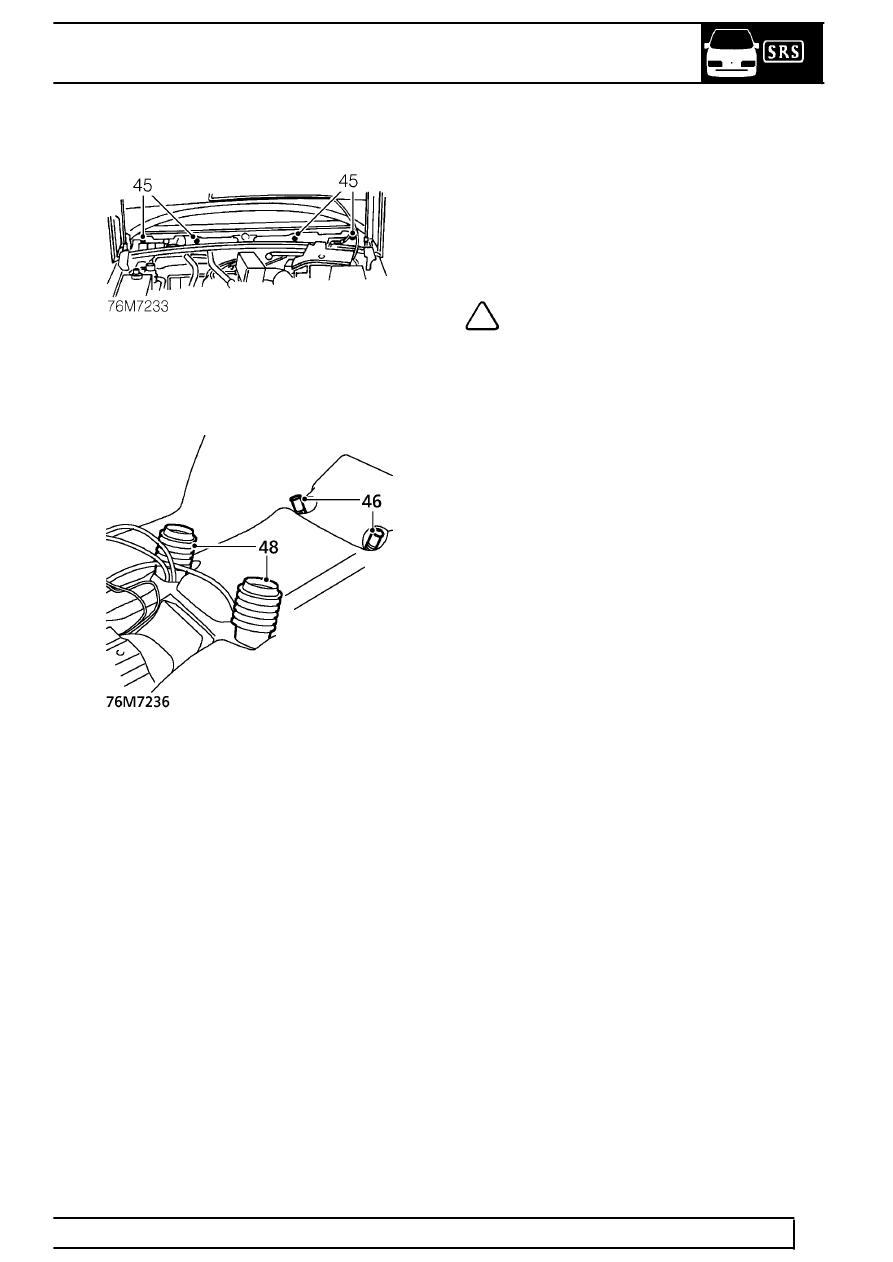
45. Remove 4 tube bolts securing fascia assembly
to scuttle panel.
46. Disconnect 2 evaporator drain hoses from
evaporator.
47. Using assistance, carefully manoeuvre fascia
assembly through the driver’s door aperture.
Position the fascia on a work surface with a soft
covering and support on suitable wooden blocks.
48. Collect 2 ducts connecting rear heating pipes to
fascia assembly.
Refit
49. Tape intake duct seals inside blower duct to aid
fitment.
50. Fit guide pins LRT-76-001 to outer fascia studs.
51. With assistance, manoeuvre fascia assembly
through driver’s door aperture and locate guide
pins to scuttle panel.
NOTE: Assistance from a third person may
be required to guide heater pipes through
bulkhead.
52. Fit one tube bolt securing fascia to scuttle panel
but do not tighten.
53. Fit nuts securing fascia to lower ’A’ posts and
tighten to
25 Nm. (18 lbf.ft)
54. Fit nuts securing fascia to transmission tunnel
brackets and tighten to
25 Nm. (18 lbf.ft)
55. Remove LRT-76-001.
56. Fit remaining tube bolts securing fascia to scuttle
panel and tighten to
25 Nm. (18 lbf.ft)
57. Fit fascia centre bracket, fit bolts and tighten to
25 Nm. (18 lbf.ft)
58. Connect evaporator drain hoses to evaporator.
59. Fit ducts connecting rear heating pipes to fascia
assembly.
60. Fit gear lever to gearbox remote, fit bolts and
tighten to
25 Nm. (18 lbf.ft)
61. Fit gear lever gaiter and ring to transmission
tunnel and secure with nuts.
62. Connect high/low switch multiplug.
63. Position SRS harness to transmission tunnel.
64. Connect multiplug to airbag DCU. Ensure
connector latching mechanism is correctly
engaged.
65. Fit transmission tunnel insulation pad to
transmission tunnel and position multiplugs
through pad.
66. Fit radio.
See ELECTRICAL, Repair.
67. Connect multiplugs at base of passenger’s side
’A’ post.
68. Fit passenger’s side ’A’ post lower trim panel
and secure with screw.
69. Engage door aperture seal to door aperture.
70. Position fascia lower closing panel and engage
diagnostic connector to panel.
71. Position closing panel to fascia and secure with
scrivets.
72. Connect vacuum hose to clutch and brake pedal
switches.
73. Connect multiplugs to clutch and brake pedal
switches.