PB 150 V8-318 5.2L VIN T 2-BBL (1983)

damage or contamination by using old pads over new lining and across caliper fingers.
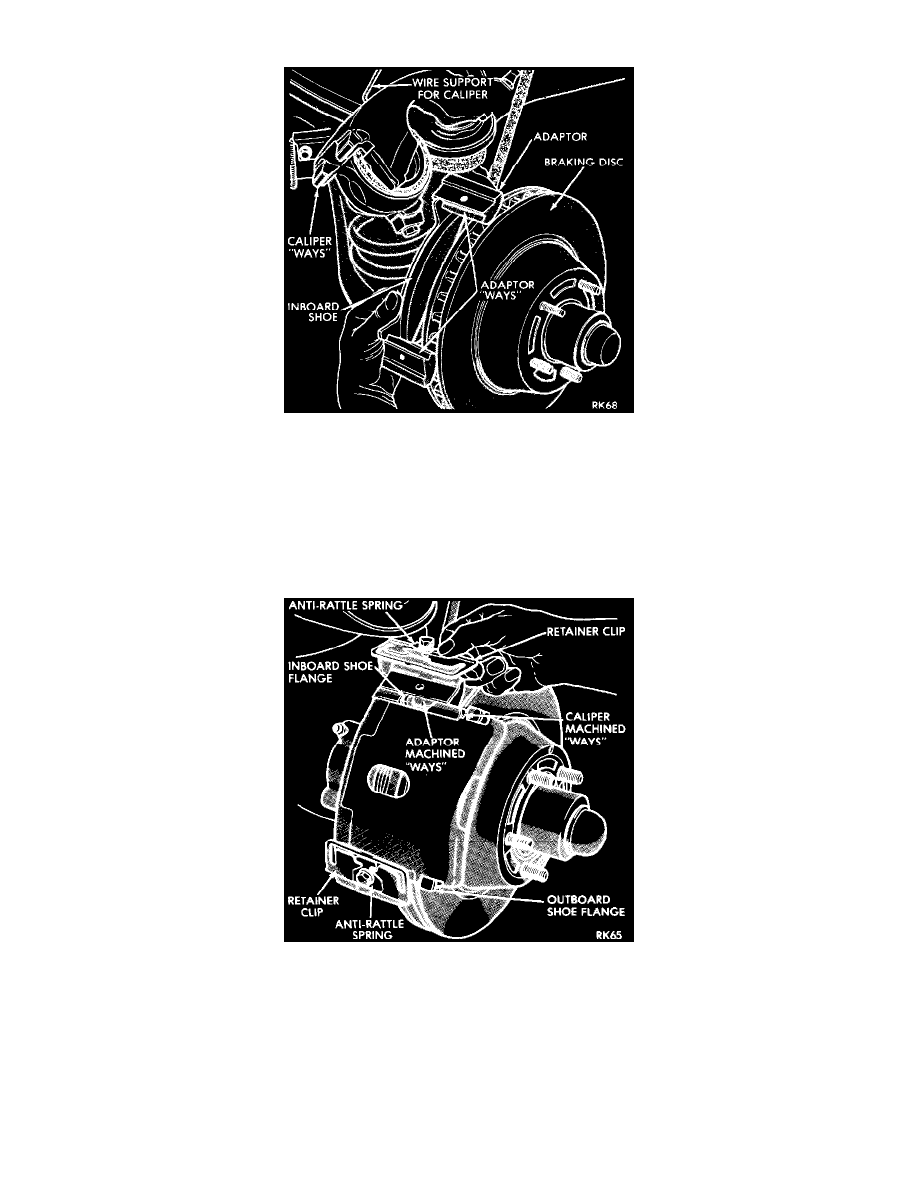
Fig 8 Removing Or Installing Shoe
3. Remove paper from noise suppression gasket and then position inboard shoe in position on adaptor with shoe "flanges" in the adaptor "ways".
4. Slowly slide caliper assembly into position in adaptor and over disc. Align caliper on machined ways of adaptor.
CAUTION: Be careful not to pull the dust boot from its groove as the piston and boot slide over the inboard shoe.
5. Install anti-rattle springs and retaining clips and torque retaining screws to 200 in lb.
Fig 3 Adaptor And Caliper Machined "Ways" And Caliper Retention
NOTE: The inboard shoe anti-rattle spring must always be installed on top of the retainer spring plate.
6. Pump brake pedal several times until a firm pedal has been obtained.
7. Check and refill master cylinder reservoirs (if necessary) with DOT 3 brake fluid as required.
NOTE: It should not be necessary to bleed the system after shoe and lining removal and installation. However, if a firm pedal cannot be obtained
bleed the brake system.
8. Install wheel and tire assemblies and wheel covers.
