
Prowler V6-3.5L VIN G (1999)
compressor is to be equipped with an A-20 spring shoe on the top and the bottom.
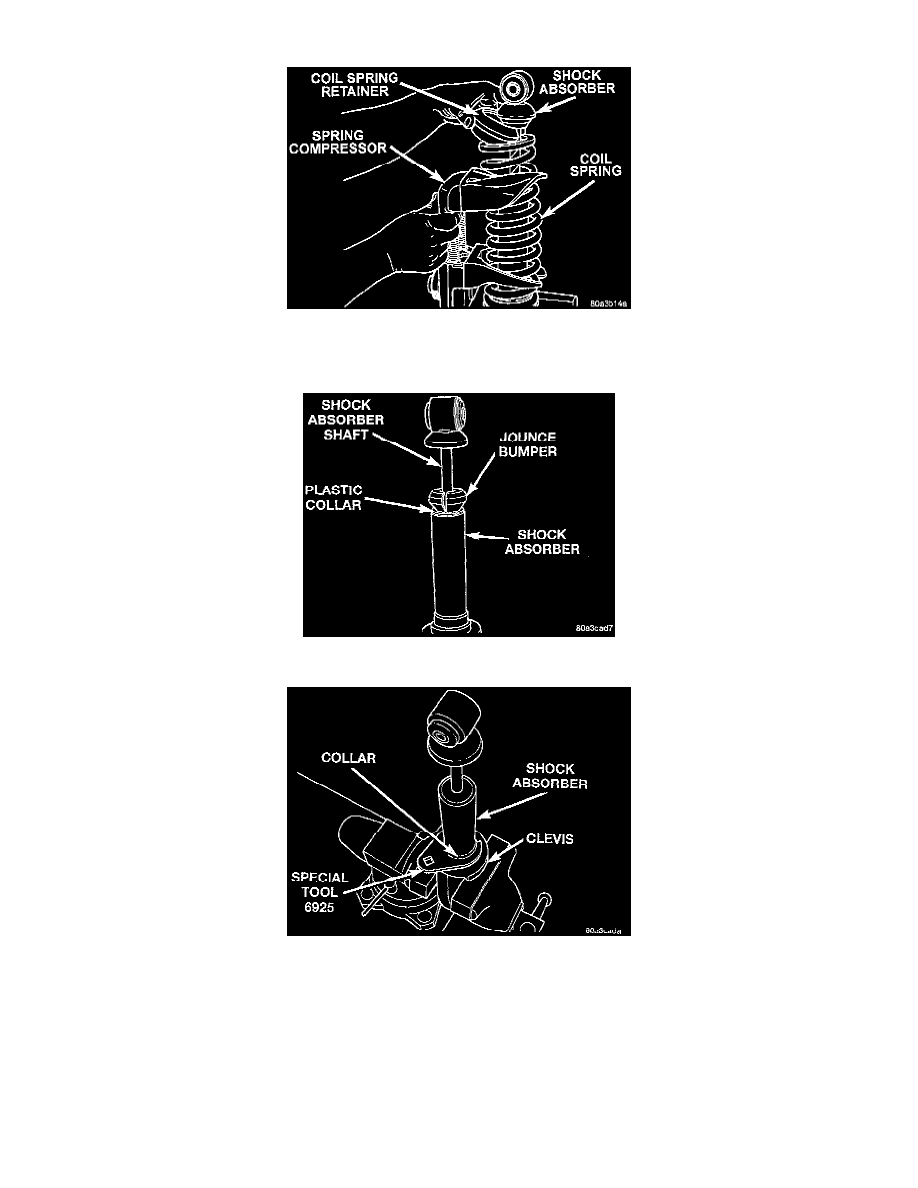
4. Compress the coil spring enough to allow the coil spring retainer to be removed from coil spring and shock absorber.
5. Un-compress the coil spring and remove the spring compressor from the coil spring.
6. Remove the coil spring from the shock absorber.
7. Remove the jounce bumper and plastic collar from the shaft of the shock absorber.
8. Remove the shock absorber from the clevis. The shock absorber is removed from the clevis using Adapter, Special Tool 6995, or equivalent.
Adapter, Special Tool 6925 locks into the notch in bottom collar of shock absorber and is used to turn shock absorber out of the clevis.
9. Inspect the shock absorber for any condition of shaft binding over the full stroke of the shock absorber shaft.
10. Inspect the components of the shock absorber for the following:
-
Shock absorber upper and lower isolator bushings for damage or deterioration.
-
Inspect the coil spring for any sign of damage and replace if required.
-
Inspect the jounce bumper for cracks and signs of deterioration.
-
Inspect the plastic collar for cracks and signs of deterioration.
11. Replace any components of the shock absorber assembly found to be worn or' deflective during the inspections before assembling the shock
absorber.