
G6 V6-3.9L (2009)
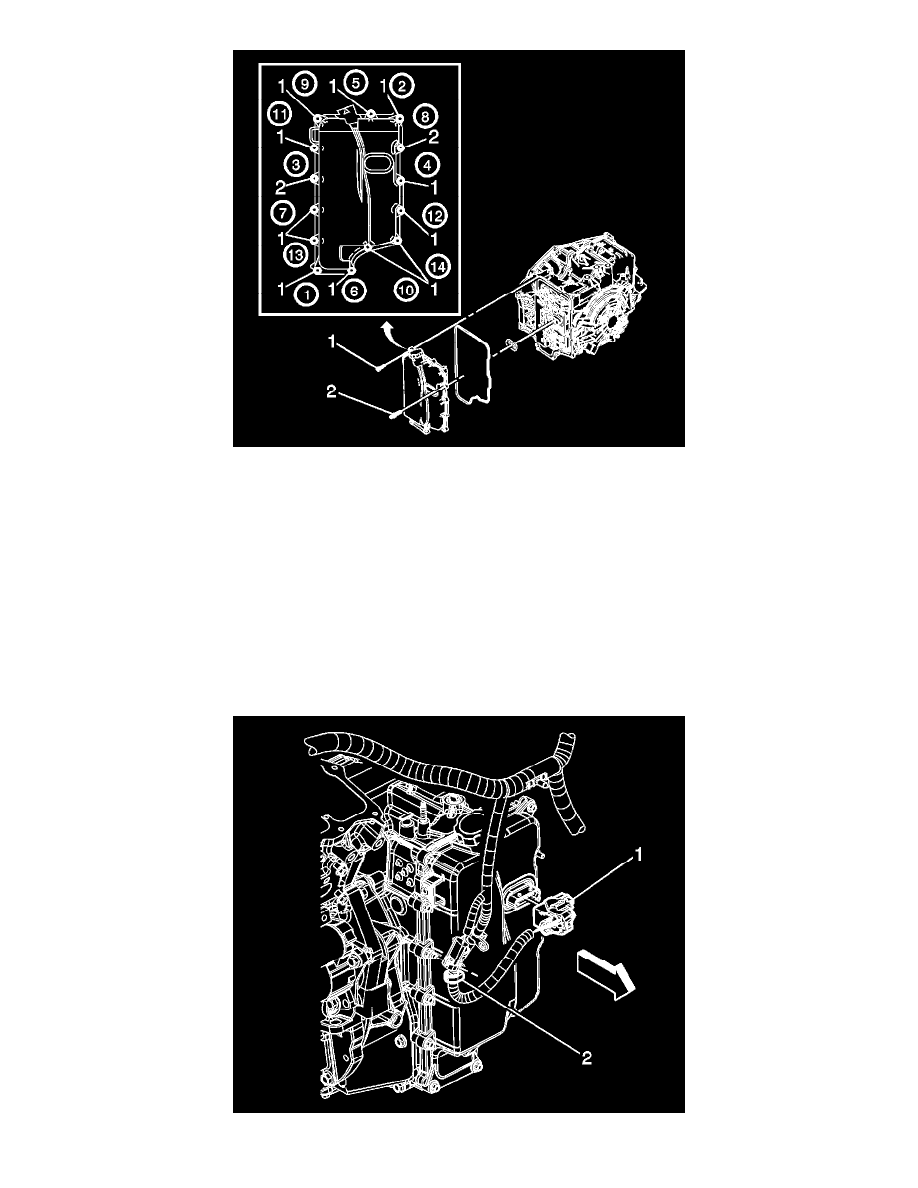
Note: The holes in the control valve body cover wiring connector hole seal must face toward the control solenoid valve assembly. If the holes
face toward the valve body cover, there is a potential for a leak around the seal.
1. Install the control valve body cover wiring connector hole seal.
2. Install the control valve body cover gasket to the control valve body cover.
3. Install the control valve body cover.
4. Lower the transmission and remove the transmission jack.
Caution: Refer to Fastener Caution (See: Service Precautions/Vehicle Damage Warnings/Fastener Caution).
Note: Install all control valve body cover bolts and studs by hand then torque all bolts and studs in sequence.
5. Install the 12 control valve body cover bolts (1) M6 x 30 and tighten the bolts in sequence to 12 Nm (106 lb in).
6. Install the 2 control valve body cover studs (2) M6 x 30 and tighten the studs in sequence to 12 Nm (106 lb in).
7. Connect the control valve body TCM electrical connector (1).