Leon Mk2
| III - Suspension strut: repair |
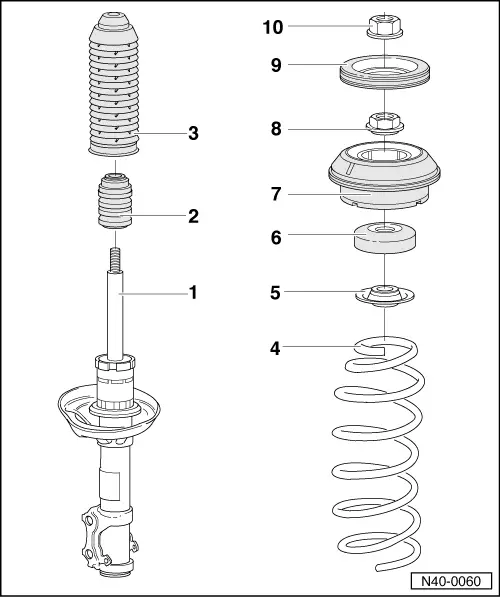
| 1 - | Shock absorber |
| q | Can be replaced separately. |
| q | Ensure that the shock absorber does not have any leaks or produce noise. |
| q | In case of replacement |
| Adjust camber and convergence → Chapter, wheel alignment |
| 2 - | Elastic limit |
| 3 - | Protective cover |
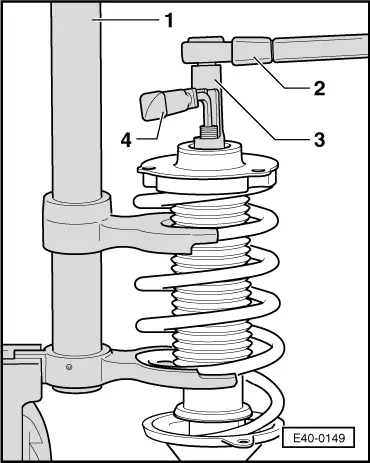
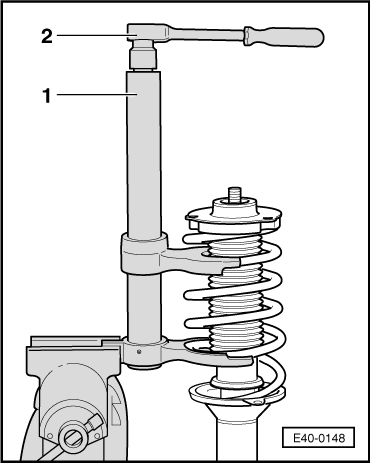
| 4 - | Suspension spring |
| q | Removing and installing → Fig. |
| q | Note the identification using colours. |
| q | The surface of the spring spiral must not be damaged. |
| 5 - | Plate suspension spring |
| 6 - | Axle roller bearing |
| 7 - | Suspension socket |
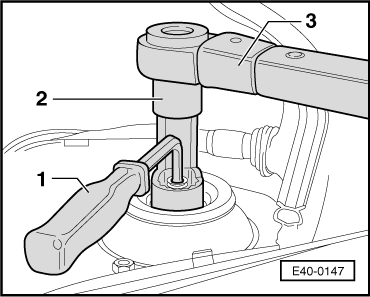
| 8 - | Hexagonal nut |
| q | 60 Nm |
| q | Loosening and tightening → Fig. |
| 9 - | Elastic limit |
| 10 - | Hexagonal nut |
| q | 60 Nm self locking |
| q | Loosening and tightening → Fig. |
|
|
|
|
 Caution