seat Workshop Repair Guides

SEAT Workshop Service and Repair Manuals

Fastening devicesT10096 : disassembly > < Fixing position of subframe and brackets
Fastening devicesT10096 : assembly
Fastening devices -T10096 -: assembly
–  Raise the vehicle.
–  Remove the lower sound insulation → Bodywork, exterior installation work; Rep. gr. 50 .
   
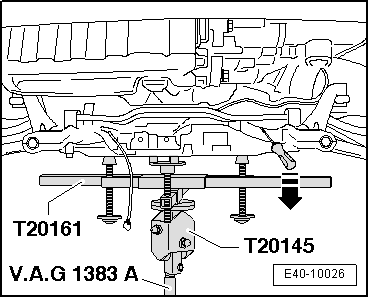
–  Prepare the motordriven lift -V.A.G 1383 A- with the base -T20145- and attachment tool - T20161- correctly under the subframe, in order to secure the attachment position on the bodywork, for subsequent fitting.
  E40-10026
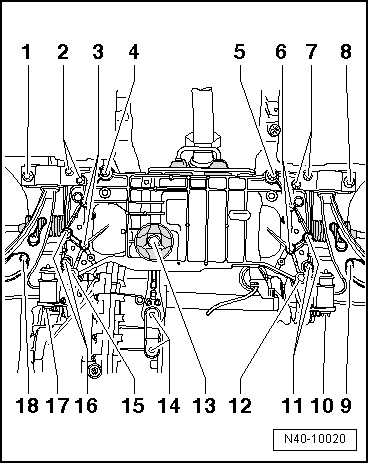
To attach the strut to the consoles, screw in the fastening devices -T10096- one by one, in the positions-1-, -8-, -9- and -18-.
  Note
The fastening devices -T10096- should only be tightened to a maximum of 20 Nm, otherwise the thread of the fastening bolt may be damaged.
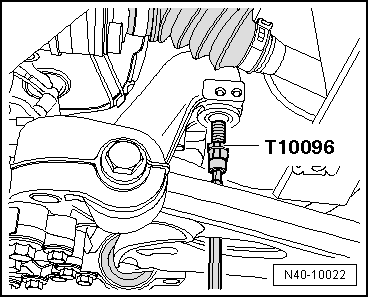
–  Remove the screws with which the bearing bracket is attached on both sides and replace by fastening devices -T10096-. Tighten these at a tightening torque of 20 Nm.
  N40-10020
Fixing position of mounting bracket
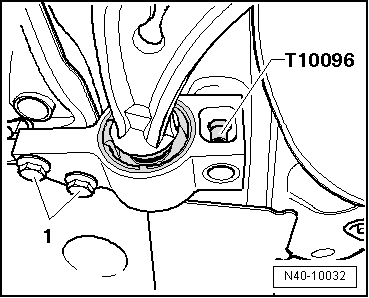
–  Successively replace the console bolts with fastening devices -T10096- and tighten to a torque of 20 Nm.
  N40-10032
Fixing position of bracket
l  This way, the position of the strut is secured on the bodywork for subsequent fitting.
Continue with removal of anti-roll bar → Anchor.
For continuation of work to remove the steering gear (2nd generation) → Anchor.
For continuation of work to remove the steering gear for the model Leon 2009 Cupra R → Anchor
For continuation of work to remove the steering gear (3rd generation) → Anchor.
  N40-10022
Specified torques
ComponentTightening torque
Subframe to body
t  Use new bolts.
70 Nm + 90°
Bracket to body
t  Use new bolts.
70 Nm + 90°
Mounting bracket to body
t  Use new bolts.
70 Nm + 90°


Fastening devicesT10096 : disassembly > < Fixing position of subframe and brackets