
Fabia Mk1
|
| (Gearbox removed) |
 Note
Note| t | Replace the clutch discs and pressure plates if the riveting is damaged or loose. |
| t | Make the clutch disc and pressure plate coincide in accordance with the spare part catalogue and engine identification characters. |
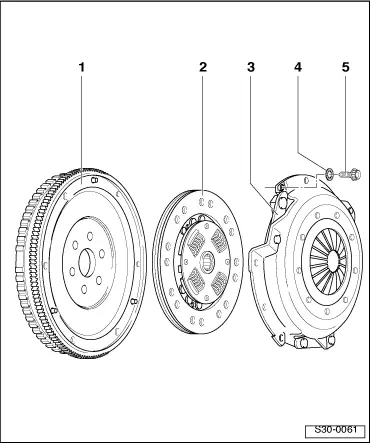
| 1 - | Flywheel |
| q | make sure the centering pins are tight |
| q | The locating face for the clutch lining must be free from grooves, oil and grease |
| q | removing and installing → The Engine; Rep. Gr.13 |
| 2 - | Clutch disc |
| q | Diameter → Chapter |
| q | Fitting position: the spring cage pointing towards the pressure plate |
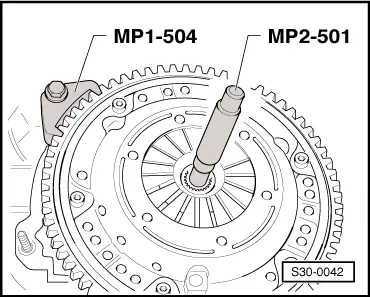
| q | center → Fig. |
| q | slightly grease the serration |
Note| t | Clean serration of the drive shaft; this especially applies for used clutch discs. Remove corrosion and only apply a very thin layer of grease G 000 100 on the drive shaft serration. |
| t | Subsequently move the clutch disc up and down on the drive shaft until the hub on the disc is no longer absolutely smooth on the shaft. |
| t | Remove all excess grease. |
| 3 - | Pressure plate |
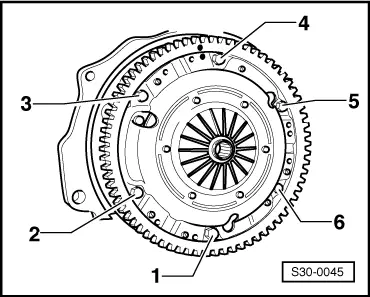
| q | removing and installing → Fig. |
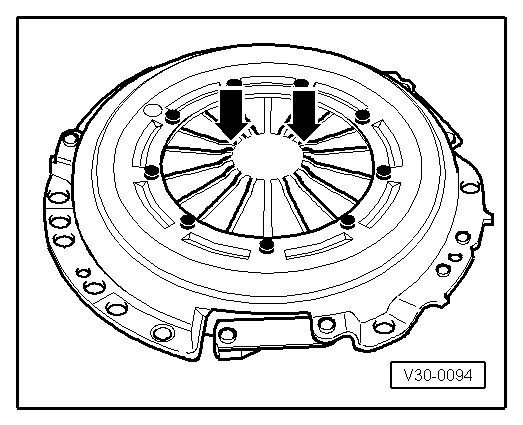
| q | Check the extremities of the membrane spring → Fig. |
Note| The pressure plates are protected against corrosion and are greased. Only clean the thrust surface as otherwise the life of the clutch may be considerably reduced. |
| 4 - | 25 Nm |
| q | removing and installing → Fig. |
|
|
|
|