skoda Workshop Repair Guides

Skoda Workshop Service and Repair Manuals

Valve seats, valves guides, valve stem seals > < Testing hydraulic bucket tappets
Removing and installing camshaft
Special tools and workshop equipment required
t  Camshaft straightedge -MP1-312-
t  Counterholder -MP1-216- or -T30004-
t  Two-arm extractor -T40001-
t  Sealant → Electronic catalogue of original parts
Removing
   
–  Remove engine cover. To do so, pull it at the front and rear upwards with a sudden motion.
–  Removing toothed belt → Chapter.
  Note
t  The camshaft need not be locked.
t  The vibration damper and the middle and bottom toothed belt guards can remain installed.
t  The timing belt remains fitted onto the crankshaft timing belt sprocket.
–  Release fixing screw for camshaft sprocket.
   While doing so counterhold the camshaft timing gear with counterholder -MP1-216- or -T30004-.
  S10-0115
–  Position two-arm extractor -T40001- with single-arm claw-A- and two-arm claw-B- on the hub of the camshaft timing gear and detach the camshaft timing gear.
   Counterhold the two-arm extractor with a wrench -C-.
–  First remove bearing caps 5, 1 and 3.
–  Release and remove bearing caps 3 and 4 crosswise.
Install
  Note
t  When fitting the camshaft the cams of cylinder 1 must point upwards.
  M13-0002
t  When installing the bearing caps pay attention to the centre displacement of the bores. Before installing the camshaft fit bearing caps and determine the fitting positions.
–  Oil the contact surfaces of the camshaft.
–  Insert camshaft.
–  Screw in bearing caps 2 and 4 alternately crosswise and tighten to 20 Nm.
–  Coat contact surface of bearing caps 1 and 5 with sealant.
–  Install bearing caps 5, 1 and 3 and tighten to 20 Nm.
–  5. Position the bearing cap by gently tapping the front side of the camshaft.
–  Wipe off any sealant oozing from the bearing caps 1 and 5. One is not allowed to spread sealant over the sealing surface of the cylinder head/cylinder head cover.
  V15-0098
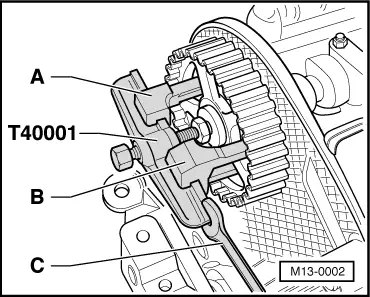
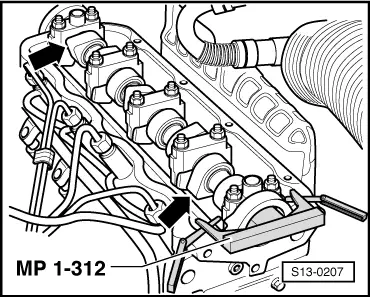
–  Lock the camshaft with the camshaft straightedge -MP1-312-.
  Note
The valves for cylinder 1 must be closed and the valves for cylinder 4 must overlap.
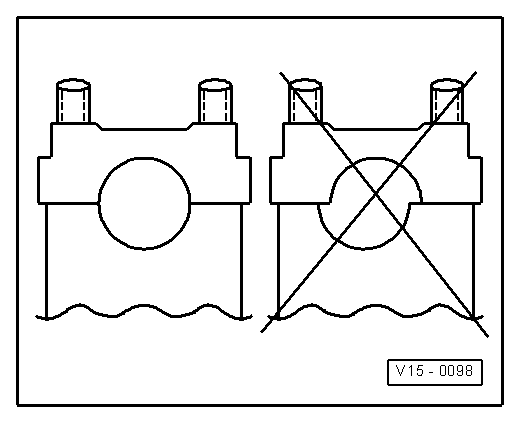
–  Centre camshaft straightedge as follows:
   Turn locked camshaft in such a way that one end of the camshaft straightedge strikes the cylinder head. Measure the resulting gap at the other end of the camshaft straightedge with a feeler gauge.
Insert feeler gauge with halved thickness between the camshaft straightedge and the cylinder head. Turn the camshaft until one end of the camshaft straightedge strikes the feeler gauge.
Insert the second feeler gauge of the same thickness between the opposite end of the straightedge and the cylinder head.
–  Install timing belt and tension → Chapter.
Further installation occurs in reverse order.
  Note
t  After carrying out work on the valve gear, carefully crank engine at least 2 revolutions to ensure that no valve touches the piston when the engine is started.
t  After installing new bucket tappets, the engine must not be started for about 30 minutes. The hydraulic clearance compensation elements must settle (otherwise valves would strike the pistons).
  S13-0207

Valve seats, valves guides, valve stem seals > < Testing hydraulic bucket tappets