| –
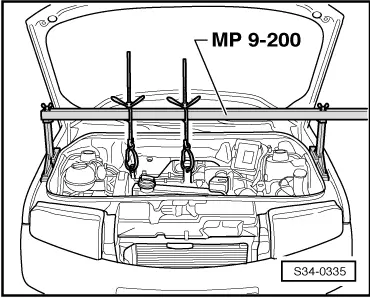
| Mount supporting device -MP9-200- and take up the weight of the engine/gearbox assembly at the spindles. |
| –
| Remove belt pulley for control pump → Chapter. |
| –
| Remove guide pulley (only on vehicles with air conditioning) → Chapter. |
| –
| Remove tensioner with tensioning pulley → Chapter. |
| –
| Remove the ventilation pipe of the cooling system → Chapter. |
| –
| Interlock the crankshaft with an assembly device -T10121- → Chapter, screw out the crankshaft screw and pull off the belt pulley - crankshaft. |
| –
| Remove the oil pan, guide pipe of the oil dipstick and possibly also the oil level and oil temperature sender -G266- (vehicles with WIV) → Chapter. |
| –
| Remove the connection for the vacuum regulating valve (PCV valve). |
| –
| Screw out all the screws from the timing case. |
| –
| Remove the timing case. Apply slight knocks with a rubber-headed hammer from outside to loosen the cover as necessary (the timing case sits on the dowel sleeves). |

Note | Cover the area around the sealing surfaces so that no sealant residues can find their way into the timing gear drive. |

WARNING | Wear protective gloves when working with sealant and grease remover! |
|
| Use a sealant remover to remove sealant residues on the timing case. |
| –
| Clean the sealing surfaces on the timing case and the engine. They must be free of oil and grease. |
|
|
|
