Octavia Mk1
 Note
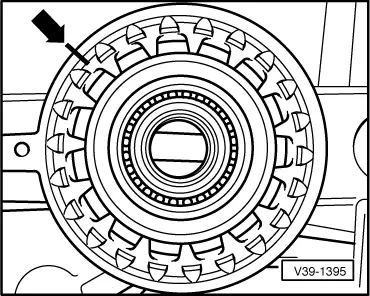
Note| t | If the tapered-roller bearings are used again, the adjusting ring -Pos. 5- must be marked → Fig. |
| t | The input shaft must not be removed for removing and installing the differential gear. |

| 1 - | Drive for speedometer, 10 Nm |
| q | with marking for axle oil level |
| q | removing and installing → Chapter |
| 2 - | Gearbox housing |
| 3 - | Output shaft for joint flange |
| q | remove before removing the differential gear |
| q | remove circlip Pos. 31 for removing |
| q | install only after adjusting the differential gear |
| q | Install thread to joint flange |
| 4 - | O-ring |
| q | always replace → Electronic Catalogue of Original Parts |
| 5 - | Adjusting ring |
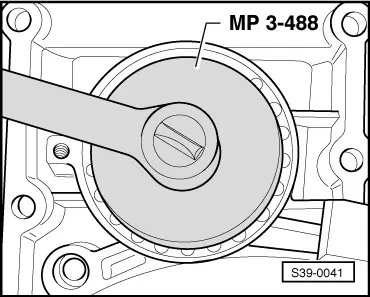
| q | removing → Fig. |
| q | mark fitting position for re-using used bearing and position again on the marking when installing → Fig. |
| q | observe setting instruction when installing new bearings → Chapter |
| 6 - | Gasket ring for joint flange |
| q | can be replaced on an installed gearbox → Chapter |
| q | remove with ejection lever -MP3-418 (VW 681)- |
| q | before installing, fill half the space between the sealing lips with sealing grease -G 052 128 A1- |
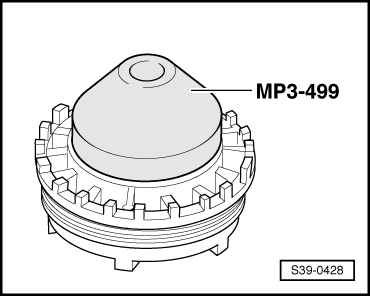
| q | inserting → Fig. |
| 7 - | Conical ring |
| q | Collar points to thrust washer |
| 8 - | Thrust washer |
| q | position over the pressure spring |
| 9 - | Pressure spring |
| 10 - | Joint flange |
| q | remove before removing the inner circlip at the differential bevel gear |
| q | removing and installing on installed gearbox in order to replace the gasket ring for joint flange → Chapter |
| q | insert with conical ring, stop disc and pressure spring |
| 11 - | Disc spring |
| q | curved side points outwards |
| 12 - | Circlip |
| 13 - | Screw cap |
| 14 - | Retaining clip |
| 15 - | 12 Nm |
| q | insert using locking agent -AMV 185 101 A1- |
| 16 - | Screw cap |
| 17 - | Circlip |
| 18 - | Disc spring |
| q | curved side points outwards |
| 19 - | Joint flange |
| q | remove before removing the inner circlip at the differential bevel gear |
| q | removing and installing on installed gearbox in order to replace the gasket ring for joint flange → Chapter |
| q | insert with conical ring, stop disc and pressure spring |
| 20 - | Pressure spring |
| 21 - | Thrust washer |
| q | position over the pressure spring |
| 22 - | Conical ring |
| q | Collar points to thrust washer |
| 23 - | Gasket ring for joint flange |
| q | can be replaced on an installed gearbox → Chapter |
| q | remove with ejection lever -MP3-418 (VW 681)- |
| q | before installing, fill half the space between the sealing lips with sealing grease -G 052 128 A1- |
| q | inserting → Fig. |
| 24 - | Bearing body, 150 Nm |
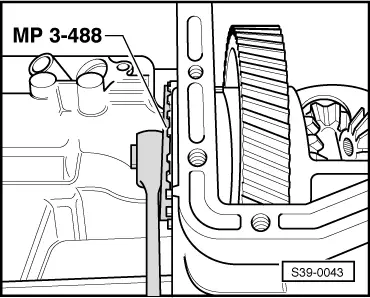
| q | remove with wrench for lifting eye nut -MP3-488 (3155)- |
| q | observe setting instruction when installing new bearings → Chapter |
| q | installing → Fig. |
| 25 - | O-ring |
| q | always replace → Electronic Catalogue of Original Parts |
| 26 - | Output shaft for joint flange |
| q | remove before removing the differential gear |
| q | remove circlip Pos. 30 for removing |
| q | install only after adjusting the differential gear |
| q | Install thread to joint flange |
| 27 - | Differential gear |
| q | remove bearing body, adjusting ring and output shafts before removing the differential gear |
| q | disassembling and assembling → Chapter |
| 28 - | 12 Nm |
| q | insert using locking agent -AMV 185 101 A1- |
| 29 - | Retaining clip |
| q | secure the bearing body Pos. 24 and the adjusting ring Pos. 5 after adjusting the tapered-roller bearing |
| 30 - | Circlip |
| q | remove only after removing the joint flange as the pressure spring Pos. 20 is pretensioned |
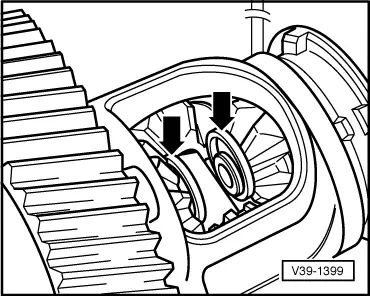
| q | removing and installing → Fig. |
| 31 - | Circlip |
| q | remove only after removing the joint flange as the pressure spring Pos. 9 is pretensioned |
| q | removing and installing → Fig. |
| 32 - | Gasket |
| q | always replace → Electronic Catalogue of Original Parts |
| 33 - | Cover |
| q | for differential gear |
| q | “older” version without inspection plug |
| 34 - | 28 Nm |
| q | insert using locking agent -AMV 185 101- |
| 35 - | Cover |
| q | for differential gear |
| q | “new” version with inspection plug |
| 36 - | Inspection plug, 25 Nm |
| q | with gasket |
| q | Check the axle oil with the gearbox installed → Chapter |
|
|
|
|
|
|
|
|
|
|
