
Superb
 Note
Note
|
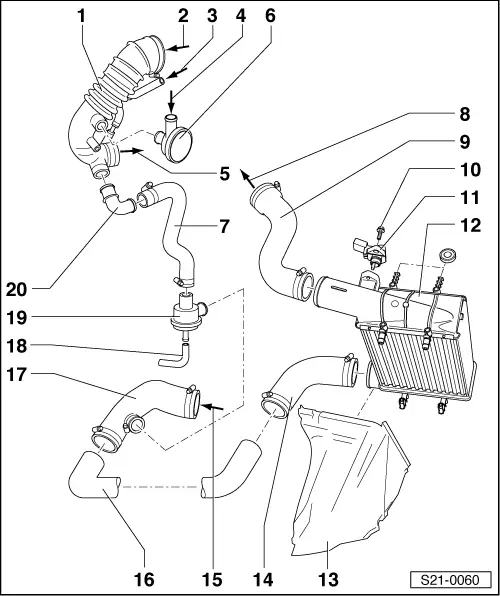
| 1 - | Air intake hose |
| 2 - | from air filter |
| 3 - | from the activated charcoal filter system |
| 4 - | of the crankcase ventilation |
| 5 - | to exhaust turbocharger |
| 6 - | Pressure control valve |
| q | for crankcase ventilation |
| 7 - | Connecting hose |
| q | pay attention to assembly markings |
| 8 - | To the throttle valve control unit |
| 9 - | Connecting hose |
| q | charge air cooler/throttle valve control unit |
| q | pay attention to assembly markings |
| 10 - | 10 Nm |
| 11 - | Charge pressure sender -G31/G71 - |
| q | replace the O-ring if it is damaged |
| 12 - | Charge air cooler |
| 13 - | Air deflector |
| 14 - | Connecting hose |
| q | cross tube/charge air cooler |
| q | pay attention to assembly markings |
| 15 - | from turbocharger |
| 16 - | Cross tube |
| 17 - | Connecting hose |
| q | exhaust turbocharger/cross tube |
| q | pay attention to assembly markings |
| 18 - | Vacuum line |
| 19 - | Stroke switch-off valve |
| q | check → Chapter |
| 20 - | Angular piece |