
Previa Van LE 4WD L4-2438cc 2.4L DOHC SC MFI (1997)
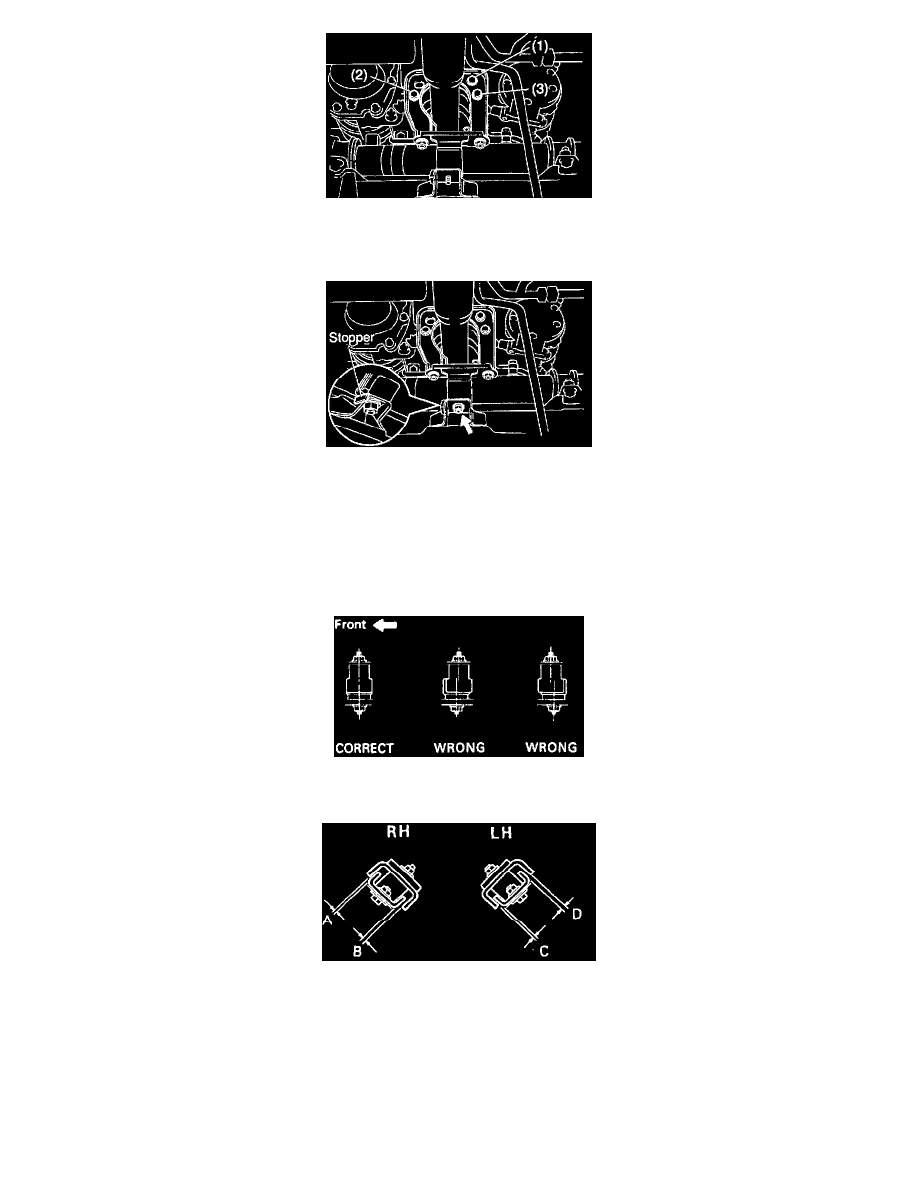
(c) Connect the No. 3 equipment drive housing stay to the No. 1 equipment drive housing stay with the 3 bolts, in several passes, in the sequence
shown.
Torque: 18 Nm (185 kg.cm, 13 ft. lbs.)
(d) Install the plate washer and nut holding the body bracket to the insulator.
Torque: 25 Nm (250 kg.cm, 18 ft. lbs.)
CAUTION:
-
The stopper must be secured against the body bracket.
-
The equipment drive shaft must not be twisted.
5. Check alignment and gap of insulators.
(a) Check that the insulators are correctly aligned at the front.
If they are not correctly aligned, adjust the position of the insulators.
(b) Check that gaps A, B, C and D shown in the illustration of the No. 1 equipment drive housing insulator are as specified below.
A: 0.5 - 4.5 mm (0.020 - 0.177 inch)
B: 6.2 - 10.2 mm (0.244 - 0.402 inch)
C: 0.2 - 4.2 mm (0.008 - 0.165 inch)
D: 7.5 - 10.5 mm (0.295 - 0.413 inch)
If the gaps are not as specified, adjust the position of the insulator.
6. Check installation angle of drive shaft. See: Service Precautions
7. Install equipment drive pulley.