|
Simplex Timing Chain Guide Rail, Remove and
Install
 Remove Remove
Remove air cleaner housing with hot film mass air flow meter and
air intake hose - see illustration "Air duct X 20 DTL, Y 20 DTL"
and "Air duct Y 20 DTH up to MY 2003" or "Air duct Y 20 DTH as of
MY 2003, Y 22 DTR".
Remove cylinder head cover – see operation "Cylinder Head
Cover, Remove and Install".
|
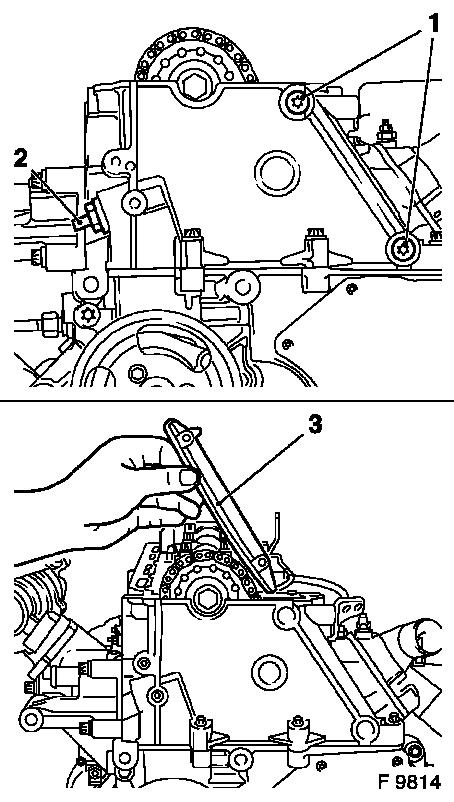
Remove simplex chain tensioner (2) – note installation
position.
Heat fastening bolts (1) intensively with hot air blower and
remove.
Caution
Use sheet metal plate or suitable heat shielding to avoid
damaging the guide rails.
Remove guide rail (3) for simplex timing chain upwards –
note installation position.
Clean thread for the fastening bolts (1) in cylinder head.
|
|
 Install
Insert guide rail for simplex timing chain and attach –
use new fastening bolts – note installation position –
tightening torque 8 Nm / 6 lbf. ft.
|
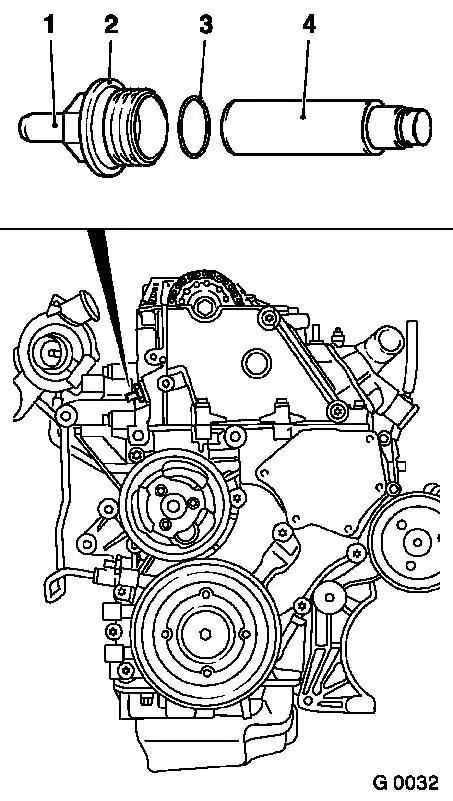
Insert Simplex chain tensioner (4) into cylinder head –
closed side of chain tensioner must point to tensioner blade.
Install Simplex chain tensioner screw plug (2) with new seal ring
(3) – tightening torque 60 Nm / 44 lbf. ft.
Caution
A distinction must be made between versions with and without
release bolts (1).
In versions with release bolts the chain tensioner must be
untightened using the release bolt after installation!
|
|
 Inspect
Press in the release pin with a hammer shaft until a click is
heard.
It must be possible to push in release bolt up to stop with
thumb and for it to slide back to its original position
automatically – the release bolt can no longer be pushed in
once the oil pressure has built up.
Install
Install cylinder head cover – see operation "Cylinder Head
Cover, Remove and Install".
Install air cleaner housing with hot film mass air flow meter
and air intake hose - see illustration "Air duct X 20 DTL, Y 20
DTL" and "Air duct Y 20 DTH up to MY 2003" or "Air duct Y 20 DTH as
of MY 2003, Y 22 DTR".
|
