|
Multi-disc Brake Assembly B2, Remove and Install
(AF 13-II)
 Remove Remove
Remove transmission – see operation "Transmission, Remove
and Install (AF 13-II/AF 17)".
Remove multi-plate clutch assembly C1- see operation
"Multi-plate Clutch Assembly C1, Remove and Install (AF
13-II)".
Remove multi-plate clutch assembly C0 and C3 – see
operation "Multi-plate Clutch C0 and C3, Remove and Install (AF
13-II)".
Remove rear ring gear with freewheel F0, see operation "Rear
Ring Gear with Freewheel F0,Remove and Install (AF 13-II)"
Remove front ring gear assembly with freewheel F1 and planet
carrier – see operation "Rear Ring Gear Assembly with
Freewheel F1 and Planet Carrier, Remove and Install (AF
13-II)".
|
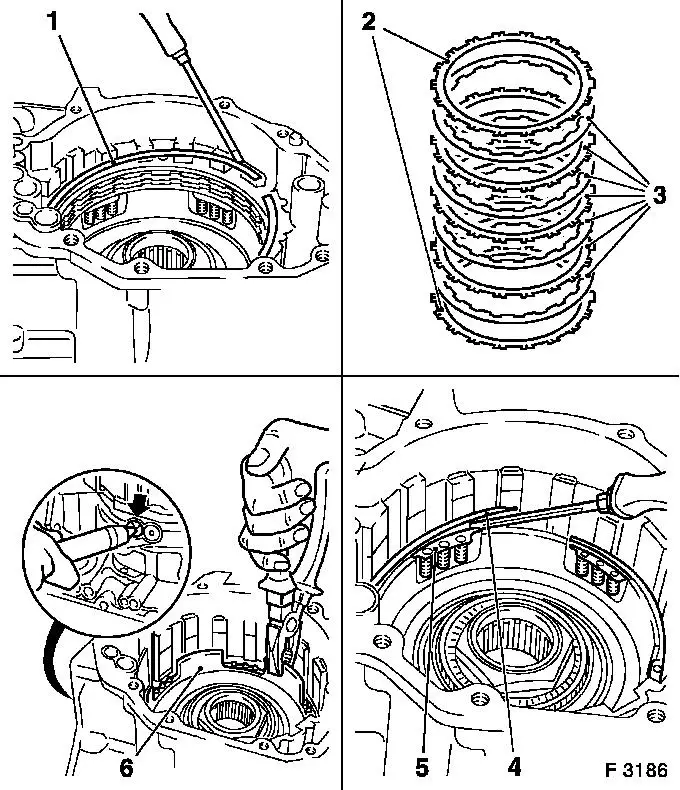
Remove retaining ring (1) for multi-disc brake B2 with
screwdriver.
Remove flange (2), steel and lining plates (3) for multi-disc
brake B2 – see "Technical Data", section "Parts List" for
number of steel and lining plates.
Remove retaining ring (4) with screwdriver. Remove return
springs assembly (5) from pistons for multi-disc brake B2.
Remove piston for multi-disc brake B2 (6) - cut off the end of
KM-994 in advance and insert KM-994 into bore hole. Blow in low
pressure compressed air (arrow), assist with pliers, if
necessary.
|
|
 Inspect
Check lining plates for wear and replace if necessary. New
lining plates must be laid in transmission fluid for at least 2
hours before installation.
Remove
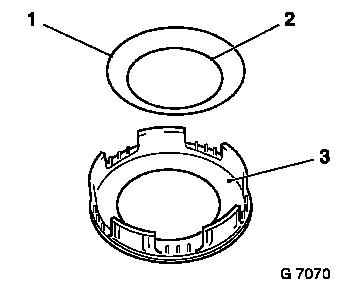
Remove rubber O-rings from piston (3) for multi-disc brake
B2:
|
(1)
|
Piston seal ring (outer)
|
|
(2)
|
Piston seal ring (inner)
|
|
|
 Install
Coat new piston seal rings with transmission fluid and attach to
piston for multi-disc brake B2.
|
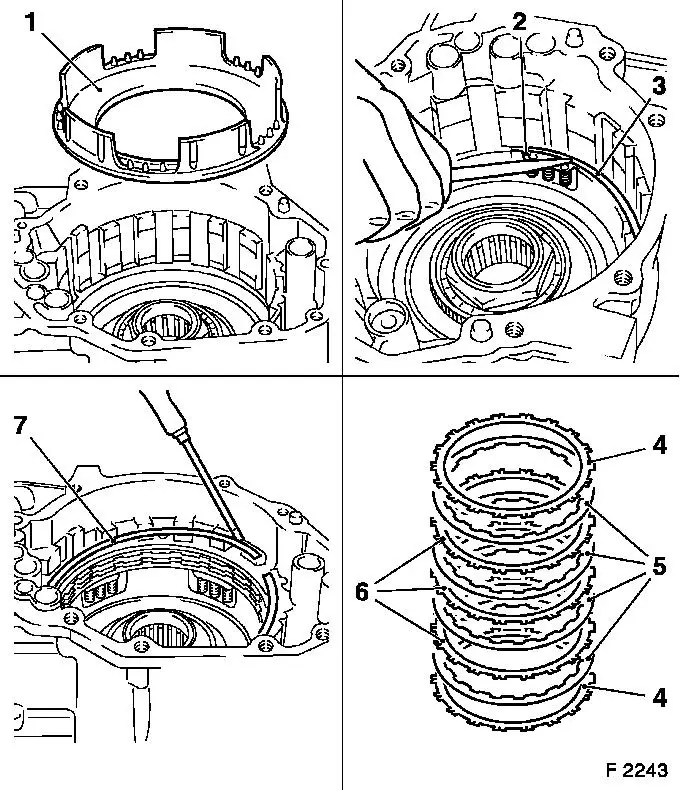
Insert piston (1) for multi-disc brake B2 – do not damage
seal rings.
Attach return springs assembly (2) to piston B2. Insert new
retaining ring (3) in groove provided with suitable screwdriver.
Ensure that retaining ring fits properly in groove.
Insert flange (4), lining plates (5) and steel plates (6)
– number of steel and lining plates see "Technical Data",
section "Parts List".
Insert new retaining ring (7) for multi-disc brake B2 with
suitable screwdriver.
|
|
|
 Measure
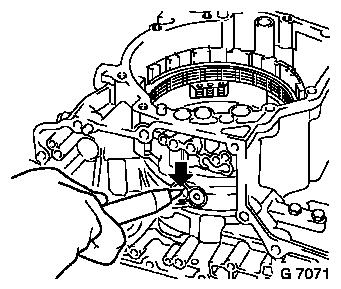
Measure piston stroke of multi-disc brake B2 with Dial Gauge
MKM-571-B: Blow in low-pressure compressed air (4 bar, arrow); for
this, cut off the end of KM-994 in advance and insert KM-994 into
bore hole. Place probe on the top lining plate. If necessary,
correct piston stroke by installing a suitable compensation flange
from the "Service" division.
Measurement value: 1.42 to 2.19 mm.
Install
Install front ring gear assembly with freewheel F1 and planet
carrier – see operation "Rear Ring Gear Assembly with
Freewheel F1 and Planet Carrier, Remove and Install (AF
13-II)".
Install rear ring gear with freewheel F0 - see operation "Rear
Ring Gear with Freewheel F0, Remove and Install (AF 13-II)"
Install multi-plate clutch assembly C0 and C3 – see
operation "Multi-plate Clutch Assembly C0 and C3, Remove and
Install (AF 13-II)".
Install multi-plate clutch assembly C1- see operation
"Multi-plate Clutch Assembly C1, Remove and Install (AF
13-II)".
Install transmission – see operation "Transmission, Remove
and Install (AF 13-II/AF 17)".
|
|
|
