Charge Air Cooler Replacement (LDE, LLU, and LUJ with AT)
Removal Procedure
Note: Although the 1.6 L
(LDE) engine is natural aspirated, it is equipped with a charge air
cooler in order to support the automatic transmission fluid cooler.
The charge air cooler was added supplementary to the CRFM
package.
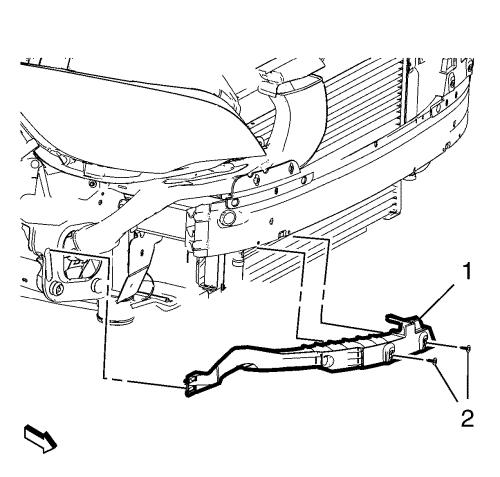
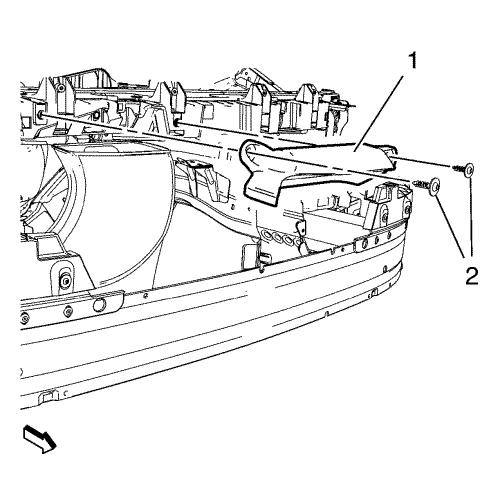
| 3. |
Remove the 2 right front
bumper fascia support bolts (2). |
| 4. |
Remove the right front bumper
fascia support (1). |
| 5. |
Remove the 2 front intake air
duct splash shield bolts (2). |
| 6. |
Remove the front intake air
duct splash shield (1). |
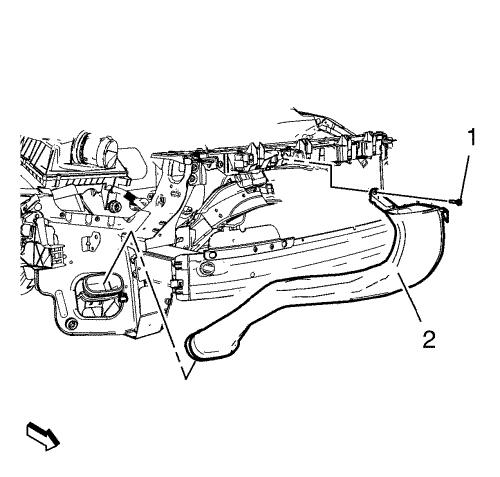
| 7. |
Remove the front intake air
duct bolt (1). |
| 8. |
Remove the front intake air
duct (2). |
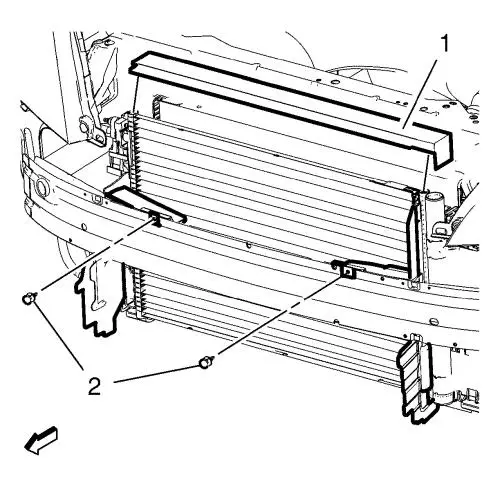
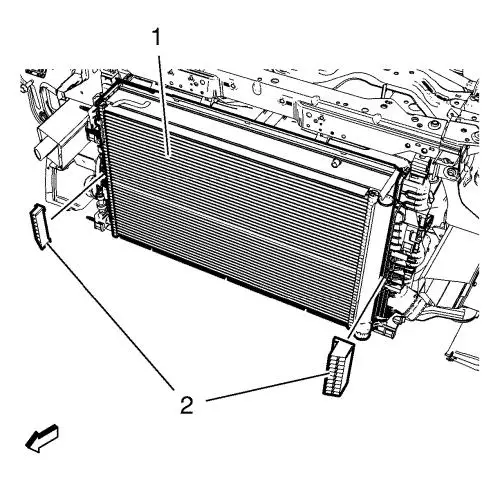
| 10. |
Remove the radiator air seal
(1). |
| 11. |
Remove the 2 radiator air
baffle clips (2) and the radiator air baffles. |
| 12. |
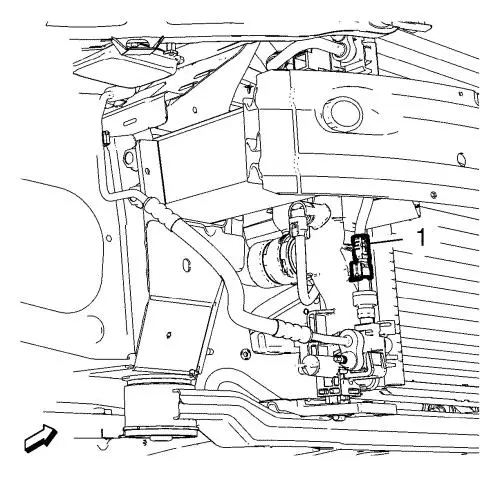
Disconnect and unclip the AC
pressure sensor wiring harness (1). |
| 13. |
Remove the 2 protector fenders
(2) from the charge air cooler (1). |
|
Note: This step is
not necessary for the 1.6 L (LDE) engine.
|
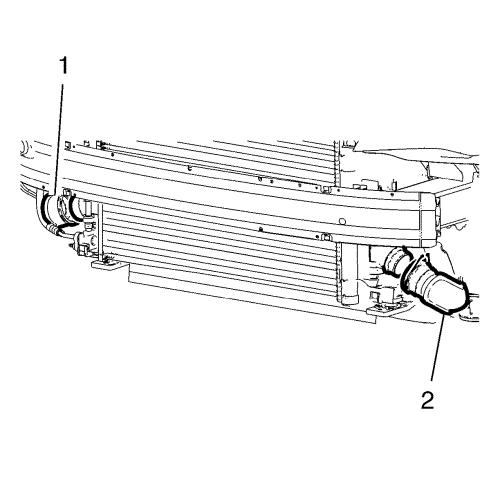
| 14. |
Disconnect the charge air
cooler outlet air hose (2) and the charge air cooler inlet air hose
(1) from the charge air cooler. |
| 15. |
Remove the transmission fluid
auxiliary cooler bolt (3). |
| 16. |
Unclip the transmission fluid
cooler pipes (2) from the charge air cooler. |
| 17. |
Unclip the transmission fluid
cooler (1) from the charge air cooler and lay aside. |

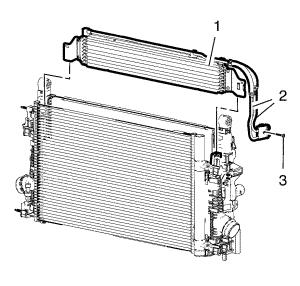
| 18. |
Unclip the AC condenser (3)
from the charge air cooler (2) and secure it at the bumper impact
bar. |
| 19. |
Unclip the charge air cooler
(2) from the radiator (1) and remove it from vehicle. |
Installation Procedure
| 1. |
Install the charge air cooler
(2) and clip it to the radiator (1). |
| 2. |
Clip the AC condenser (3) to
the charge air cooler (2). |
| 3. |
Clip the transmission fluid
cooler (1) to the charge air cooler. |
| 4. |
Clip the transmission fluid
cooler pipes (2) to the charge air cooler. |
| 5. |
Install the transmission fluid
auxiliary cooler bolt (3) and tighten. |
|
Note: This step is
not necessary for the 1.6 L (LDE) engine.
|
| 6. |
Connect the charge air cooler
outlet air hose (2) and the charge air cooler inlet air hose (1) to
the charge air cooler. |
| 7. |
Install the 2 protector
fenders (2) to the charge air cooler (1). |
| 8. |
Connect and clip in the AC
pressure sensor wiring harness (1). |
| 9. |
Install the 2 radiator air
baffles and the radiator air baffle clips (2). |
| 10. |
Install the radiator air seal
(1). |
| 12. |
Install the front intake air
duct (2). |
| 13. |
Install the front intake air
duct bolt (1) and tighten. |
| 14. |
Install the front intake air
duct splash shield (1). |
| 15. |
Install the 2 front intake air
duct splash shield bolts (2) and tighten. |
| 16. |
Install the right front bumper
fascia support (1). |
| 17. |
Install the 2 right front
bumper fascia support bolts (2) and tighten. |
|
