Camshaft Replacement
Special Tools
For equivalent regional tools refer to
Special Tools .
Removal Procedure
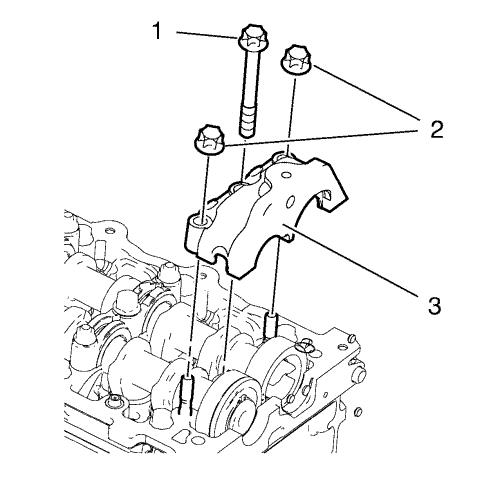
| 4. |
Remove the camshaft bearing
front cap bolt (1). |
| 5. |
Remove the 2 camshaft bearing
front cap nuts (2). |
| 6. |
Remove the camshaft bearing
front cap (3). |
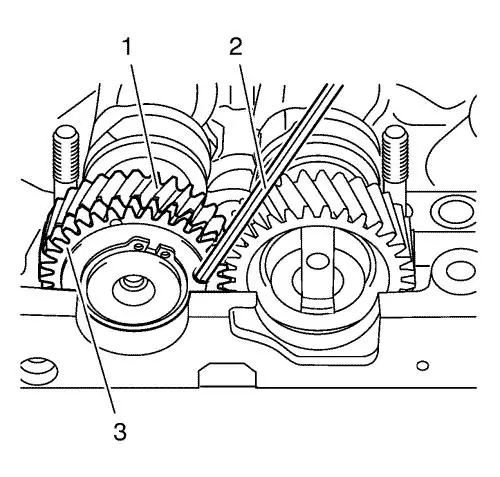
| 7. |
Install the
EN-6092-10 fixing tool (2) as shown in order to fix
the exhaust camshaft secondary gear (3) to the exhaust camshaft
gear (1). |
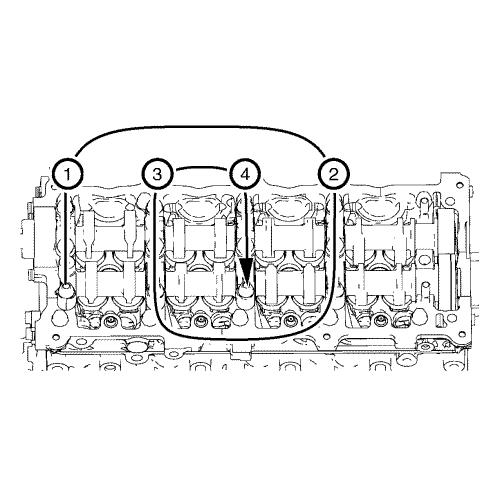
| 8. |
Remove the camshaft bearing
cap bolts and nuts in a sequence as shown one turn at a time until
there is no spring tension pushing on the camshaft. |
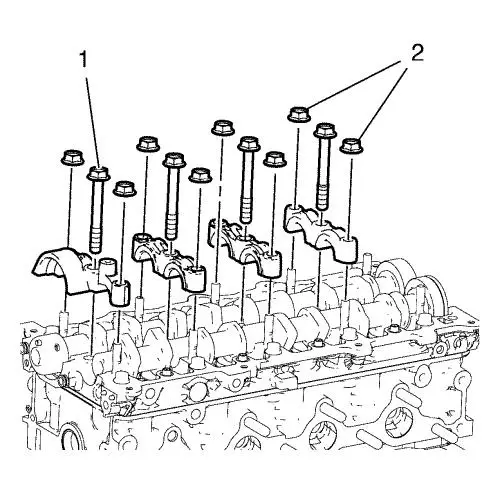
| 9. |
Remove the 8 camshaft bearing
cap nuts (2) and the 4 camshaft bearing cap bolts (1). |
|
Note: Mark the
camshaft bearing caps to ensure they will be installed in the same
position.
|
| 10. |
Remove the 4 camshaft bearing
caps. |
| 11. |
Remove the exhaust camshaft
and the intake camshaft. |
Installation Procedure
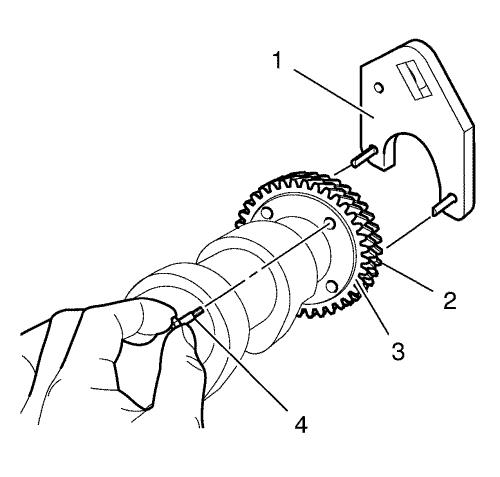
| 1. |
The exhaust camshaft secondary
gear (2) has to be pretensioned. Use the EN-6092
adjuster (1) to pretension the secondary gear and use
EN-6092-10 fixing tool (4) to fix with the exhaust
camshaft gear (3). |
|
Note: Lubricate the
camshafts with engine oil.
|
| 2. |
Install the exhaust camshaft
along with the intake camshaft. |
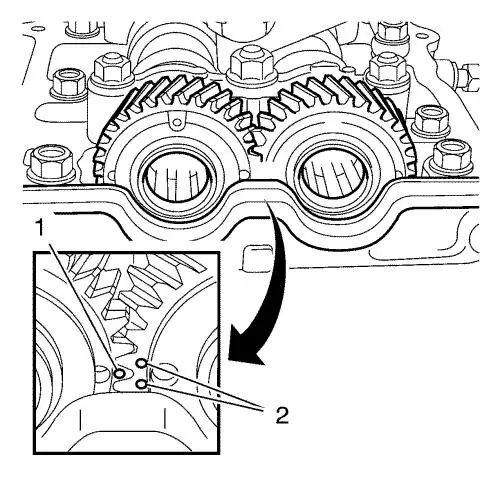
| 3. |
The marks in the intake
camshaft gear (2) must align with the marks in the exhaust camshaft
gear (1). |
|
Note: Lubricate the
camshaft bearing caps with engine oil.
|
| 4. |
Install the 4 camshaft bearing
caps. |
| 5. |
Install the 4 camshaft bearing
cap bolts (1) and the 8 camshaft bearing cap nuts (2). |
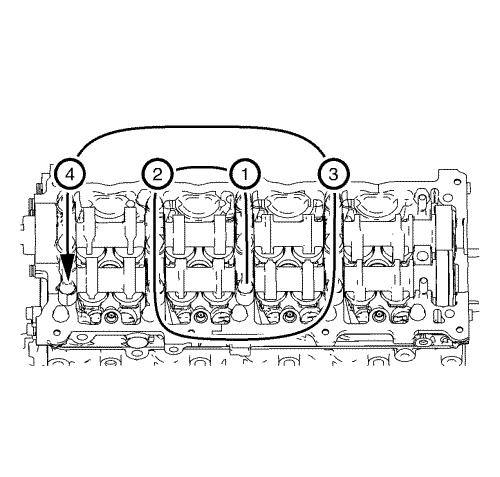
| 6. |
Tighten the 4 camshaft bearing
cap bolts and nuts in a sequence as shown and in increments of 1 or
2 turns at a time until they are seated. |
| 7. |
Tighten the camshaft bearing
cap bolts and nuts to 27 N·m (20 lb ft)
. |
| 8. |
Remove the EN-6092-10
fixing tool . |
|
Note: Lubricate the
camshaft bearing front cap with engine oil.
|
| 9. |
Install the camshaft bearing
front cap (3). |
| 10. |
Install the camshaft bearing
front cap bolt (1) and the 2 camshaft bearing front cap nuts (2)
and tighten to 27 N·m (20 lb ft) .
|
|
