|
Valve Clearance, Adjust (Z 17 DTH, with Air
Conditioning, LHD)
 Remove Remove
| 1. |
Remove camshaft housing cover 
|
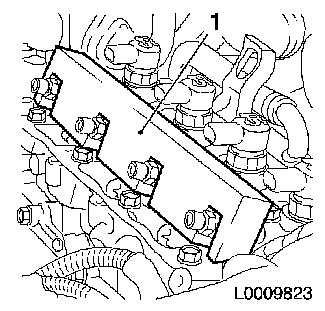
| 2. |
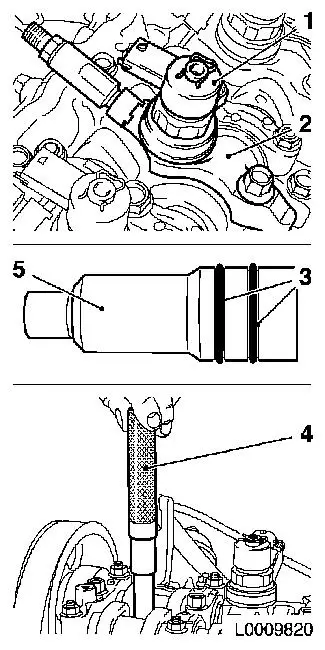
Remove 4x injector (1)
Note: Mark 4x
injector.
Important: If when removing an
injector, the heat insulation sleeve (5) is also drawn out, the
gaskets (3) must be replaced and the heat insulation sleeve knocked
into the cylinder head using KM-6357
(4).
|
| • |
Remove 4x injector (2) bracket
|
|
|
|
| 3. |
Check injector bracket
Note: If an old
injector bracket was installed, it must be replaced with a new
one
- New injector bracket
- Old injector bracket
|
|

|
 Inspect
| 4. |
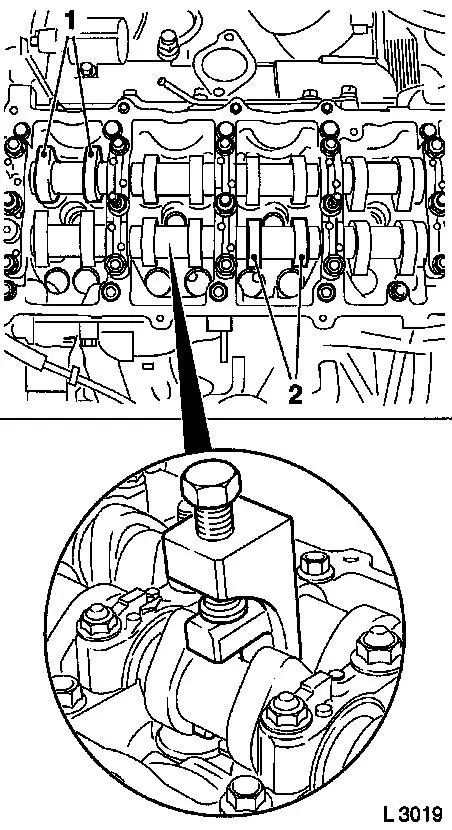
Turn crankshaft
| • |
Turn crankshaft until cam pairs (1) and (2) point upwards
|
|
| 5. |
Check valve clearance
| • |
Using feeler gauge
Note: The valve play is
checked on a cold engine – room temperature.
| – |
Test values: Intake valves/Exhaust valves (0.35 – 0.45
mm)
|
|
|
| 6. |
Adjust valve clearance
| • |
Turn cup tappet until tappet groove points outwards
|
Important: Make sure that the
valves are not set when the piston is in "TDC". The valves could
strike the piston head
|
| • |
Press down cup tappets
Note: Note different
tool versions for intake and exhaust valves
| – |
Mark – IN = Intake side
|
| – |
Mark – EX = Exhaust side
|
|
|
|
|
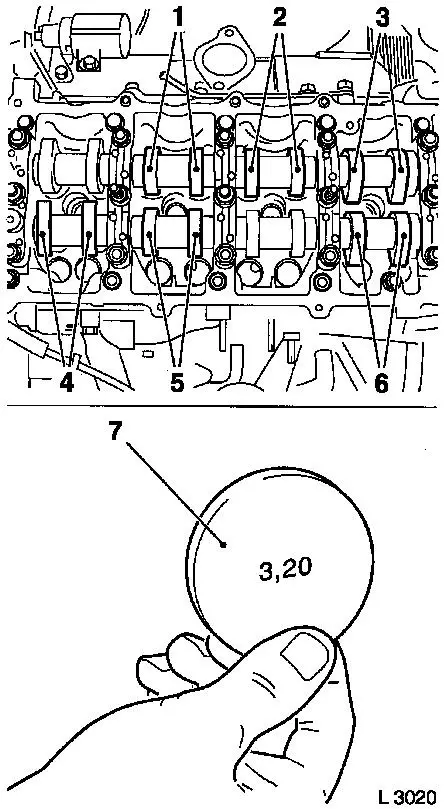
| 7. |
Example for determination of shim thickness:
|
1. Thickness of installed shim
|
3.15 mm
|
|
2. Measurement between cam and cup tappets
|
+ 0.45 mm
|
| |
= 3.60 mm
|
|
3. Nominal valve clearance
|
- 0.40 mm
|
|
| 8. |
Insert adjustment shim
| • |
Coat new shim (7) with engine oil and insert in cup tappet with
identification mark facing downwards
|
|
| 9. |
Turn crankshaft
| • |
In direction of engine rotation by 180°
| – |
Check and adjust valve pair (6) and (2)
|
|
| • |
In direction of engine rotation by 180°
| – |
Check and adjust valve pair (5) and (3)
|
|
| • |
In direction of engine rotation by 180°
| – |
Check and adjust valve pair (4) and (1)
Note: The clearance of
all adjusted valves must be re-checked
|
|
|
|
|
 Install
| 10. |
Detach accumulator
| • |
Unscrew 2x bolts 1 - 1 1/2 turns
|
|
| 11. |
Renew 2x injector gaskets
|
|
|
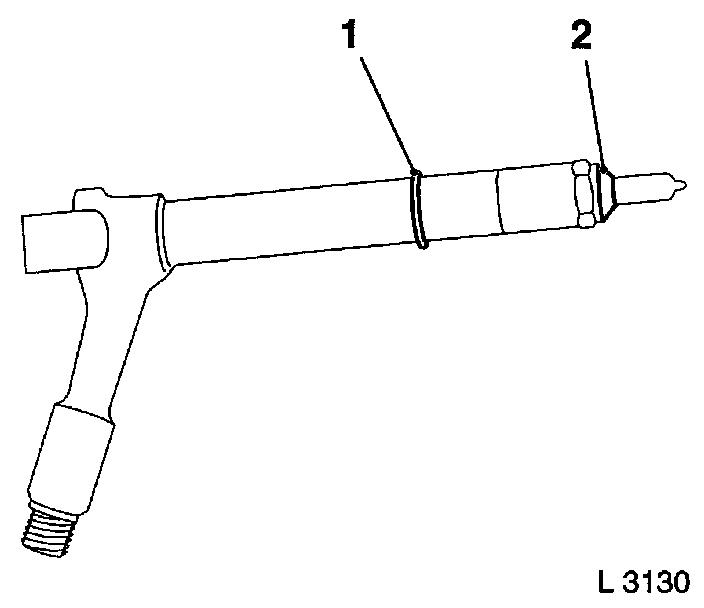
| 12. |
Install injector
| • |
Install 4x brackets
| – |
Align injectors with EN-48560 (1)
|
|
|
|
|
| 13. |
Fasten 4x accumulator high pressure lines to injectors
| • |
Hand-tighten 8x union nuts
|
|
| 14. |
Fasten 4x injectors
| • |
Tighten 4 bolts in three stages
|
|
|
|
| 16. |
Remove 4x accumulator high pressure lines at injectors
| • |
Seal off connections of accumulator using suitable sealing
plugs
|
| • |
Seal off connections of injectors with protective caps
|
|
| 17. |
Install camshaft housing cover
|
|
