|
Remove and install valve body assembly
(transmission removed) (AF13-II)
 Remove Remove
| 1. |
Drain transmission fluid.
| • |
Place collecting pan underneath.
|
| • |
Detach oil drain bolt from transmission
|
|
| 3. |
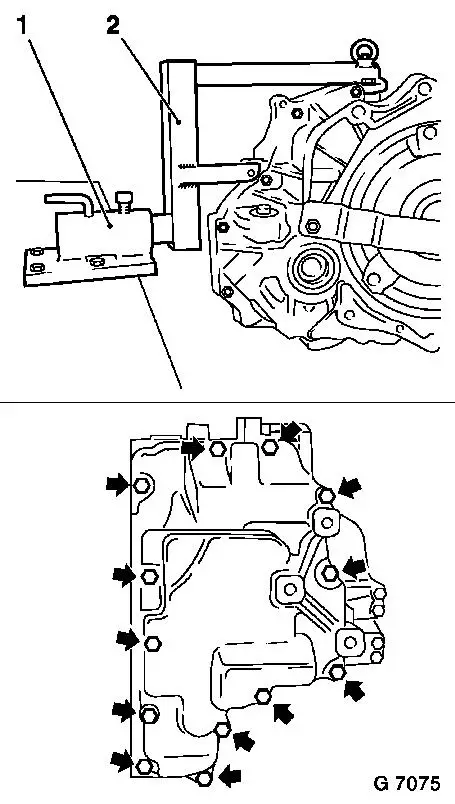
Attach KM-910 (2) to transmission
| • |
Attach assembly to bracket KM-113-2
(1) and lock in horizontal position
|
|
| 4. |
Detach valve body cover from transmission
| • |
Unscrew 13x bolts (arrows)
Note: Fluid escapes.
Place pan underneath.
|
|
|
|
| 5. |
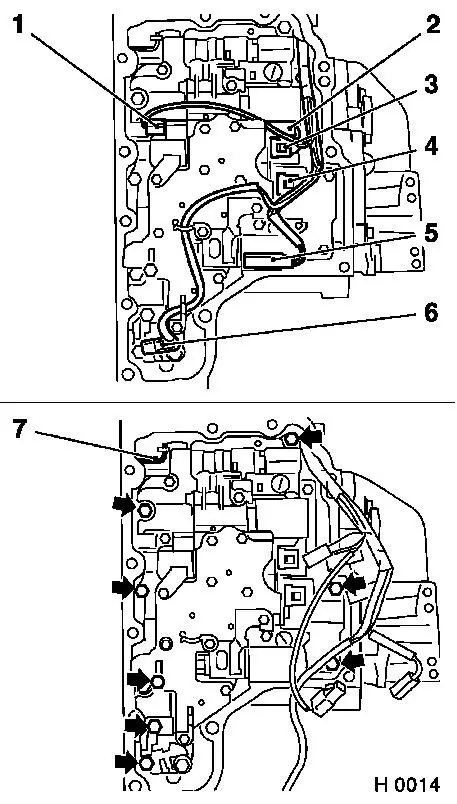
Disconnect solenoid wiring harness plug (4) of 1-2 / 3-4
gearshift
|
| 6. |
Disconnect solenoid wiring harness plug (3) of 2-3
gearshift
|
| 7. |
Disconnect converter clutch wiring solenoid valve harness plug
(5)
|
| 8. |
Disconnect pressure regulator wiring harness plug (2)
|
| 9. |
Disconnect neutral shift solenoid valve wiring harness plug
(1)
|
| 10. |
Remove wiring harness with fluid temperature sensor (6) from
support and uncover
|
| 11. |
Unhook connecting rod (7) from toothed section
| • |
Unscrew 8x bolt (arrows)
Note: Note differing
bolt lengths
|
| • |
Pull valve body back carefully
|
|
|
|
 Install
| 13. |
Insert new seal rings (1) with assembly grease into
transmission housing
|
| 14. |
Hook connecting rod into toothed section
| • |
Insert valve body into transmission housing
|
|
| 15. |
Attach valve body to transmission
| • |
Tighten 8x bolt 10 Nm
Note: Note differing
bolt lengths
|
|
| 16. |
Connect wiring harness plugs of solenoid valves and pressure
regulator
|
| 17. |
Insert wiring harness into retaining clamps with temperature
sensor
|
|

|
| 18. |
Clean sealing surfaces
| • |
Remove sealant residues
|
|
| 19. |
Attach valve body cover to transmission
| • |
Recut thread for bolts in transmission housing
|
| • |
Re-cut threads of bolts
| – |
Coat with locking compound
|
|
| • |
Coat valve body cover with sealing compound
|
| • |
Tighten valve body cover 25 Nm
|
|
| 20. |
Attach oil drain bolt to transmission with new seal ring
|
| 21. |
Detach assembly from bracket KM-113-2
| • |
Detach KM-910 from transmission
|
|
| 23. |
Check and correct transmission fluid level 
|
|
