|
Overhaul valve body assembly (AF13-II)
Note: The valve body
should only be disassembled for cleaning purposes as the individual
parts are not available from suppliers.
 Remove Remove
|
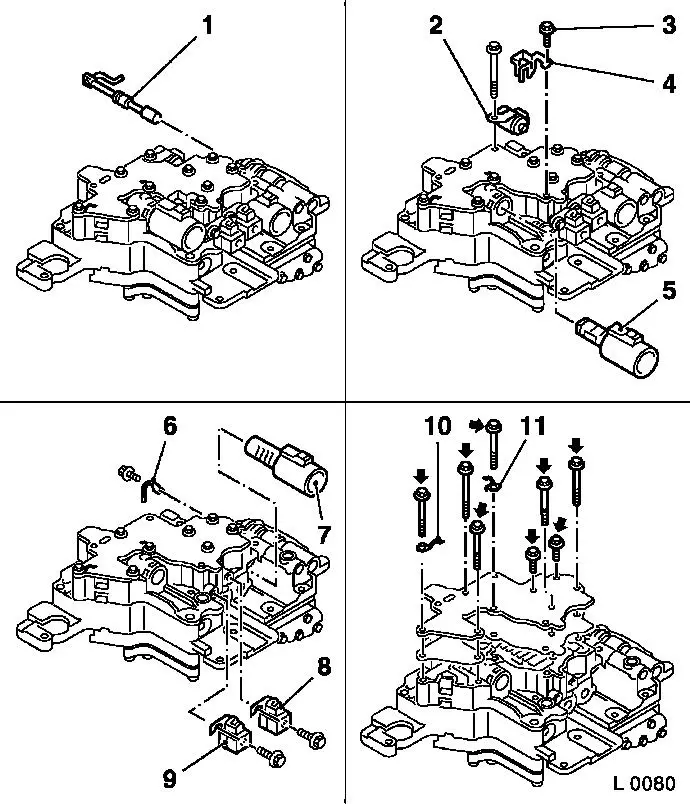
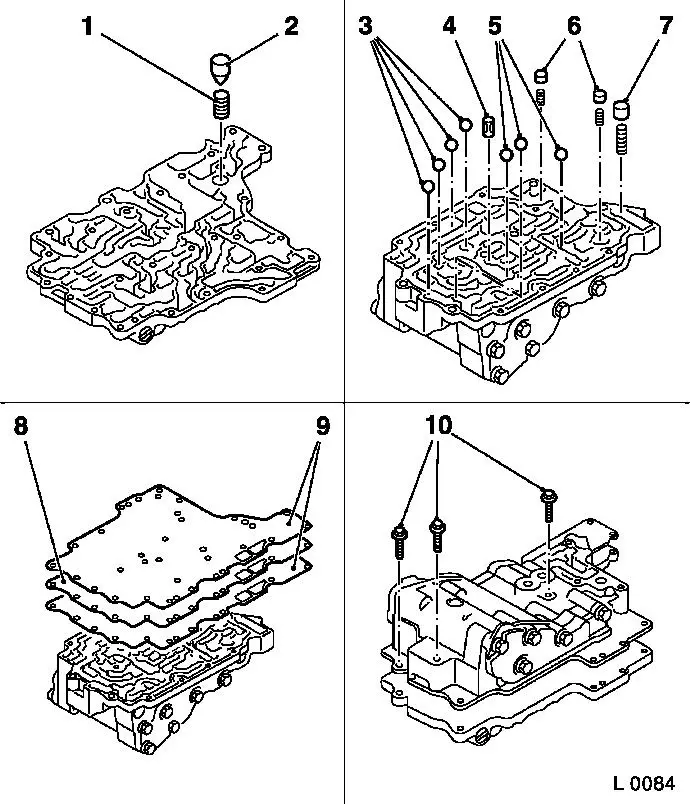
| 2. |
Remove switch valve (1) from valve body
|
| 3. |
Detach neutral shift solenoid valve (2)
|
| 4. |
Detach bolt (3) for converter clutch solenoid valve retaining
clamp (4)
|
| 5. |
Remove converter clutch solenoid valve (5)
|
| 6. |
Unscrew 8x bolt (arrows)
| • |
Remove wiring harness retaining clamps (10) and (11)
|
|
| 7. |
Remove pressure regulator (7)
| • |
Remove pressure regulator retaining clamp (6)
|
|
| 8. |
Remove 2-3 gearshift solenoid valve (8)
|
| 9. |
Remove 1-2 / 3-4 gearshift solenoid valve (9)
|
|
|
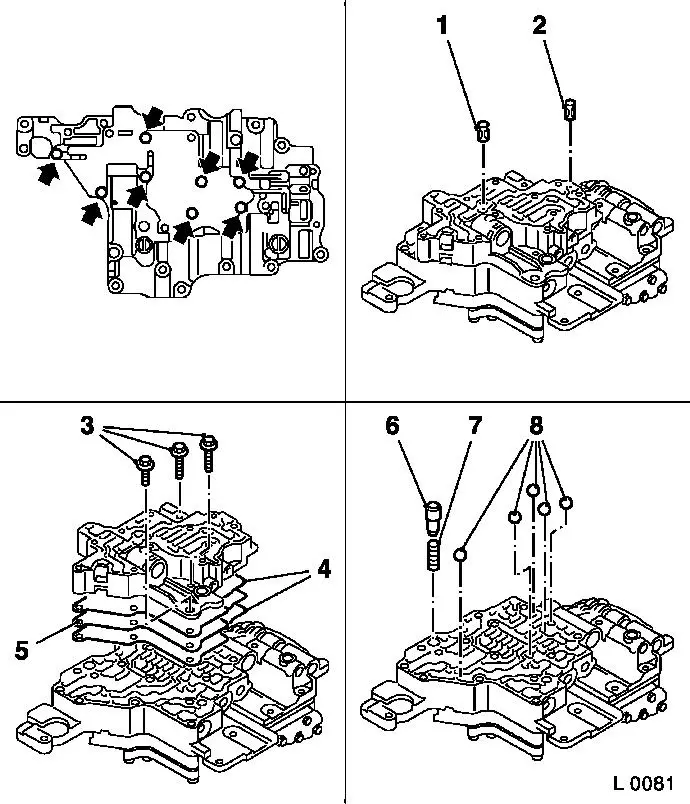
| 10. |
Remove cover of front valve body with gasket
| • |
Unscrew 8x bolt (arrows)
|
|
| 11. |
Remove fluid strainers (1 and 2)
|
| 12. |
Detach front valve body
|
| 13. |
Remove plate (5) from front valve body
| • |
Remove gaskets no.1 and no.2 from front valve body (4)
|
|
| 14. |
Remove lock ball (8) and pressure regulator valve (6) with
spring (7)
|
|
|
| 15. |
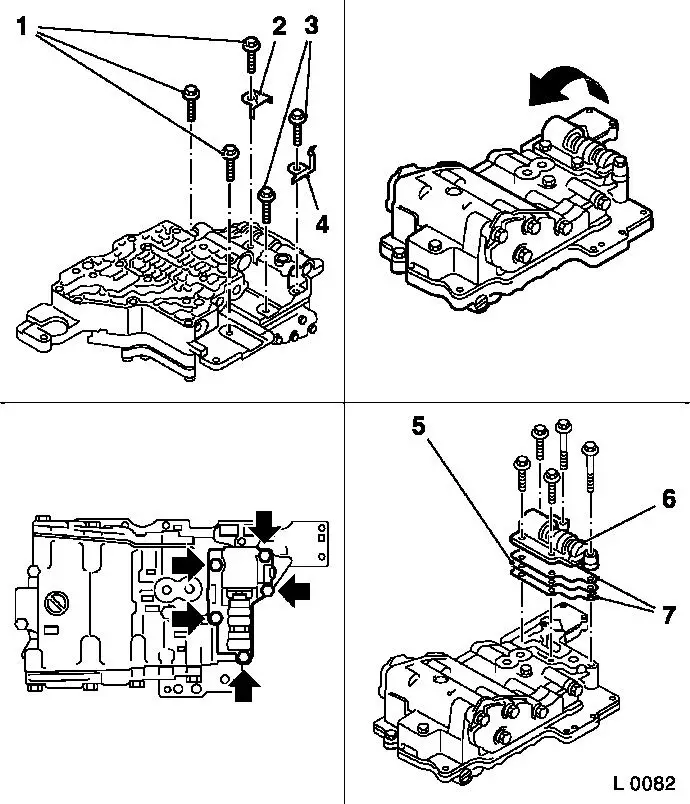
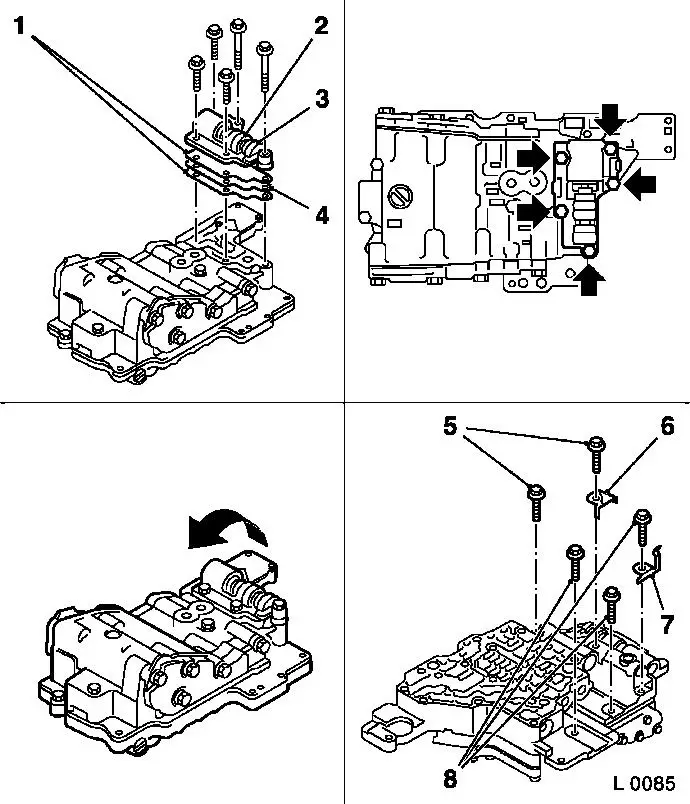
Unscrew 3 bolts (1) and 2 bolts (3)
|
| 16. |
Remove wiring harness
| • |
Remove retaining clamps (2) and (4)
|
|
| 17. |
Turn valve body (arrow)
|
| 18. |
Unscrew 5x bolt (arrows)
|
| 19. |
Remove rear valve body no.2 (6)
| • |
Remove plate of rear valve body (5)
|
| • |
Remove 2 gaskets no.3 (7) from rear valve body
|
|
|
|
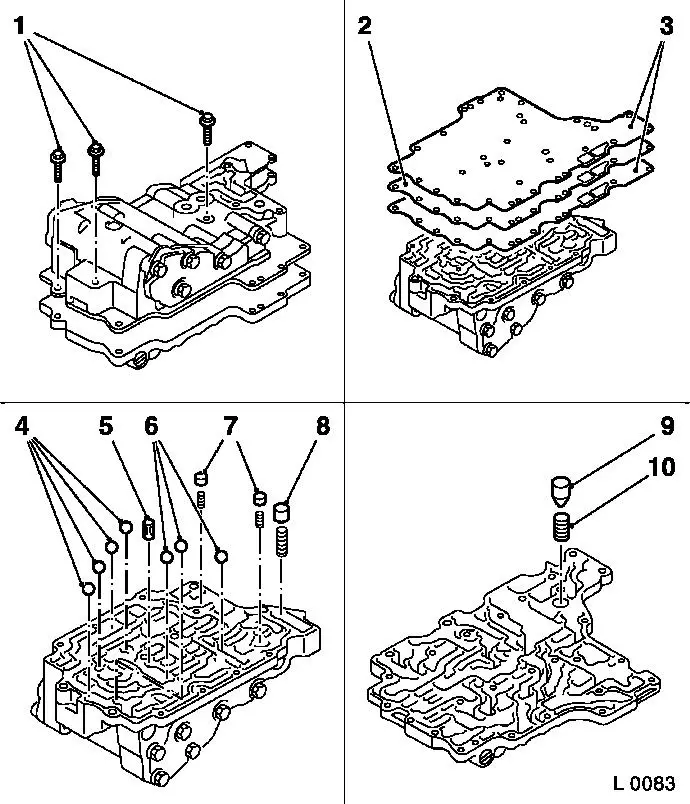
| 21. |
Remove rear valve body no.1 with valve body plate
| • |
Turn rear valve body no.1
|
| • |
Remove valve body plate (2)
|
| • |
Remove gaskets no.1 and no.2 from rear valve body (3)
|
|
| 22. |
Remove fluid strainer (5)
|
| 23. |
Remove lock balls (4 and 6)
|
| 24. |
Remove pressure regulator valves (7 and 8)
|
| 25. |
Remove fluid cooler bypass valve (9) with spring (10) from
centre valve body
|
| 26. |
Check all parts for wear or damage
Note: Replace complete
valve body if necessary.
|
|
 Install
|
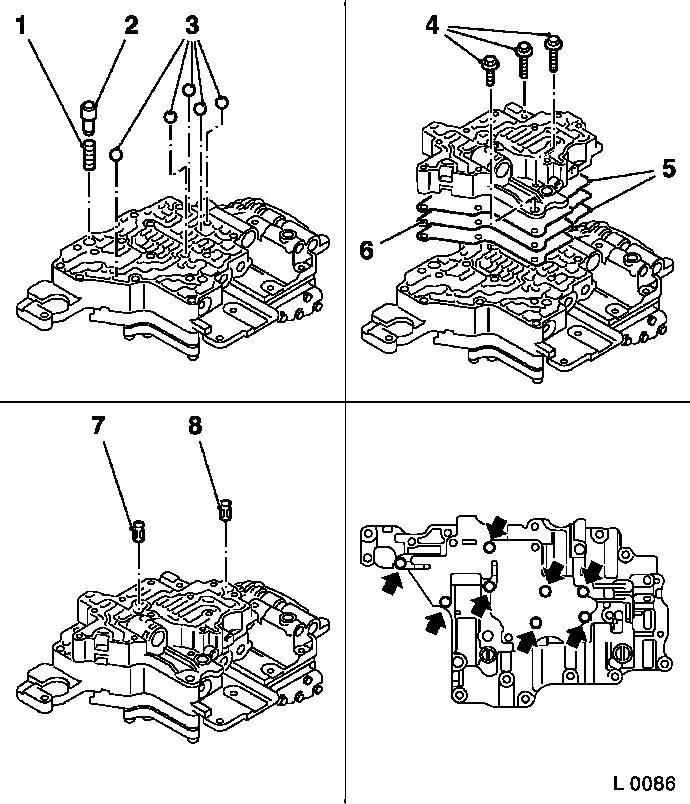
| 27. |
Insert fluid cooler bypass valve (2) with spring (1) in centre
valve body
|
| 28. |
Insert pressure regulator valves (6 and 7)
|
| 29. |
Insert lock balls (3 and 5)
|
| 30. |
Insert fluid strainer (4)
|
| 31. |
Insert valve body plate (8) in rear valve body no.1
| • |
Insert seals no.1 and no.2 from rear valve unit (9)
|
|
| 32. |
Turn rear valve body no. 1.
|
| 33. |
Attach rear valve body no. 1 to centre valve body
| • |
Tighten 3x bolt (10) 7 Nm
Note: Handle all parts
carefully as the individual parts are not available from
suppliers.
|
|
|
|
| 34. |
Attach rear valve body no. 2 (3) on rear valve body
| • |
Attach with rear valve unit plate (4)
|
| • |
Attach with gasket no.3 (1)
|
|
| 35. |
Attach 5 bolts (arrows)
|
| 37. |
Install fluid carrier plate (6) and wiring harness retaining
clamp (7)
|
| 38. |
Attach 2 bolts (5) and 3 bolts (8)
|
|
|
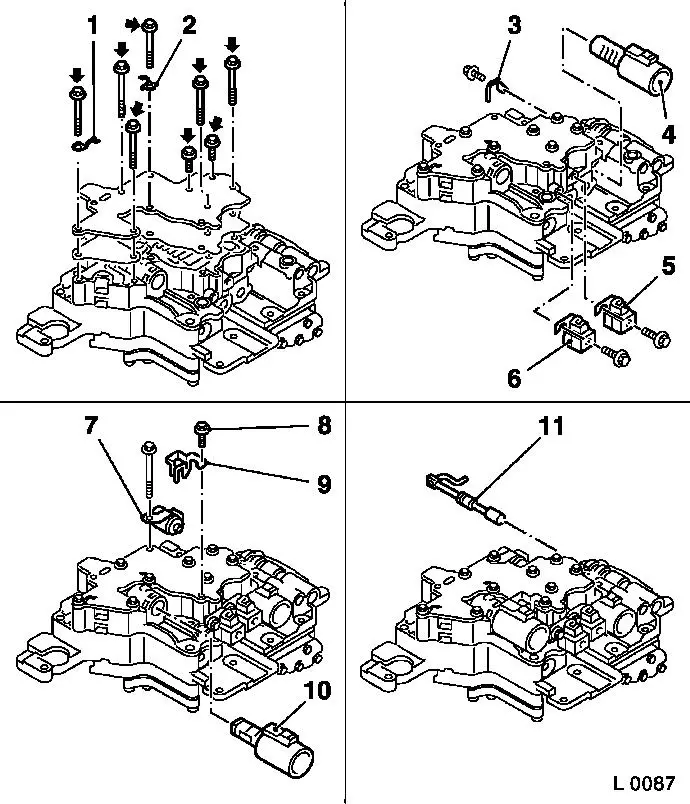
| 39. |
Insert lock balls (3) and pressure regulator valve (2) with
spring (1) in valve body
|
| 40. |
Attach plate (6) of front valve body to front valve body
| • |
Fit with front valve body gasket no.1 and gasket no.2 (5)
|
|
| 41. |
Attach front valve body to centre valve body with 3 bolts
(4)
|
| 42. |
Insert fluid strainers (7 and 8)
|
| 43. |
Insert 8x bolt (arrows) in front valve body
|
|
|
| 44. |
Attach front valve body cover to front valve body
| • |
Attach 8 bolts (arrows)
|
| • |
Attach wiring harness retaining clamps (1 and 2)
|
|
| 45. |
Install 2-3 gearshift solenoid valve (5) and 1-2 / 2-4
gearshift solenoid valve (6)
| • |
Tighten solenoid valves 7 Nm
|
|
| 46. |
Attach pressure regulator retaining clamp (3) and pressure
regulator (4) – tightening torque 7
Nm
|
| 47. |
Insert converter clutch solenoid valve (10).
|
| 48. |
Attach bolt (8) for converter clutch solenoid valve retaining
clamp (9)
|
| 49. |
Install neutral gearshift solenoid valve (7)
| • |
Tighten solenoid valve 7 Nm
|
|
| 50. |
Insert shift valve (11) in valve body
|
|
| 51. |
Install valve body in transmission 
|
|
