Golf Mk5
|
|
|
|
|
|
|
|
|
|
|
|
|
|
|
 Caution
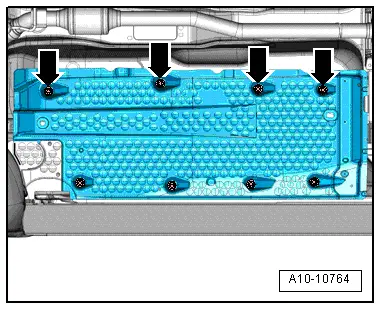
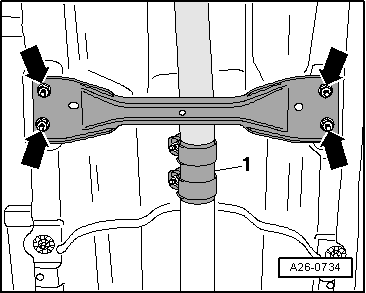
| Component | Nm | |
| Tunnel cross-piece to body | 25 |

|
|
|
|
|
|
|
|
|
|
|
|
|
|
|
| Component | Nm | |
| Tunnel cross-piece to body | 25 |