volkswagen Workshop Repair Guides

Volkswagen Workshop Service and Repair Manuals

Removing and installing lower C-pillar trim, 4-door models > < Removing and installing upper C-pillar trim, 4-door models
Removing and installing C-pillar trim, 2-door models
Special tools and workshop equipment required
   
t  Removing wedge -3409-
  Note
Removal and installation are described for the left vehicle side. Follow same instructions for the right side as appropriate.
Removing
–  Remove bench seat → Chapter.
–  Remove backrest → Chapter.
–  Remove side trim → Chapter.
–  Remove load compartment side trim → Chapter.
  W00-0016
–  Unclip C-pillar trim -1- where it overlaps with B-pillar trim -see magnified area-.
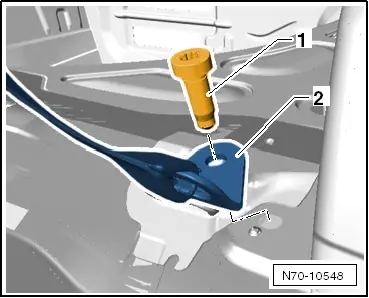
–  Release C-pillar trim -1- out of retaining clips -2- using removing wedge -3409-.
–  Release C-pillar trim -1- out of retaining clips -3- using removing wedge -3409-.
–  Remove C-pillar trim -1-. While doing so, remove trim from door seal beading.

–  Unscrew bolt -1- (40 Nm).
   
–  Thread belt end anchor together with seat belt -2- through opening in trim.
Installing
  Note
t  Before installing, check all fasteners for damage and renew if necessary.
t  Ensure that C-pillar trim is correctly inserted in retaining clips -4-.
t  Following installation, ensure that trim is positioned in door seal beading.
–  Install in reverse order of removal.
  N70-10548

Removing and installing lower C-pillar trim, 4-door models > < Removing and installing upper C-pillar trim, 4-door models