| –
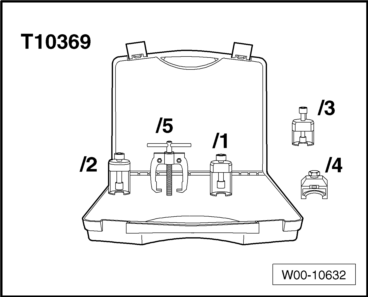
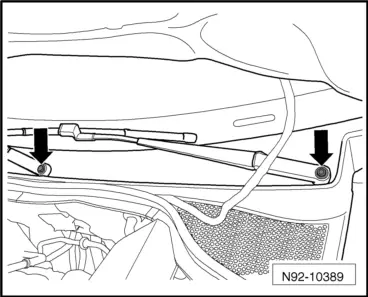
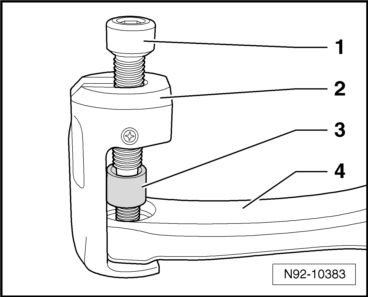
| Slide legs of puller -T10369/1--2- under wiper arm -4- as shown in the illustration. |

Caution | The wiper shaft may be damaged. |
| Always use thrust piece -3- to loosen wiper arm. |
|
| –
| Turn thrust bolt -1- of puller clockwise until thrust piece -3- comes into contact with wiper shaft. Turn thrust bolt -1- of puller clockwise using an Allen key (6 mm AF) until wiper arm -4- is loosened off shaft. |
| –
| Remove puller and wiper arm. |
| –
| Repeat this process with the second wiper arm. |
| Install in the reverse order of removal. When doing this, note the following: |

WARNING | Risk of injury due to automatic engine starting in vehicles with a start-stop system. |
| t
| In vehicles with an activated start-stop system (indicated by a message in the dash panel insert), the engine may start automatically. |
| t
| When work is being done on the vehicle, it must be ensured that the start/stop system has been deactivated (switch ignition off or switch off start/stop system by pressing the button in the middle of the dash panel). |
|

Note | To move wiper motor to park position, switch on ignition and press steering column switch down briefly 1x (touch wiping). |
| –
| Operate wiper motor briefly until park position is reached. |
| –
| When the wiper motor stops, switch ignition off again and remove ignition key. |
Note | Securing nuts of wiper arms are not tightened to specified torque until after wiper blade park position has been adjusted. |
|
|
|