3.2TL TYPE S V6-3.2L SOHC (2002)

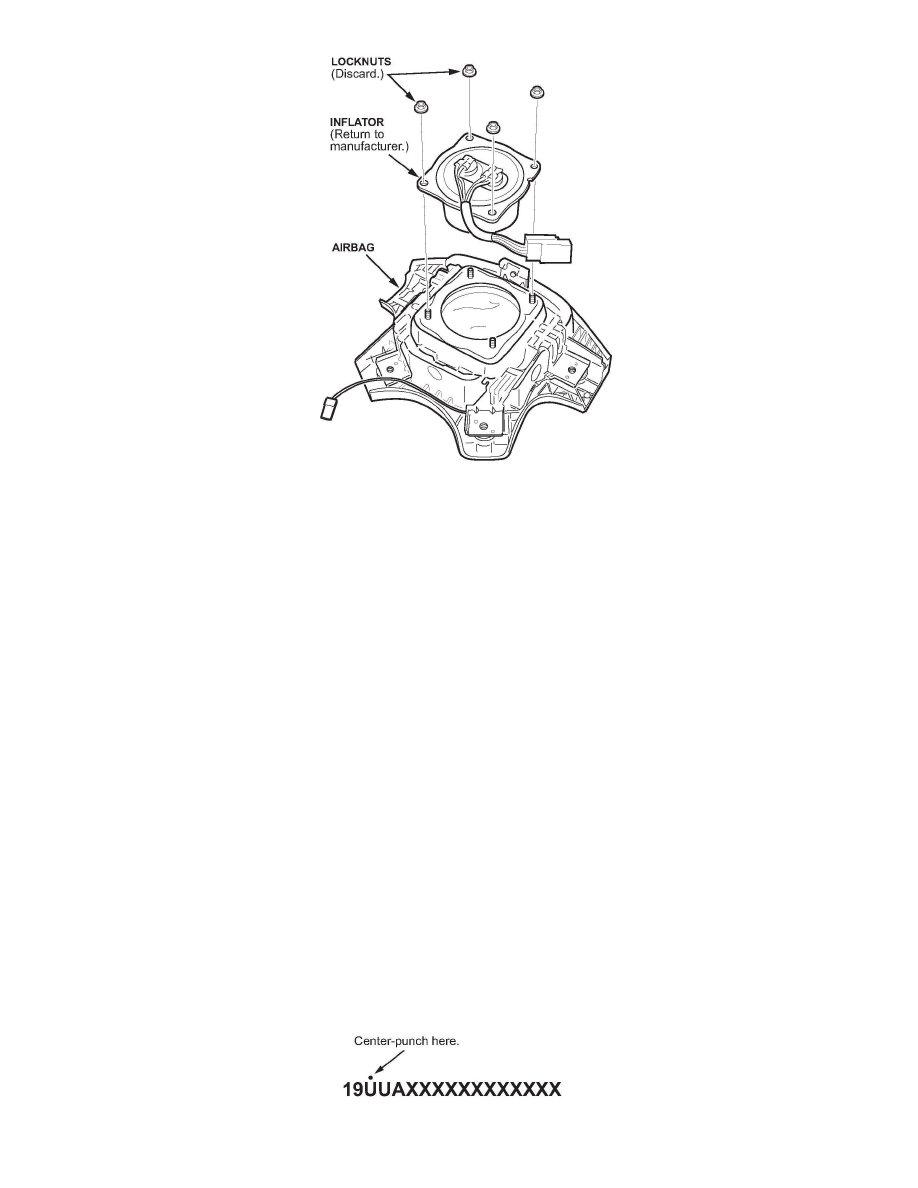
6. Using needle-nose Vise Grips, remove the four locknuts from the inflator. The locknuts will not be reused.
NOTE:
Do not remove the inflator from the airbag until you complete step 7.
7. Use shop air to clean any debris that may be on the inflator, then remove the inflator from the airbag.
NOTE:
^
Do not allow any debris to enter the inflator opening in the airbag.
^
Do not deploy the inflator. The inflator must be returned to its supplier in the box the new inflator came in (see INFLATOR PACKING AND
GROUND SHIPPING INSTRUCTIONS: DEALERS IN THE 48 CONTIGUOUS STATES or INFLATOR PACKING AND AIR SHIPPING
INSTRUCTIONS: DEALERS IN ALASKA AND HAWAII).
8. Turn over the airbag (inflator side down), and shake it to remove any debris from the inflator opening.
9. Install the new inflator in the airbag with new locknuts. Torque the locknuts to 3.9 N.m (2.8 lb-ft, 34 lb-in).
NOTE:
The 55A inflator is slightly taller than the S84 inflator, but they are still interchangeable.
10. Cover the lower two inflator locknuts with new felt tape.
11. Reinstall the horn plate with new felt washers on its mounting bolts. Torque the mounting bolts to 3.4
N.m (2.5 lb-ft, 30 lb-in), then make sure the horn plate moves freely.
12. Reinstall the driver's airbag using new Torx bolts:
^
Refer to the appropriate service manual, or
^
Online, enter keywords DRIVER AIR, and select Driver's Airbag Replacement from the list.
13. Center-punch a completion mark above the third character of the engine compartment VIN:
