
MDX V6-3.7L (2007)
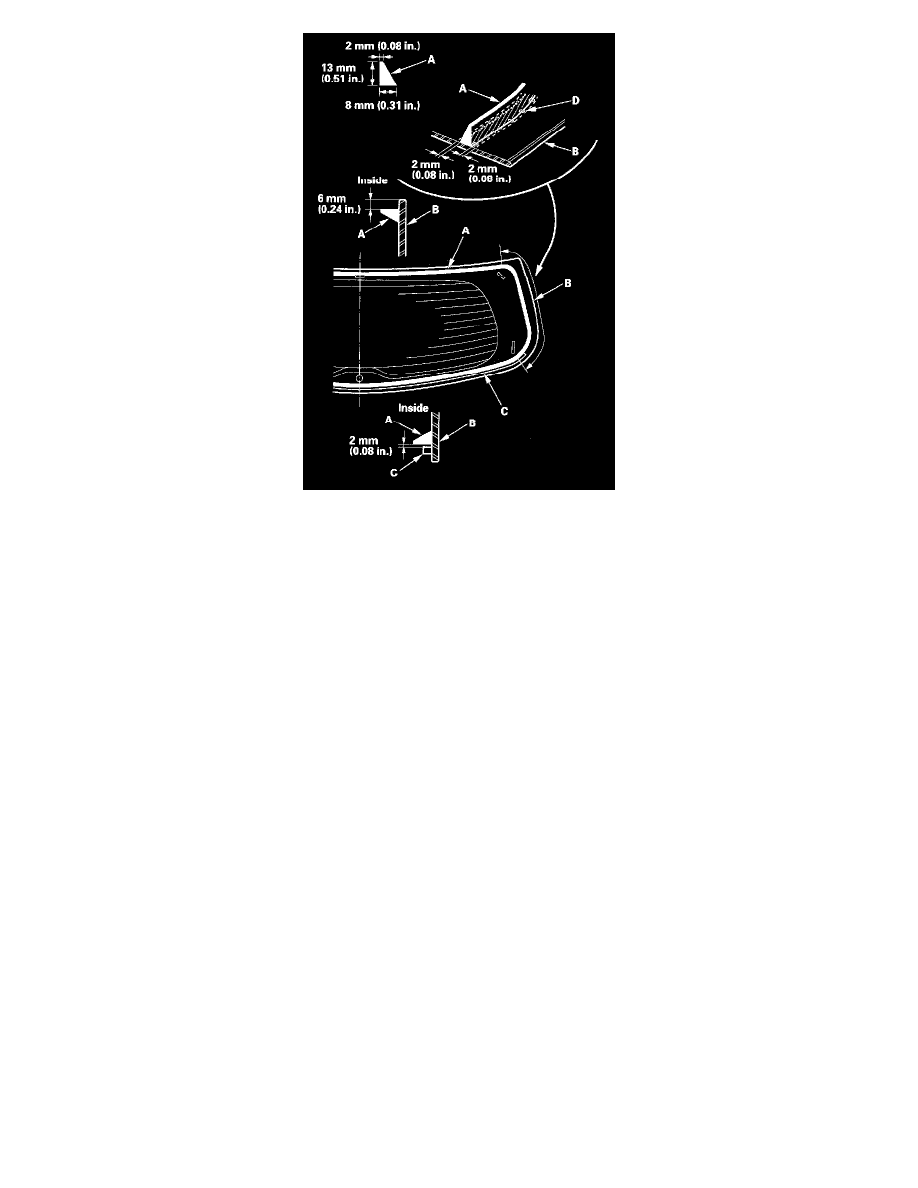
18. Pack adhesive into the cartridge without air pockets to ensure continuous delivery. Put the cartridge in a caulking gun, and run a bead of adhesive
(A) on the rear window (B) around the edge of the lower rubber dam (C) as shown. With the printed dots (D) on the rear window as a guide, apply
the adhesive to both side portions of the quarter glass. Apply the adhesive within 30 minutes after applying the glass primer. Make a slightly
thicker bead at each corner.
19. Use suction cups to hold the rear window over the opening, align it with the alignment marks you made in step 14, and set it down on the adhesive.
Lightly push on the rear window until its edges are fully seated on the adhesive all the way around.
NOTE: Do not open or close the doors for about an hour until the adhesive is dry.
20. Scrape or wipe the excess adhesive off with a putty knife or towel. To remove adhesive from a painted surface or the rear window, use a soft shop
towel dampened with alcohol.
21. After the adhesive has dried, spray water over the rear window and check for leaks. Mark the leaking areas, and let the rear window dry, then seal
with sealant. Let the vehicle stand for at least 4 hours after rear window installation. If the vehicle has to be used within the first 4 hours, it must
be driven slowly.
22. Reinstall all remaining removed parts.
NOTE: Advise the customer not to do the following things for 2 to 3 days:
-
Slam the doors with all the windows rolled up.
-
Twist the body excessively (such as when going in and out of driveways at an angle or driving over rough,uneven roads).