
MDX V6-3471cc 3.5L (2002)
nut yet.
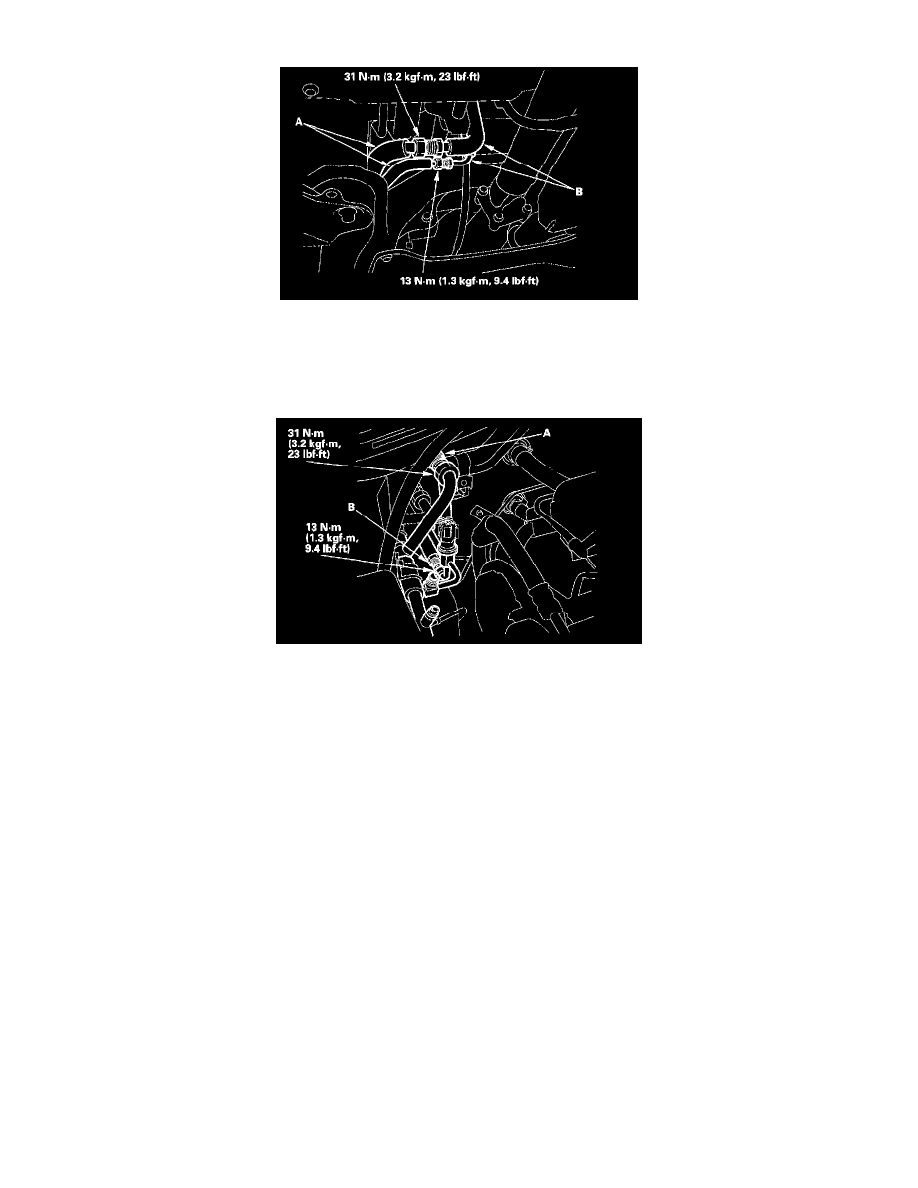
4. Apply a few drops of refrigerant oil to the connections, then connect the lower lines (A) to the rear evaporator lines (B). Do not tighten the
connections yet.
5. Install the screw in the A/C line clamp (next to the steering gearbox) on the lower A/C lines.
6. Install the 6 mm flange nut onto the A/C line clamp/bracket mounting stud, and tighten it.
7. Tighten the lower A/C lines at the rear evaporator connections.
8. Apply a few drops of refrigerant oil to the connections, then connect the rear A/C suction line (A) and receiver line (B) to the front evaporator
lines. Do not tighten the connections yet.
9. Install the screws into the two A/C line clamps along the engine compartment bulkhead.
10. Tighten the upper-A/C-line-to-front-evaporator connections.
11. Tighten the upper-to-lower A/C line connections.
12. Add refrigerant oil.
13. Charge the system.
14. Reinstall the left front wheel.