NSX V6-3.2L DOHC (2001)

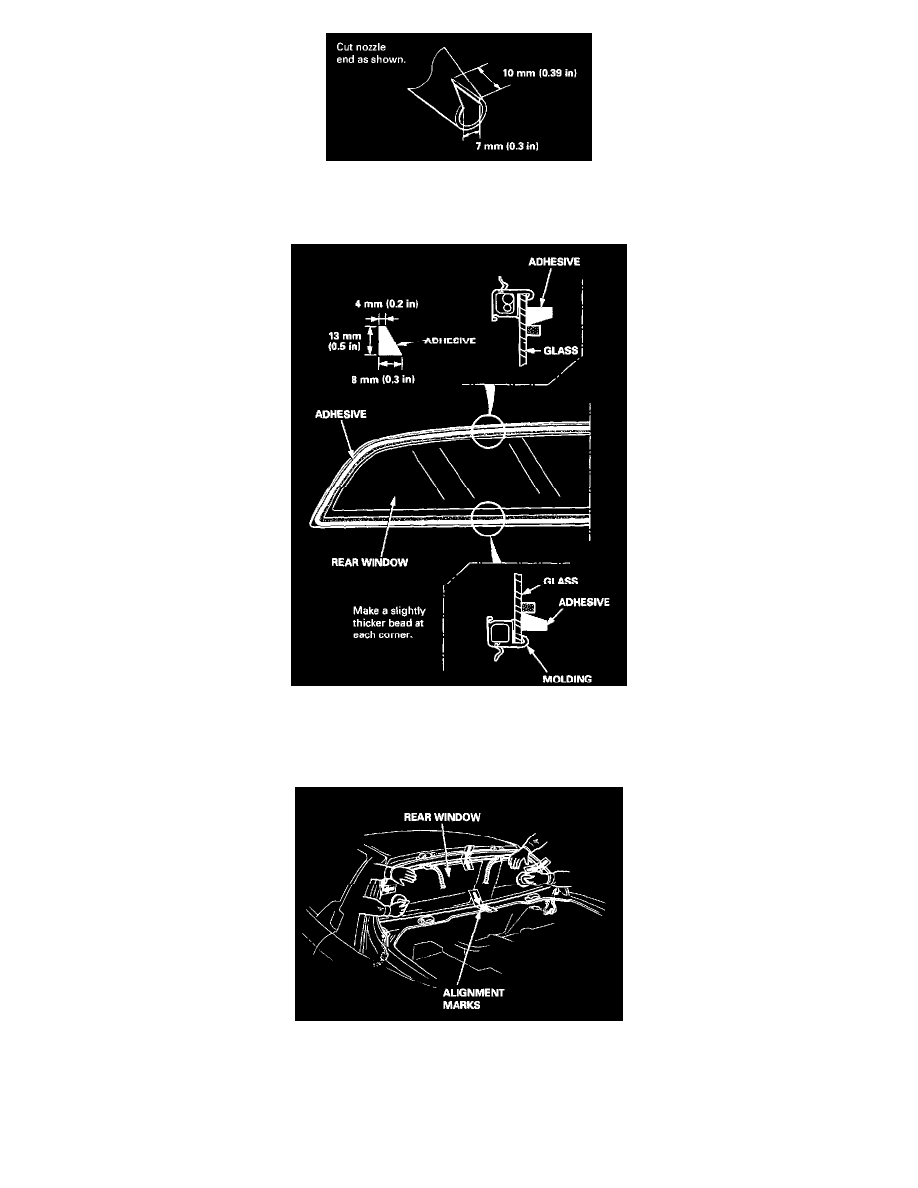
8. Before filling a cartridge, cut the end of the nozzle as shown.
9. Pack adhesive into the cartridge without air pockets to ensure continuous delivery. Put the cartridge in a caulking gun, and run a bead of adhesive
around the edge of the rear window as shown.
NOTE: Apply the adhesive within thirty minutes after applying the glass primer.
10. Use suction cups to hold the rear window over the opening, align it with the alignment marks made in step 4, and set it down on the adhesive.
Lightly push on the rear window until its edges are fully seated on the adhesive all the way around.
NOTE: Do not close or open the doors until the adhesive is dry.
11. After the adhesive is dry, spray water over the rear window and check for leaks. Mark leaking areas and let the rear window dry, then seal with
sealant.
NOTE: Let the vehicle stand for at least four hours after rear window installation. If the vehicle has to be used within the first four hours, it must
